Rabbit Farmer's various VW Projects
Re: Rabbit Farmer's various VW Projects
Have you considered moving the original master door switch to the middle, there is usually enough length to the loom to do so. You then only have to extend the wires to the window motor(and door lock if still equipped).
Sachilles
02 Subaru impreza (Donut) #66
02 Subaru impreza (Donut) #66
-
Rabbit Farmer
- Posts: 2261
- Joined: Wed Jun 25, 2003 11:37 pm
- AntiSpam: No
- Location: Earth
- Contact:
Re: Rabbit Farmer's various VW Projects
Crossed my mind, but the collection of four switches would take up a lot of limited real-estate. Door lock is staying on the door. Makes sense to me in emergency situations.sachilles wrote:Have you considered moving the original master door switch to the middle, there is usually enough length to the loom to do so. You then only have to extend the wires to the window motor(and door lock if still equipped).
S
Go Fast VW & Audi parts at FastAddiction.com
-
drummingpariah

- Posts: 498
- Joined: Wed Mar 20, 2013 7:13 pm
- AntiSpam: No
- Location: Manchester, NH
- Contact:
Re: Rabbit Farmer's various VW Projects
Emergency situations?Rabbit Farmer wrote:Door lock is staying on the door. Makes sense to me in emergency situations.

-
3rdgendennis

- Posts: 297
- Joined: Sun Feb 08, 2009 9:29 pm
Re: Rabbit Farmer's various VW Projects
Stage rally requires removing or disabling of power locks for emergency situations
The youngest David Dennis
"If you're not living on the edge, you're taking up too much space"
Dennis Motorsports
"If you're not living on the edge, you're taking up too much space"
Dennis Motorsports
-
Rabbit Farmer
- Posts: 2261
- Joined: Wed Jun 25, 2003 11:37 pm
- AntiSpam: No
- Location: Earth
- Contact:
Re: Rabbit Farmer's various VW Projects
I thought of removing them, but we don't always park our cars in a place that I would want to leave it unlocked.3rdgendennis wrote:Stage rally requires removing or disabling of power locks for emergency situations
Go Fast VW & Audi parts at FastAddiction.com
-
Rabbit Farmer
- Posts: 2261
- Joined: Wed Jun 25, 2003 11:37 pm
- AntiSpam: No
- Location: Earth
- Contact:
Re: Rabbit Farmer's various VW Projects
Lots of updates... I had to organize the photos in folders/sub-folders just to apply some organization to the chaos.
Since I had a long winter to stare at the car to try to figure out some improvements, I jumped into it in November and ended up making a lot of changes, including one major project that I wish I never started.
Many months yielded only a weight savings of 16.2 pounds with the first phase of the project… removing the stock wiring harness for stuff I didn’t need... wasn’t worth it and wish I never started. More to come on that later after I work through the pictures to determine what is worth sharing.
So... I guess I will start somewhere in the middle as the beginning phase of the winter is long and very confusing.
Something simple. The Doors.
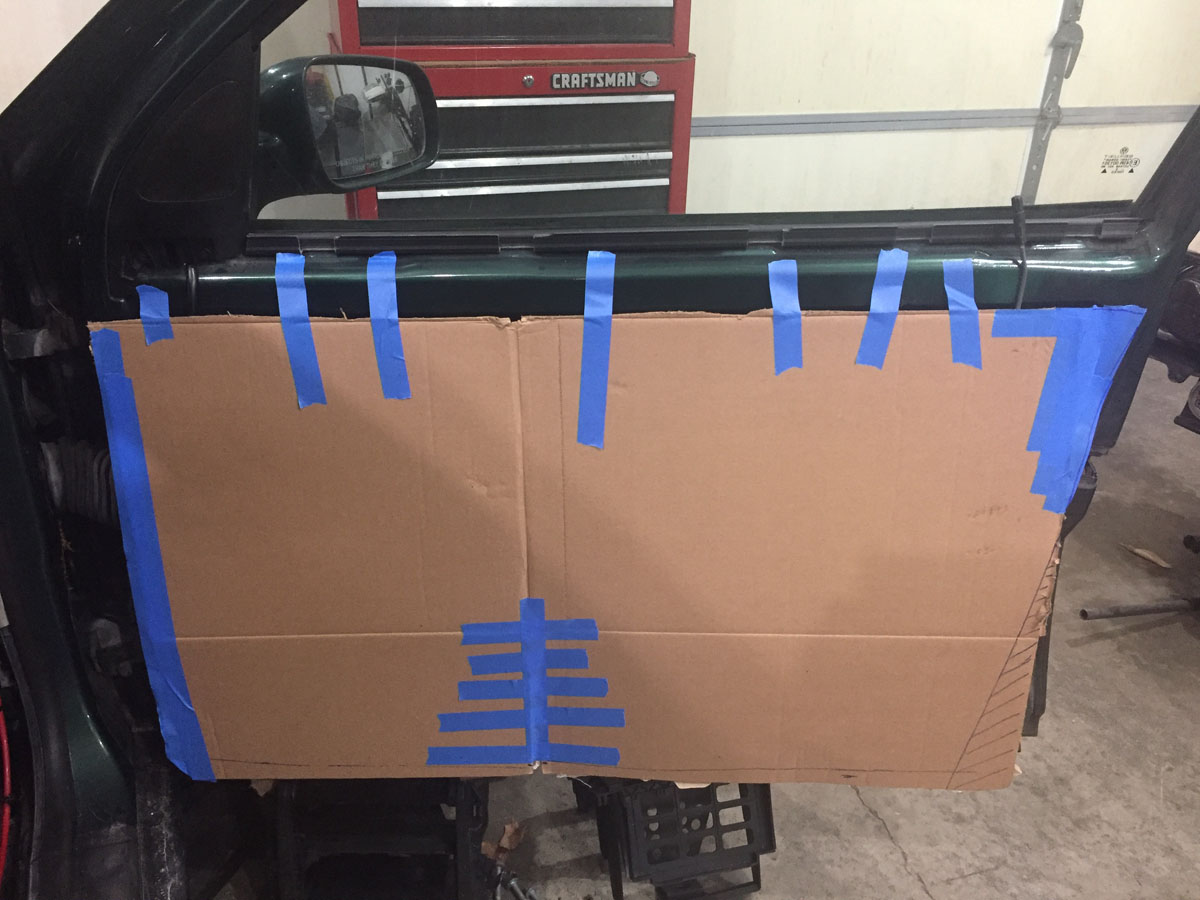
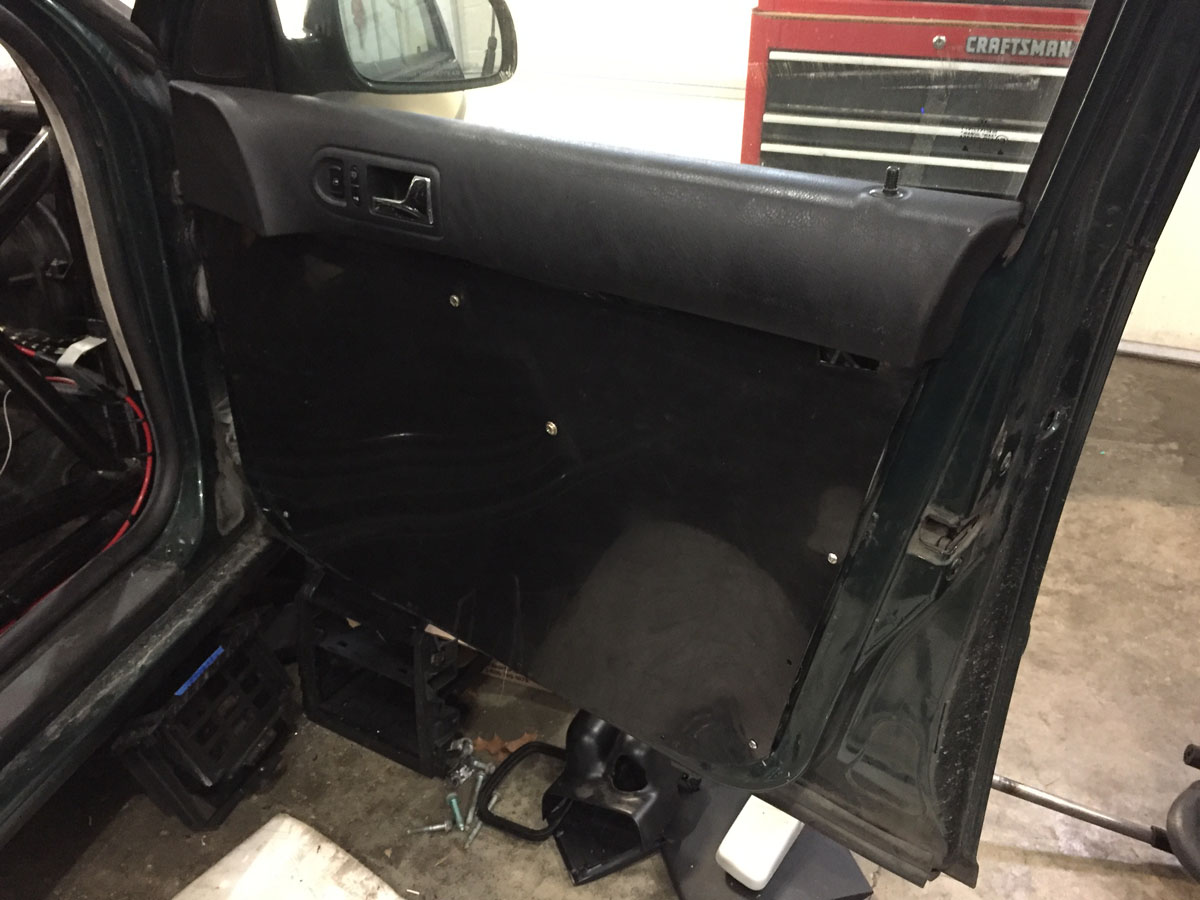
When I was putting the car together for the first time, I took what was currently there and modified (cut) it so that the stock door panel would work with the cage.
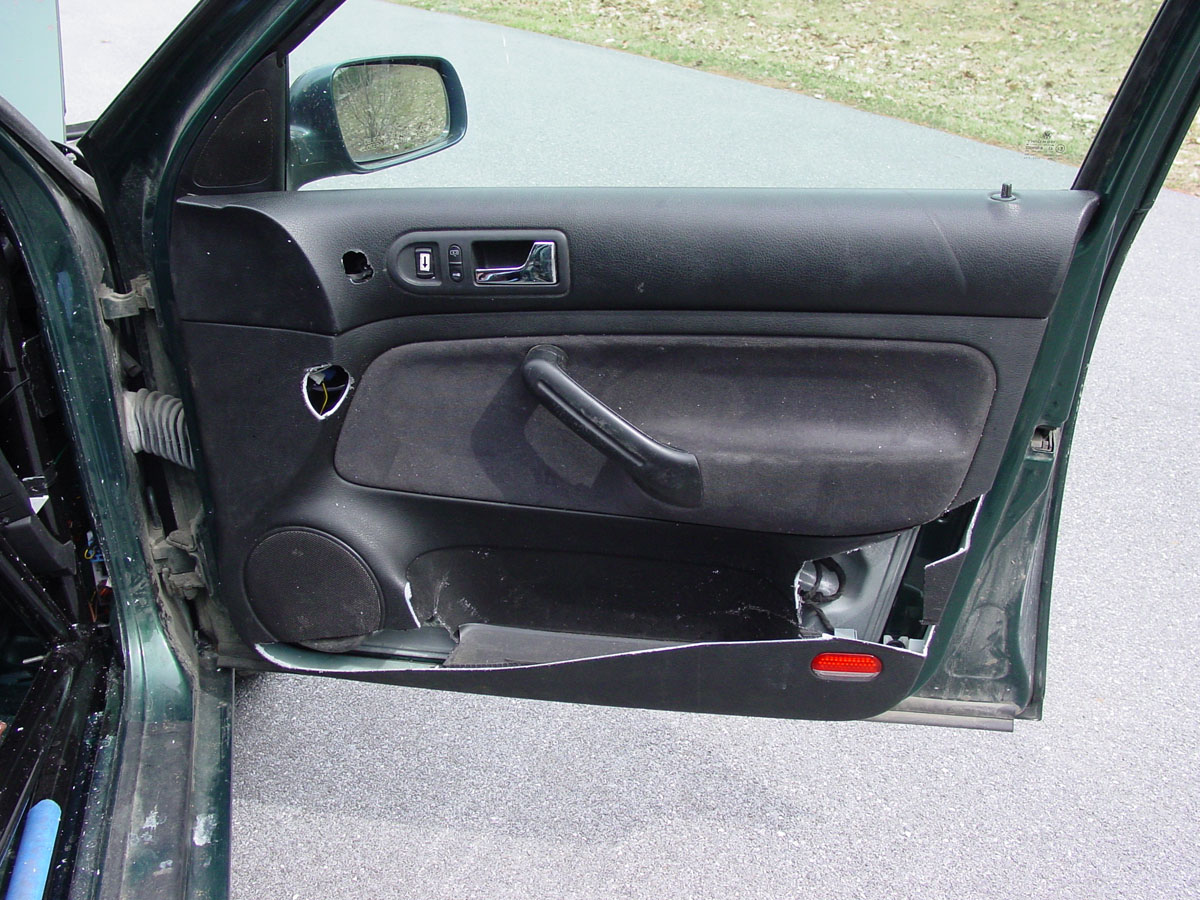
I cut out the sections that interfered with the cage so that, when the door was closed, it looked good.
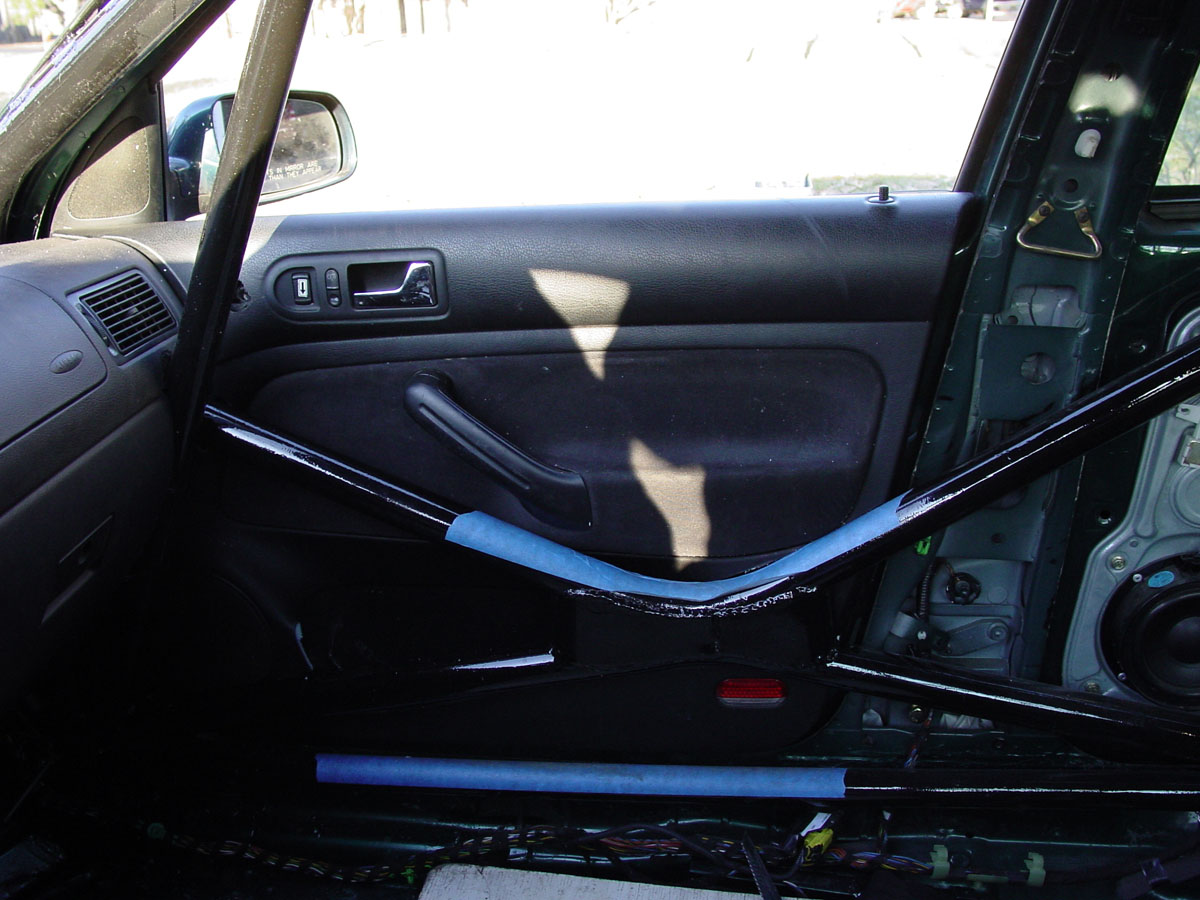
Not that I expected a huge weight savings, I think the new modified door panels I did over the winter look better than the hacked up stock panels.
I started with the passenger door as it was easier to work with as it did not have window switches and the gas door/hatch switches. Yep… I still have power windows. The driver’s door is the mirror image of the passenger side so once I had a template, it was easy to duplicate for the other door.
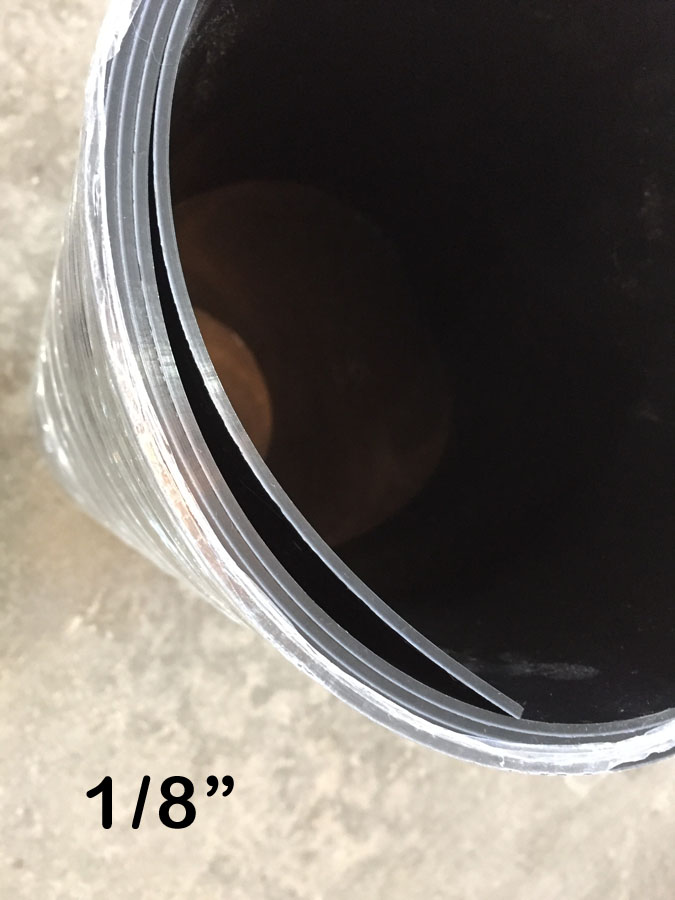
I picked up a roll of 22” wide by 10’ long 1/8” thick high density polyethylene plastic from http://www.SpeedwayMotors.com for $20 . Lots of other color options (black, light blue, dark blue, red, white, and yellow). I like the understated “black” though was tempted with red.

I made some measurements on my high-tech concrete work surface (the floor)…
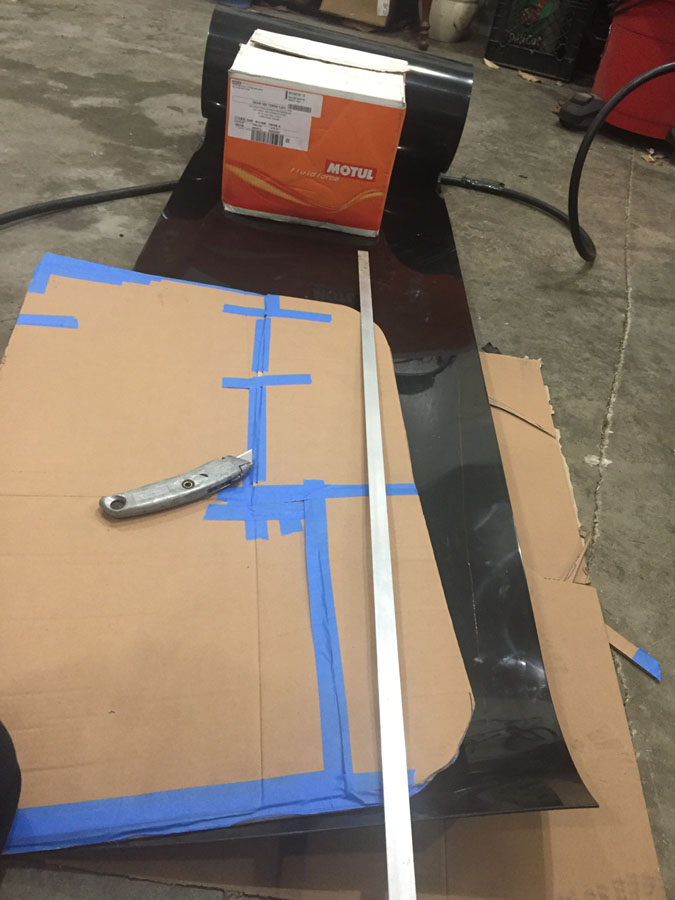
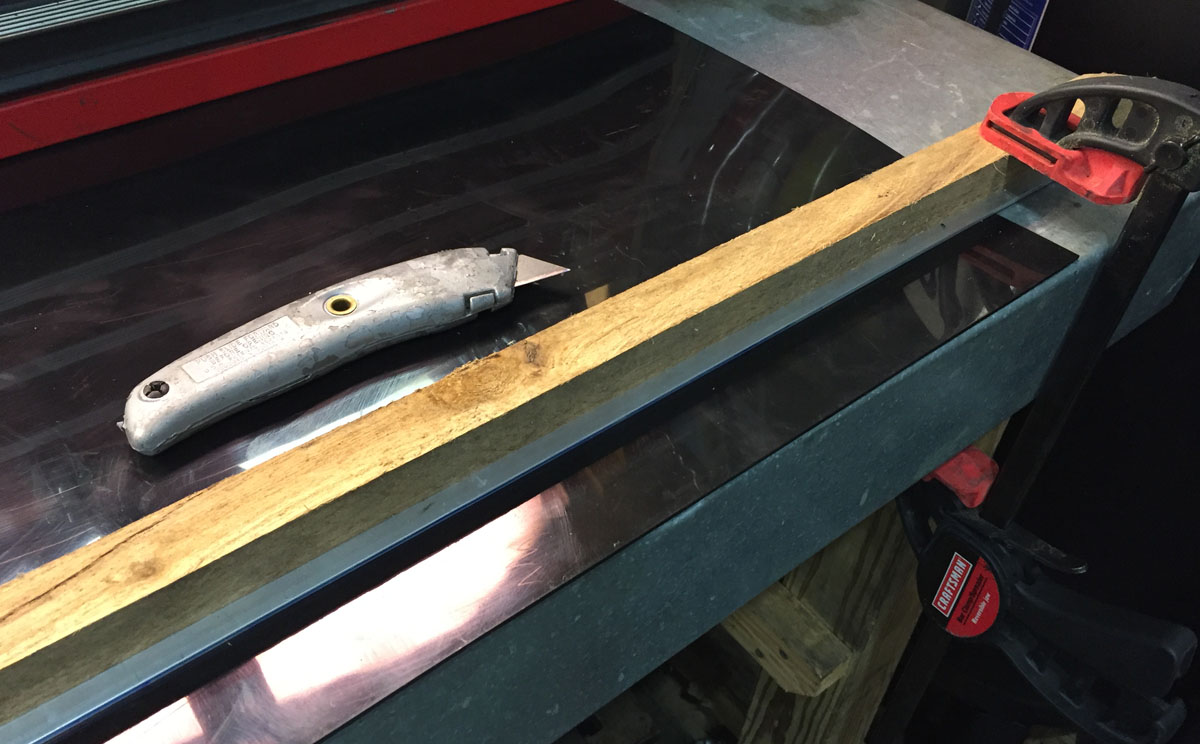
Used a thick piece of aluminum flat stock as a cutting edge held in place by the typically bent tomato stake and bar clamps. A brand new blade in the utility knife was my friend.
I purchased the world’s worst thread rivet nut insert tool available on the internet. It did not last the entire project and had to be disassembled at the end of each task just to get the threaded piece of the tool out of the pressed in threaded nut. I threw it away when done.
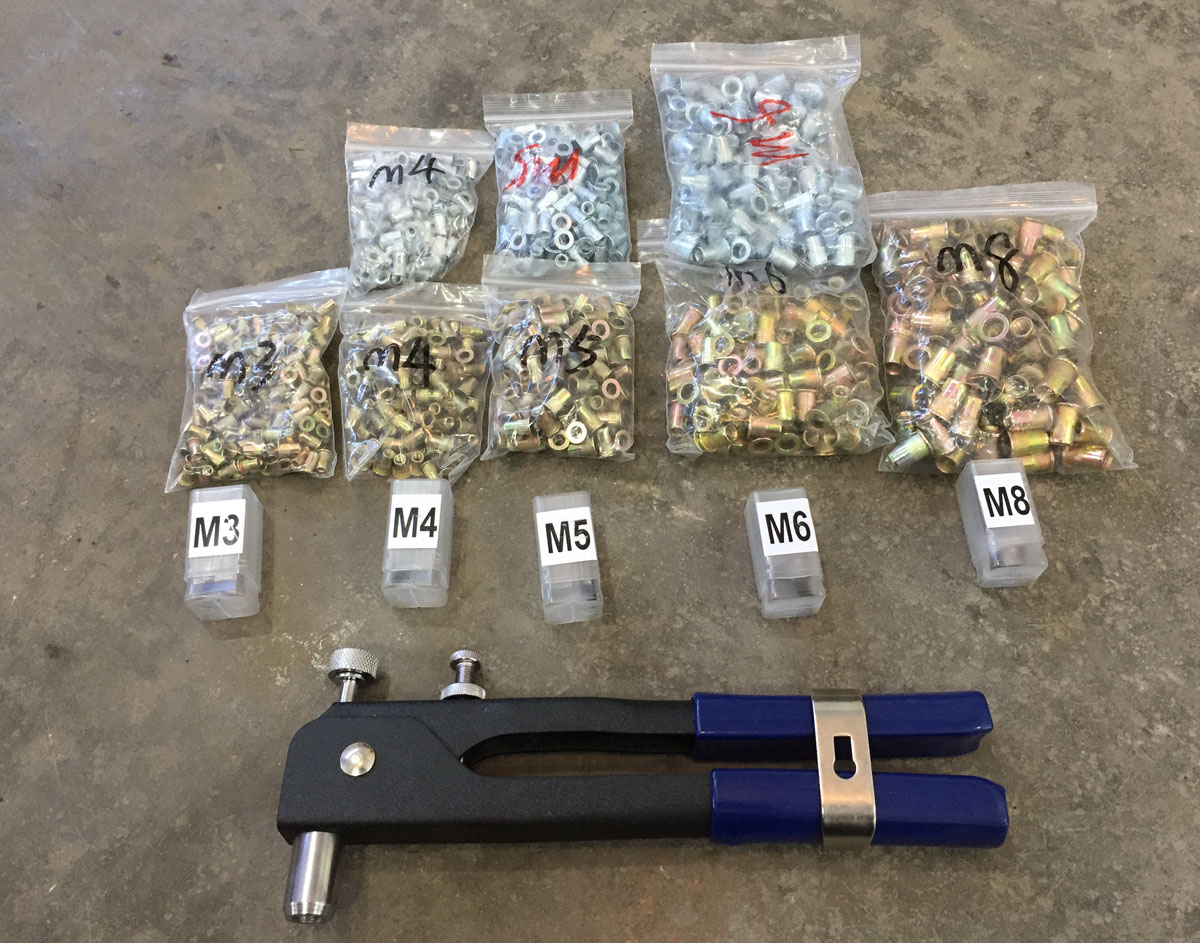
The threaded rivet nuts that I used... 5mm I think.
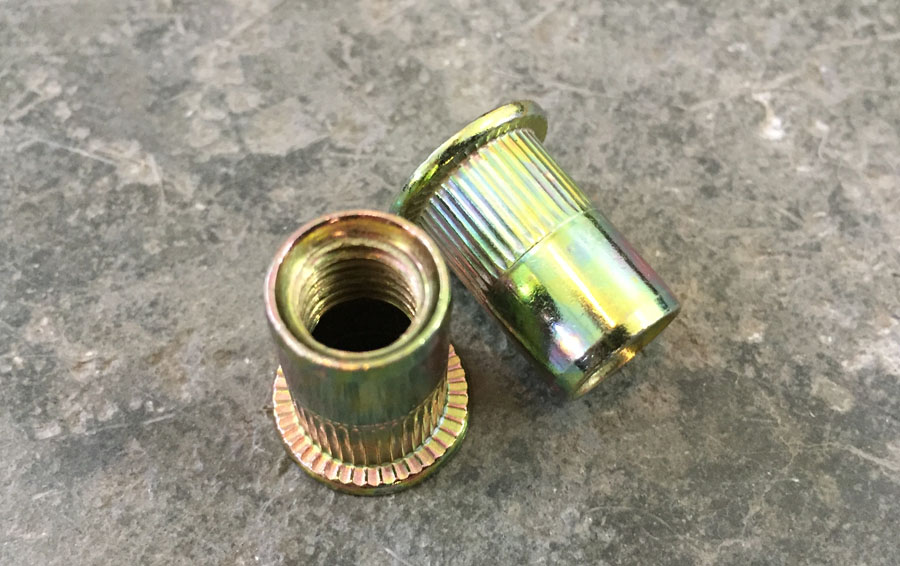
Installing one of many of the rivet nuts on the door.

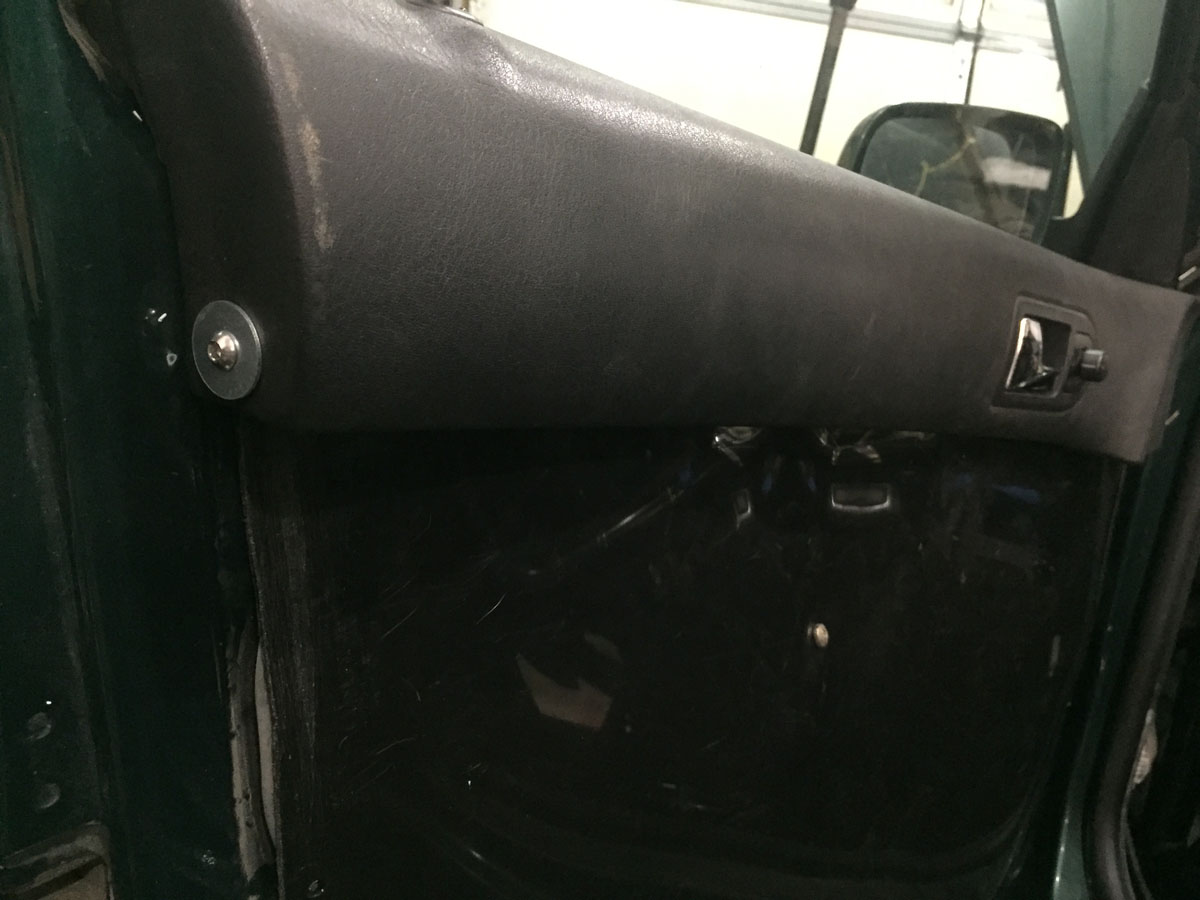
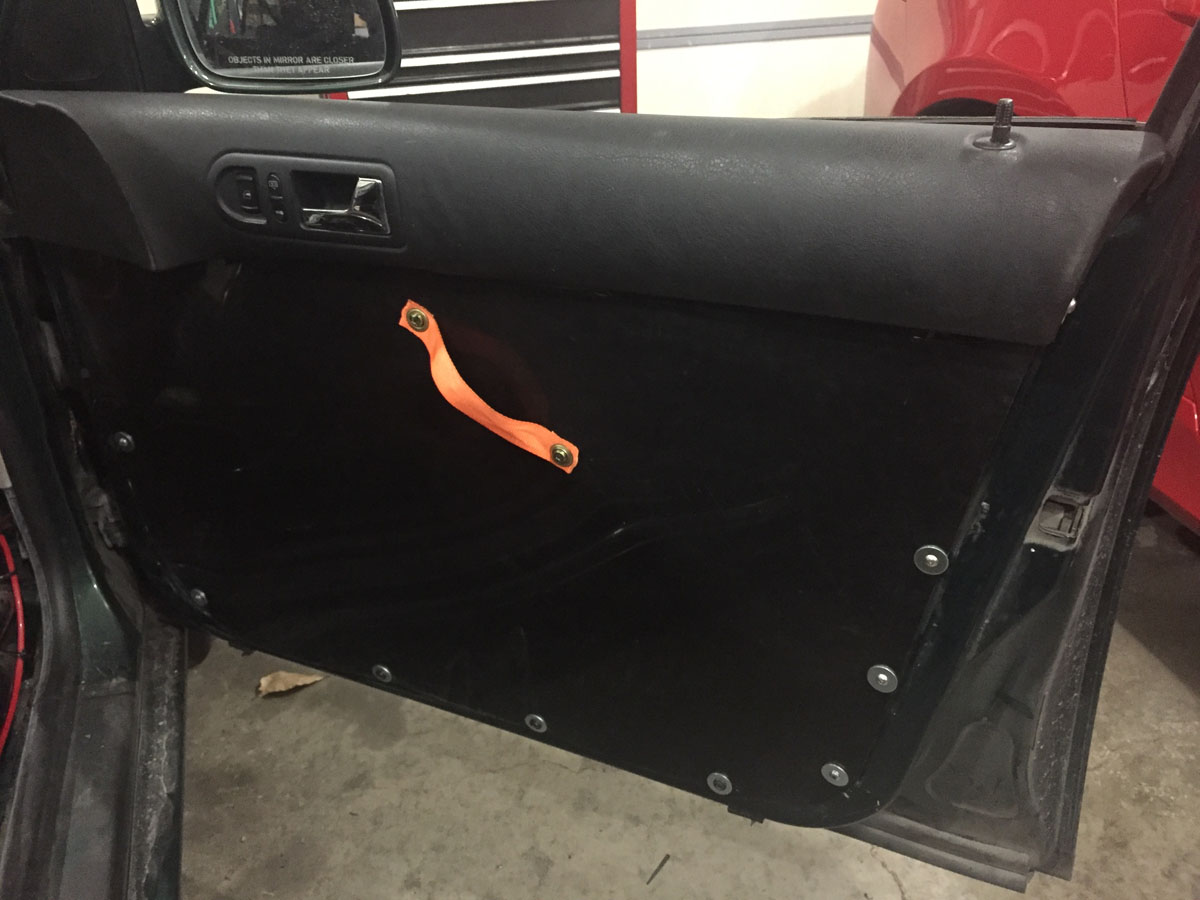
I used the top of the stock door panel as it had the door latch and provided some protection for the driver in regards to the top edge of the door.
To hold the stock piece to the door, I made a simple bracket with a threaded rivet nut.
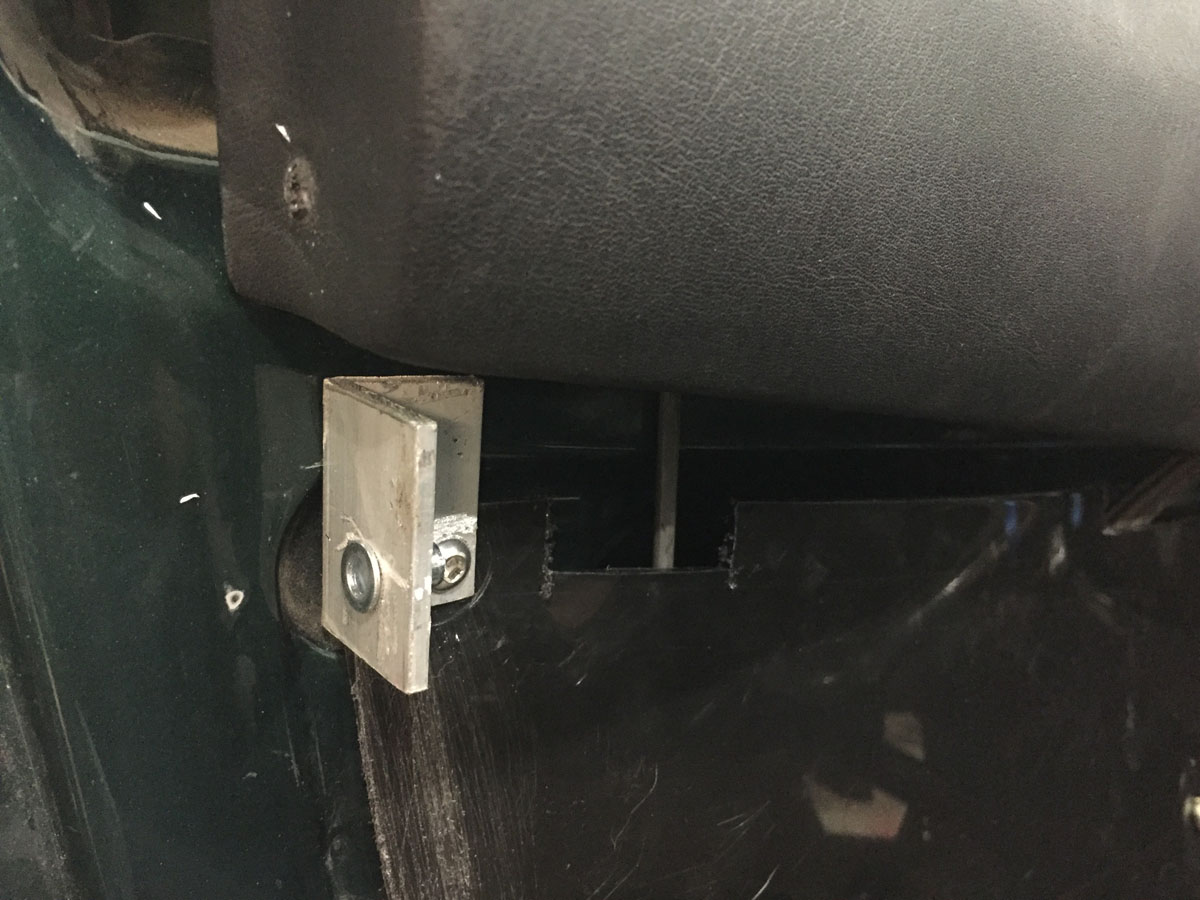
I think it came out pretty good.
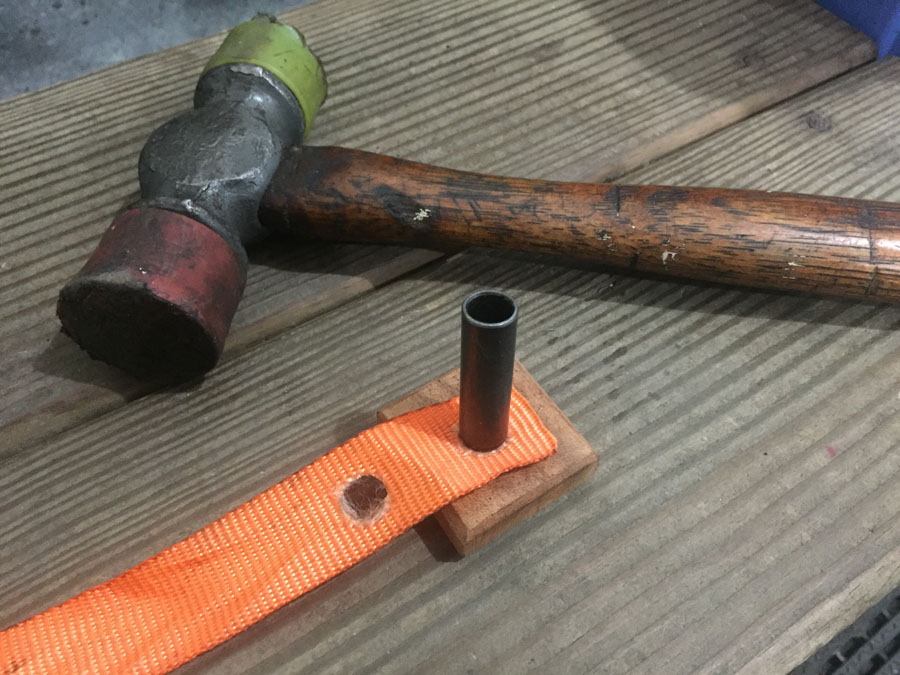
Next… time for a door handle to close the door. Time to learn how my use the grommet tool that had very limited instructions (like which side of the grommet half goes towards the fabric).
Cutting hole (first attempt at strap)
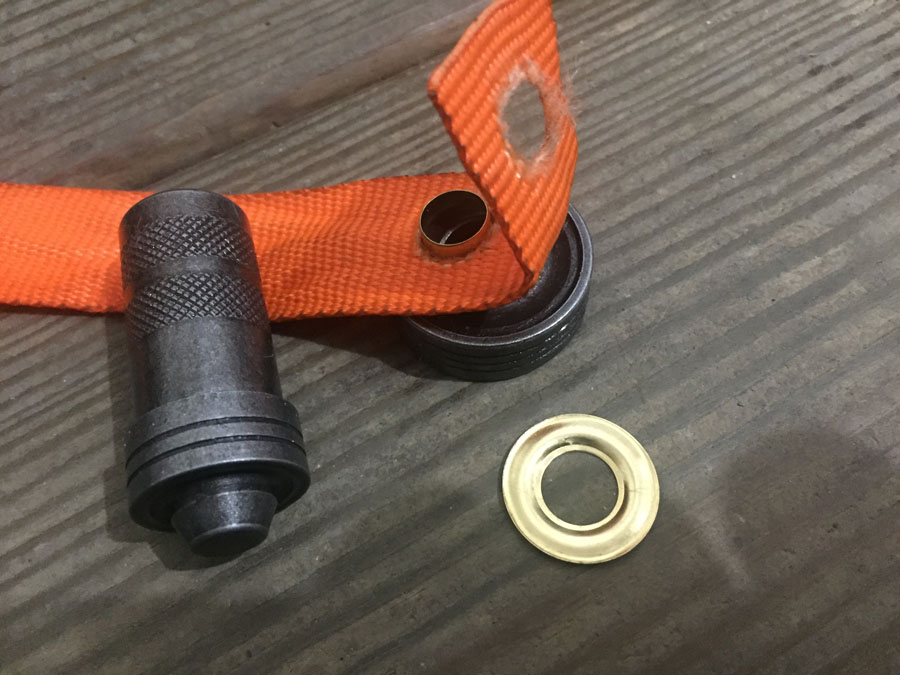
Lower part of die with half of the grommet
Lightly tap it together
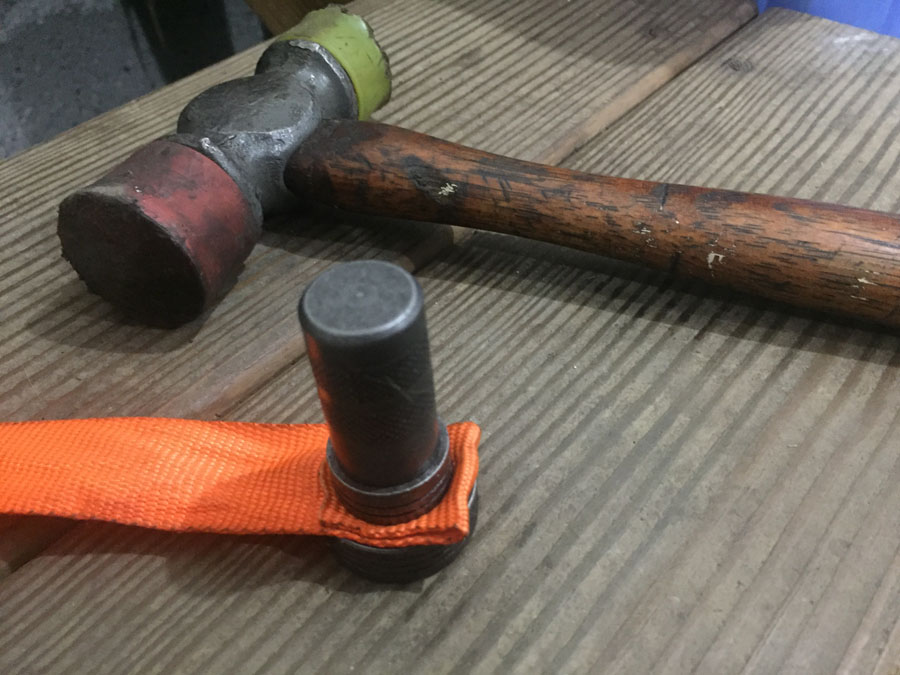
Finished product (round 1)
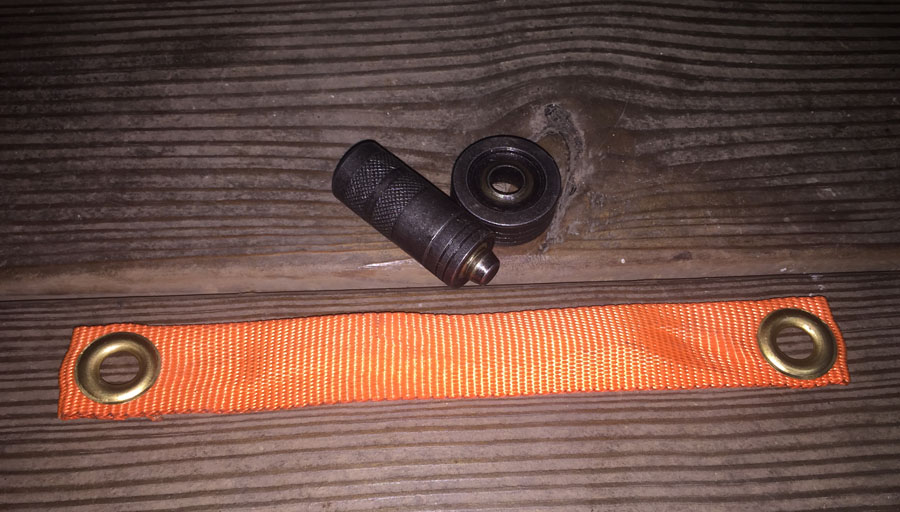
What I did discover is that the grommet would cut into the fabric when used as a door handle.
So I changed the design slightly for the driver’s side where I used three layers at the end and put the folded strap on top instead of the bottom. Seemed to work better.
Finished product…
Now on to the driver’s side which proved to be a bit more difficult because of the lack of the correct tools (a vise only works as a metal brake with simple bends) and it seems my lack of visualizing an object in 3-D space. Damn monkey with a football.
The driver’s side door panel is not as flat as the passenger side so I had to made a support that went between the door panel and the plastic piece.
Anyway… it ain’t pretty so there is nothing to show. (sigh)
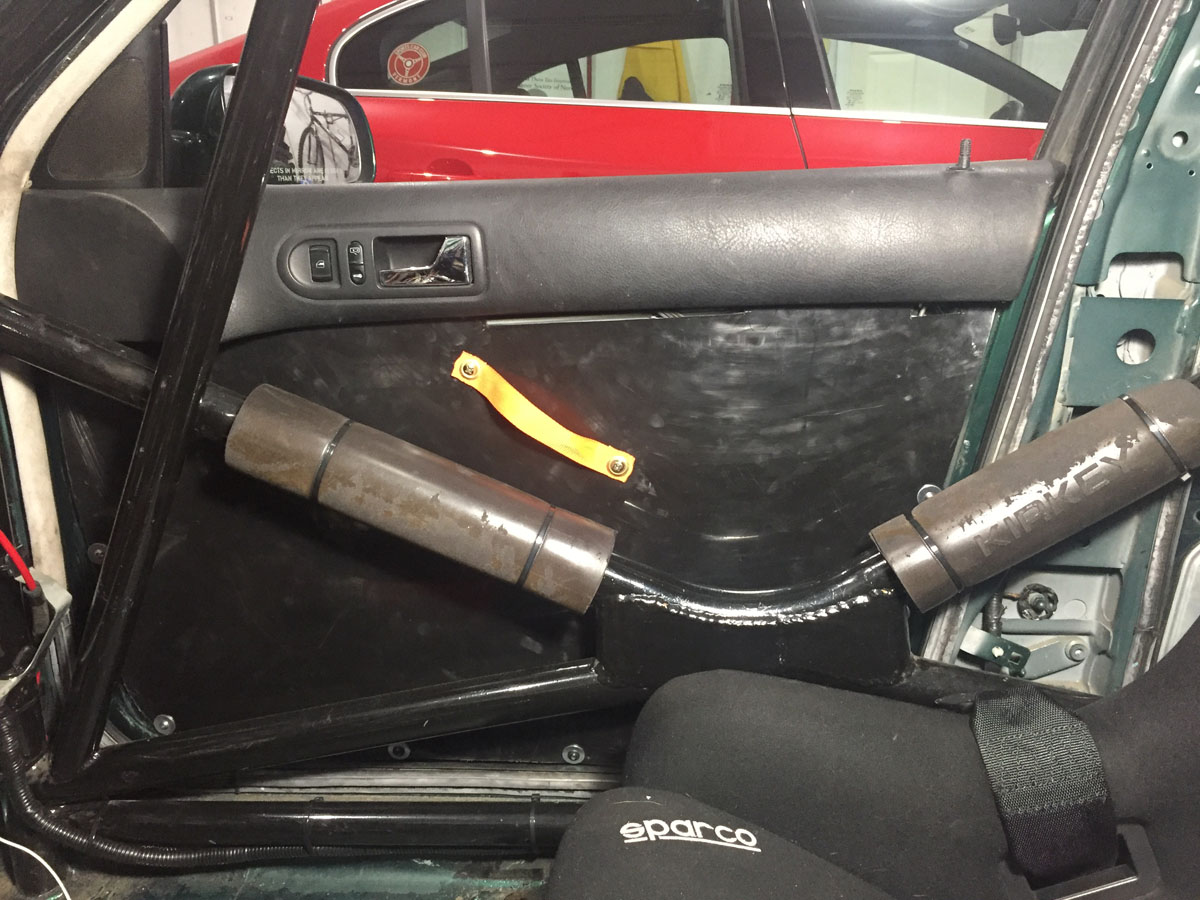
Driver’s door done and switches installed… more threaded rivet nuts to the rescue.
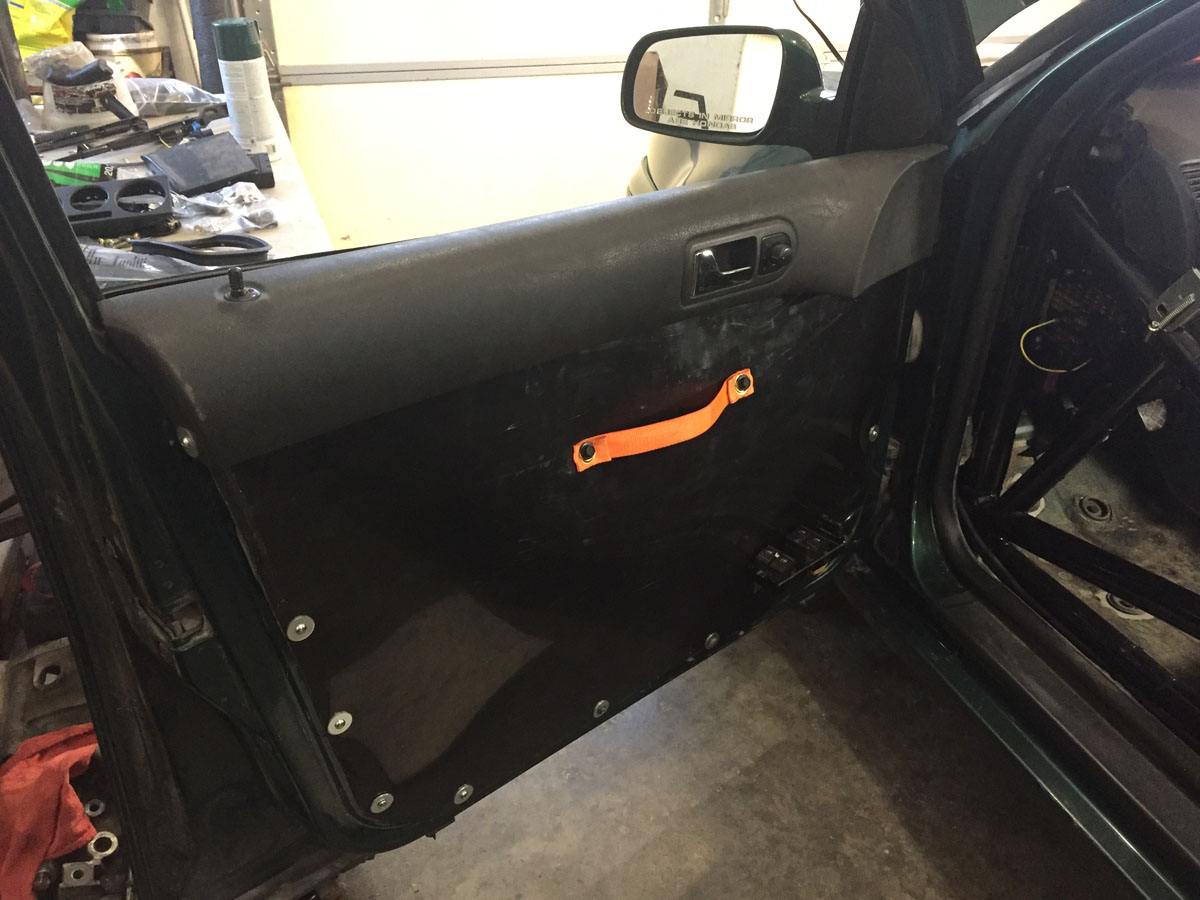
Using the same 1/8” plastic, I made a piece in the footwell to protect the wires. The plastic was the perfect size to slide into the groove in the dead pedal.
Probably too much information for what was a simple (albeit time consuming) project. It would have been sooooooo much easier in the summer as working with a roll of plastic in the winter is a pain. Hard to flatten it.
Enough for one update.
By the way… the car is currently at http://www.VEMS.us (Colchester, Vermont) awaiting its tune. Fingers crossed that everything works out.
Edit… while I was at it, I had to use the Command Prompt to change the file extensions from upper to lower case (used “Rename *.JPG *.jpg”) as the server is case-sensitive. Never a dull moment.
Since I had a long winter to stare at the car to try to figure out some improvements, I jumped into it in November and ended up making a lot of changes, including one major project that I wish I never started.
Many months yielded only a weight savings of 16.2 pounds with the first phase of the project… removing the stock wiring harness for stuff I didn’t need... wasn’t worth it and wish I never started. More to come on that later after I work through the pictures to determine what is worth sharing.
So... I guess I will start somewhere in the middle as the beginning phase of the winter is long and very confusing.
Something simple. The Doors.
When I was putting the car together for the first time, I took what was currently there and modified (cut) it so that the stock door panel would work with the cage.
I cut out the sections that interfered with the cage so that, when the door was closed, it looked good.
Not that I expected a huge weight savings, I think the new modified door panels I did over the winter look better than the hacked up stock panels.
I started with the passenger door as it was easier to work with as it did not have window switches and the gas door/hatch switches. Yep… I still have power windows. The driver’s door is the mirror image of the passenger side so once I had a template, it was easy to duplicate for the other door.
I picked up a roll of 22” wide by 10’ long 1/8” thick high density polyethylene plastic from http://www.SpeedwayMotors.com for $20 . Lots of other color options (black, light blue, dark blue, red, white, and yellow). I like the understated “black” though was tempted with red.
I made some measurements on my high-tech concrete work surface (the floor)…
Used a thick piece of aluminum flat stock as a cutting edge held in place by the typically bent tomato stake and bar clamps. A brand new blade in the utility knife was my friend.
I purchased the world’s worst thread rivet nut insert tool available on the internet. It did not last the entire project and had to be disassembled at the end of each task just to get the threaded piece of the tool out of the pressed in threaded nut. I threw it away when done.
The threaded rivet nuts that I used... 5mm I think.
Installing one of many of the rivet nuts on the door.
I used the top of the stock door panel as it had the door latch and provided some protection for the driver in regards to the top edge of the door.
To hold the stock piece to the door, I made a simple bracket with a threaded rivet nut.
I think it came out pretty good.
Next… time for a door handle to close the door. Time to learn how my use the grommet tool that had very limited instructions (like which side of the grommet half goes towards the fabric).
Cutting hole (first attempt at strap)
Lower part of die with half of the grommet
Lightly tap it together
Finished product (round 1)
What I did discover is that the grommet would cut into the fabric when used as a door handle.
So I changed the design slightly for the driver’s side where I used three layers at the end and put the folded strap on top instead of the bottom. Seemed to work better.
Finished product…
Now on to the driver’s side which proved to be a bit more difficult because of the lack of the correct tools (a vise only works as a metal brake with simple bends) and it seems my lack of visualizing an object in 3-D space. Damn monkey with a football.
The driver’s side door panel is not as flat as the passenger side so I had to made a support that went between the door panel and the plastic piece.
Anyway… it ain’t pretty so there is nothing to show. (sigh)
Driver’s door done and switches installed… more threaded rivet nuts to the rescue.
Using the same 1/8” plastic, I made a piece in the footwell to protect the wires. The plastic was the perfect size to slide into the groove in the dead pedal.
Probably too much information for what was a simple (albeit time consuming) project. It would have been sooooooo much easier in the summer as working with a roll of plastic in the winter is a pain. Hard to flatten it.
Enough for one update.
By the way… the car is currently at http://www.VEMS.us (Colchester, Vermont) awaiting its tune. Fingers crossed that everything works out.
Edit… while I was at it, I had to use the Command Prompt to change the file extensions from upper to lower case (used “Rename *.JPG *.jpg”) as the server is case-sensitive. Never a dull moment.
Go Fast VW & Audi parts at FastAddiction.com
-
Rabbit Farmer
- Posts: 2261
- Joined: Wed Jun 25, 2003 11:37 pm
- AntiSpam: No
- Location: Earth
- Contact:
Re: Rabbit Farmer's various VW Projects
Next minor update... still avoiding the big "wiring removal" post.
Two things I wanted to accomplish with this change....
1. Clearer lens cover on the cluster
2. Fewer idiot lights since my ECU doesn't even know my car is running.
Cluster removed from dash and plastic cover removed
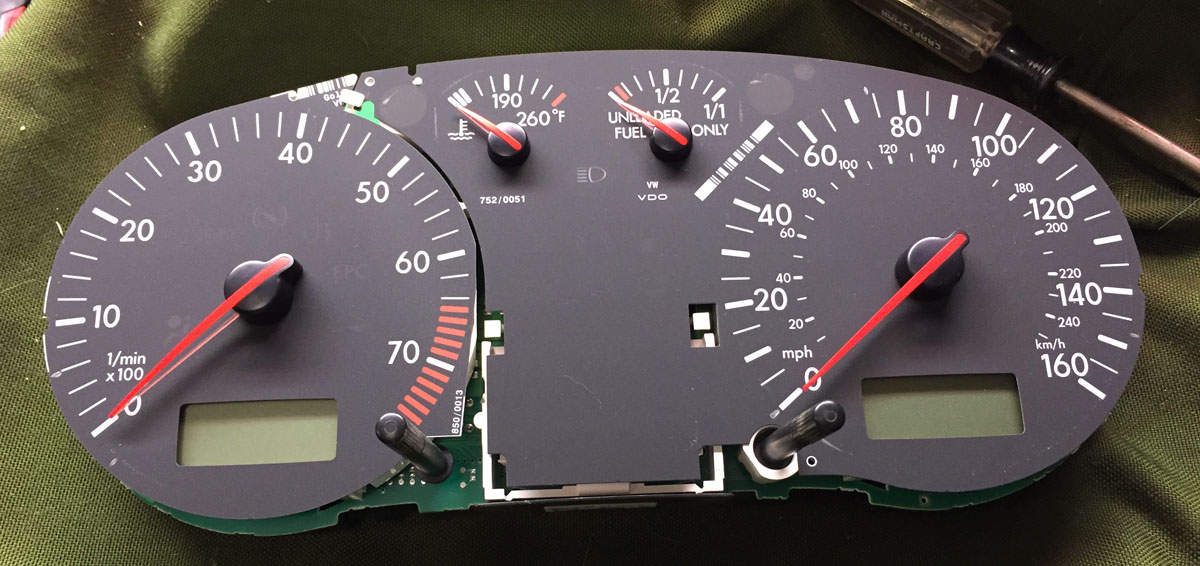
Off with the needles
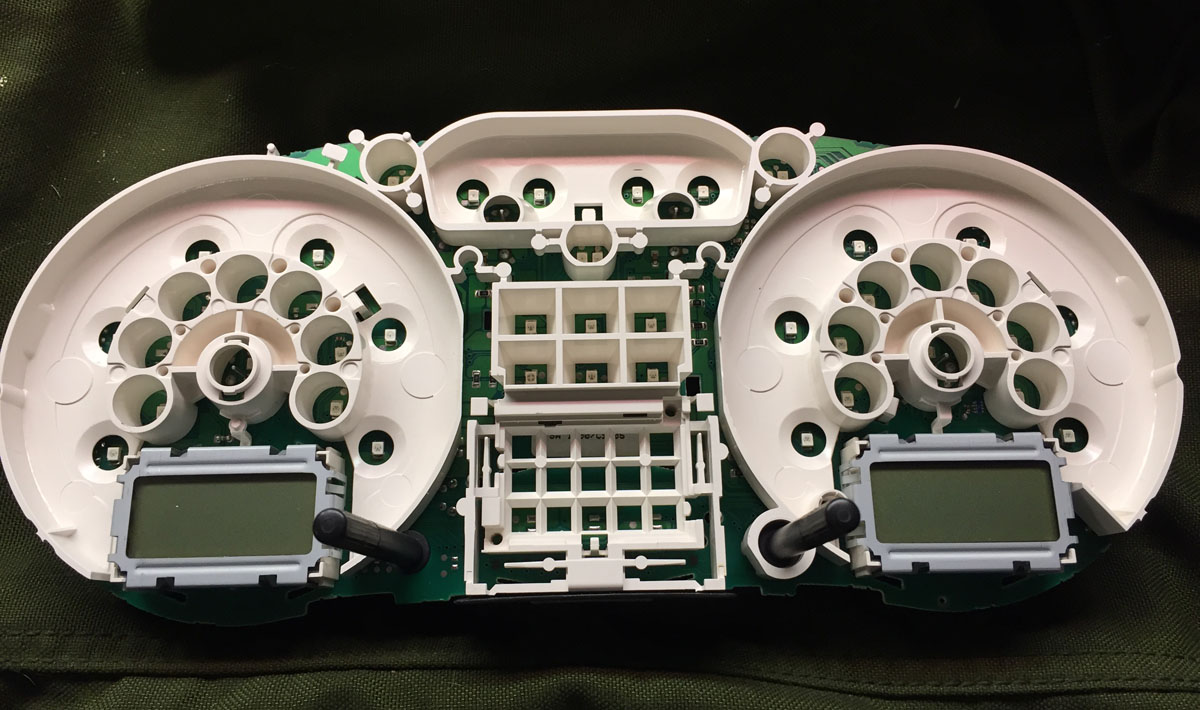
The inside of the MK4 cluster. Thinking of my old Rabbit days, I thought this was going to be an exercise in removing some tiny light bulbs. Nope... tiny LEDs that are soldered into the electronic board.
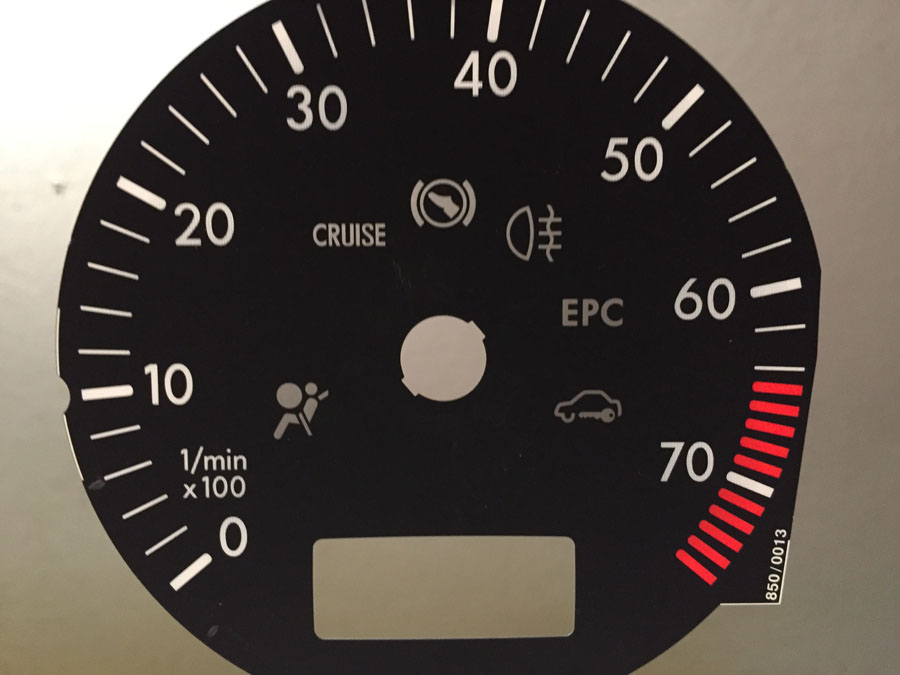
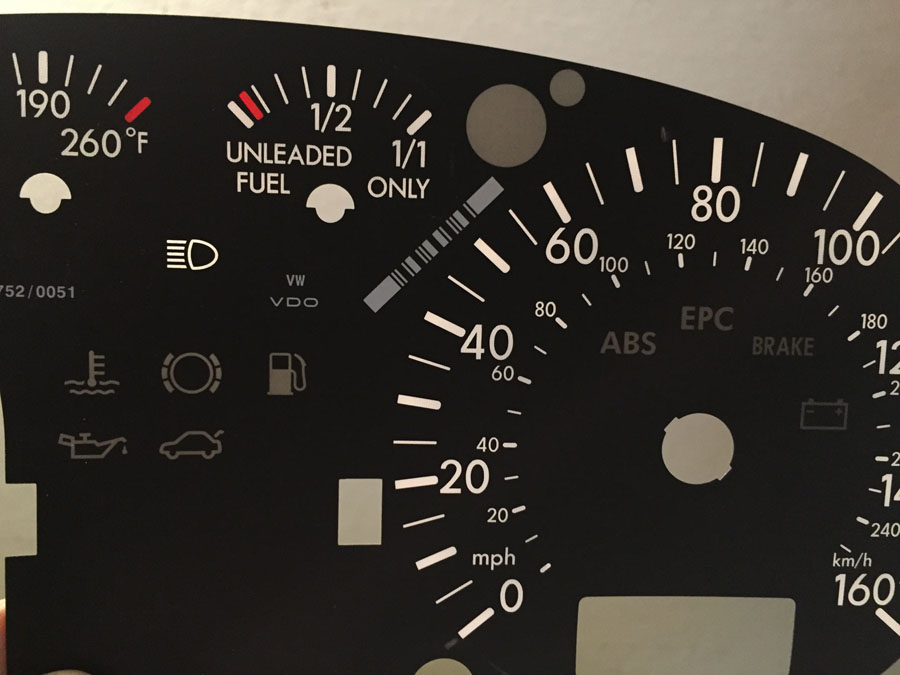
Tach held up to the light so that you can see the idiot light images.
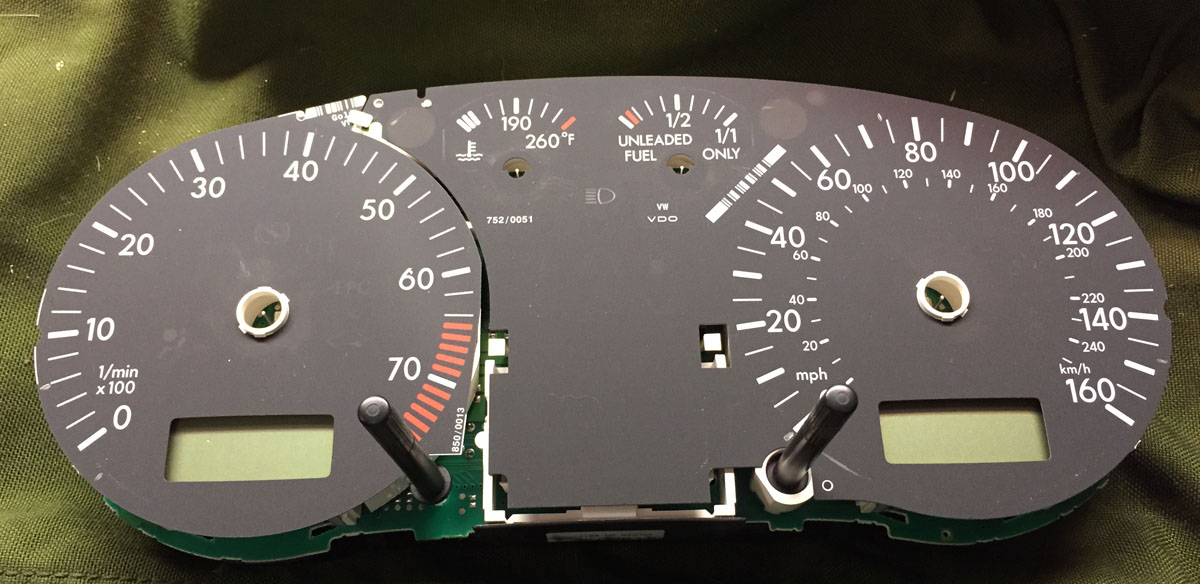
Plan B... electrical tape.
Results...
Speedometer before...
And after...
Scratched cover...
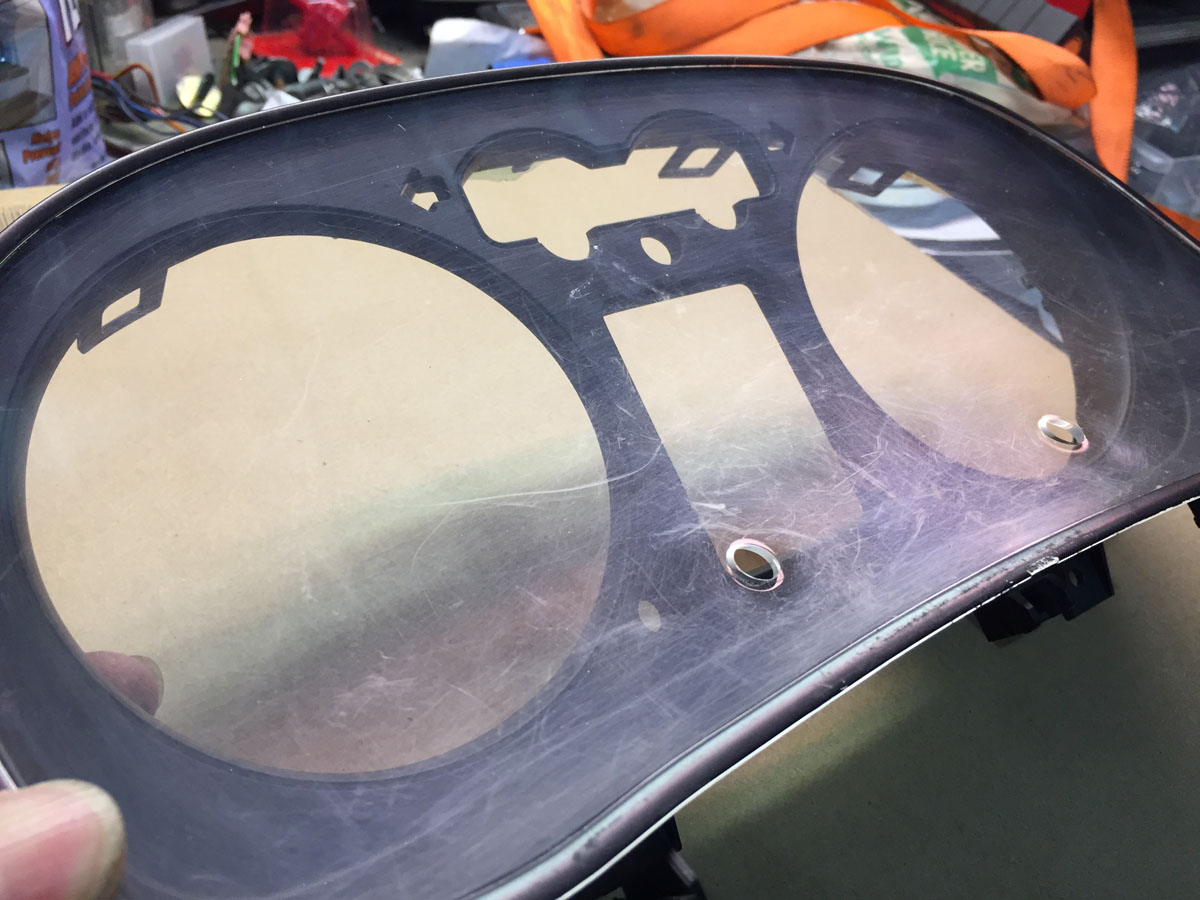
Pretty!

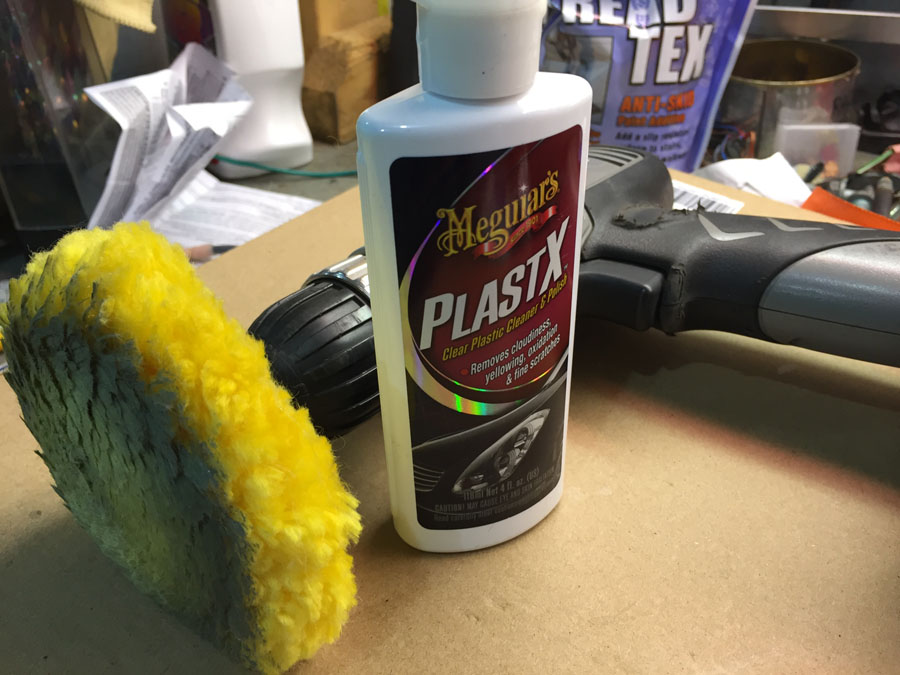
I just used headlight polish. Works quite well.
Two things I wanted to accomplish with this change....
1. Clearer lens cover on the cluster
2. Fewer idiot lights since my ECU doesn't even know my car is running.
Cluster removed from dash and plastic cover removed
Off with the needles
The inside of the MK4 cluster. Thinking of my old Rabbit days, I thought this was going to be an exercise in removing some tiny light bulbs. Nope... tiny LEDs that are soldered into the electronic board.
Tach held up to the light so that you can see the idiot light images.
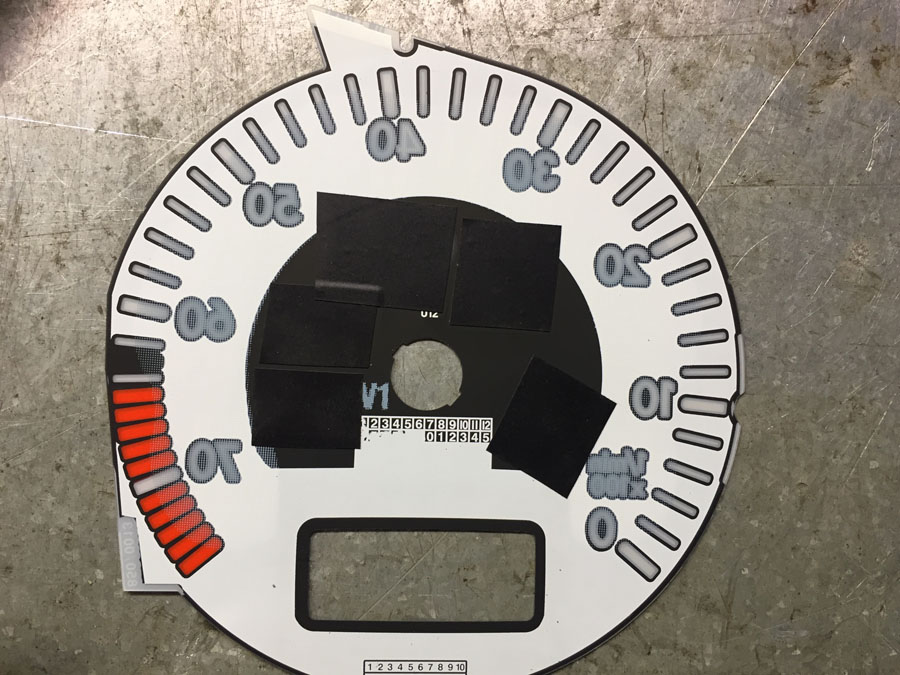
Plan B... electrical tape.
Results...
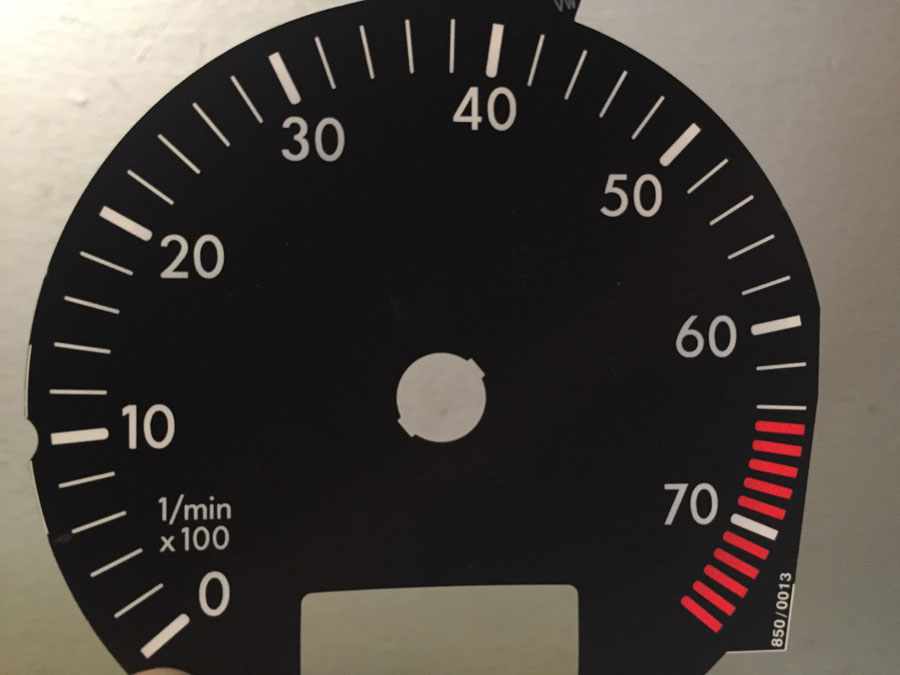
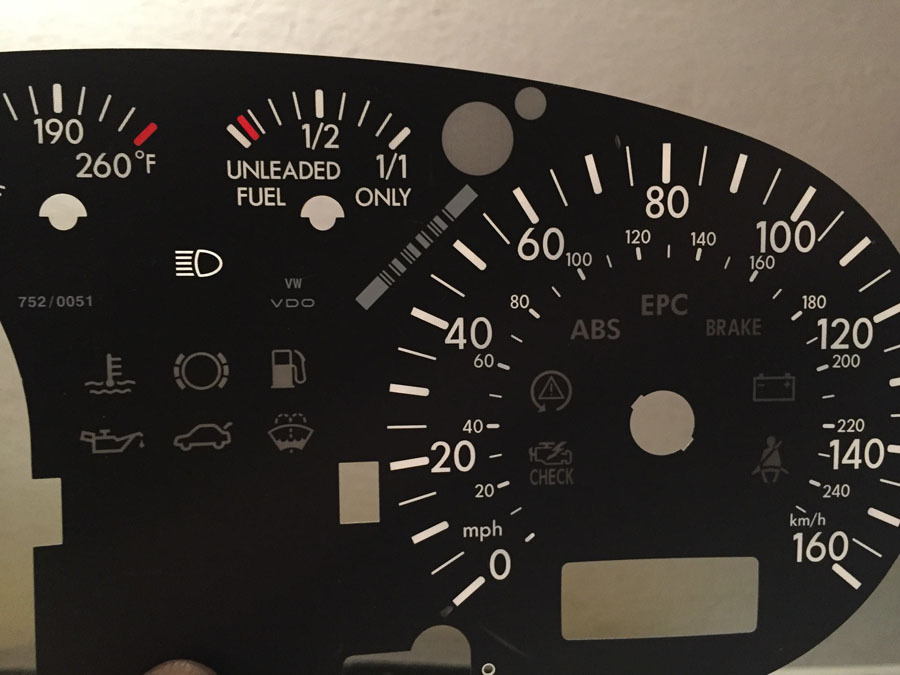
Speedometer before...
And after...
Scratched cover...
Pretty!
I just used headlight polish. Works quite well.
Go Fast VW & Audi parts at FastAddiction.com
-
Rabbit Farmer
- Posts: 2261
- Joined: Wed Jun 25, 2003 11:37 pm
- AntiSpam: No
- Location: Earth
- Contact:
Re: Rabbit Farmer's various VW Projects
When trying to start the car after the "big wiring project" (that I wish I never started), the fuel pump would not turn on and the engine would not turn over.
Engine turn over was the clutch switch not installed yet. I was planning on circumventing this control and wasn't planning on installing it. Of course, I should have either followed through with that plan or installed it prior to trying to start the car.
Then there was the fuel pump that was not... well, pumping.
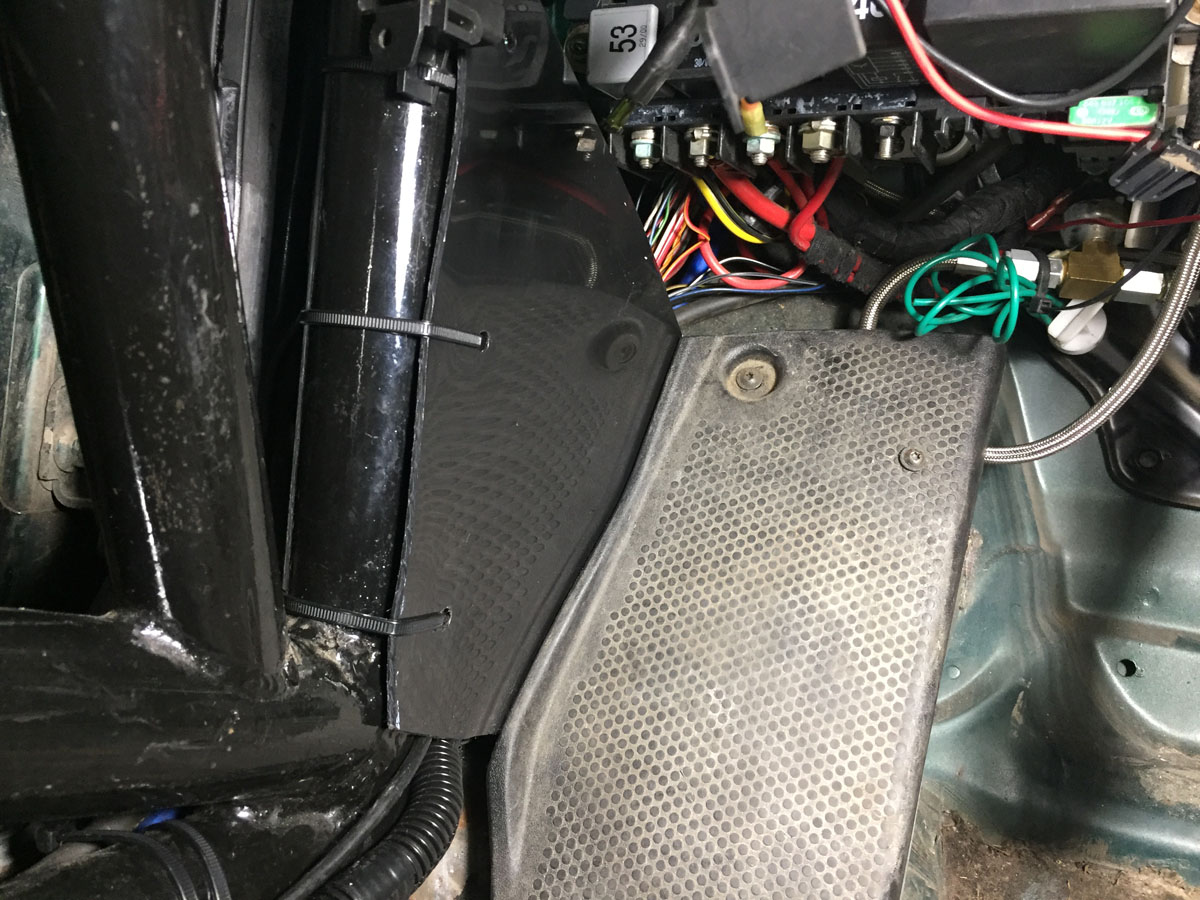
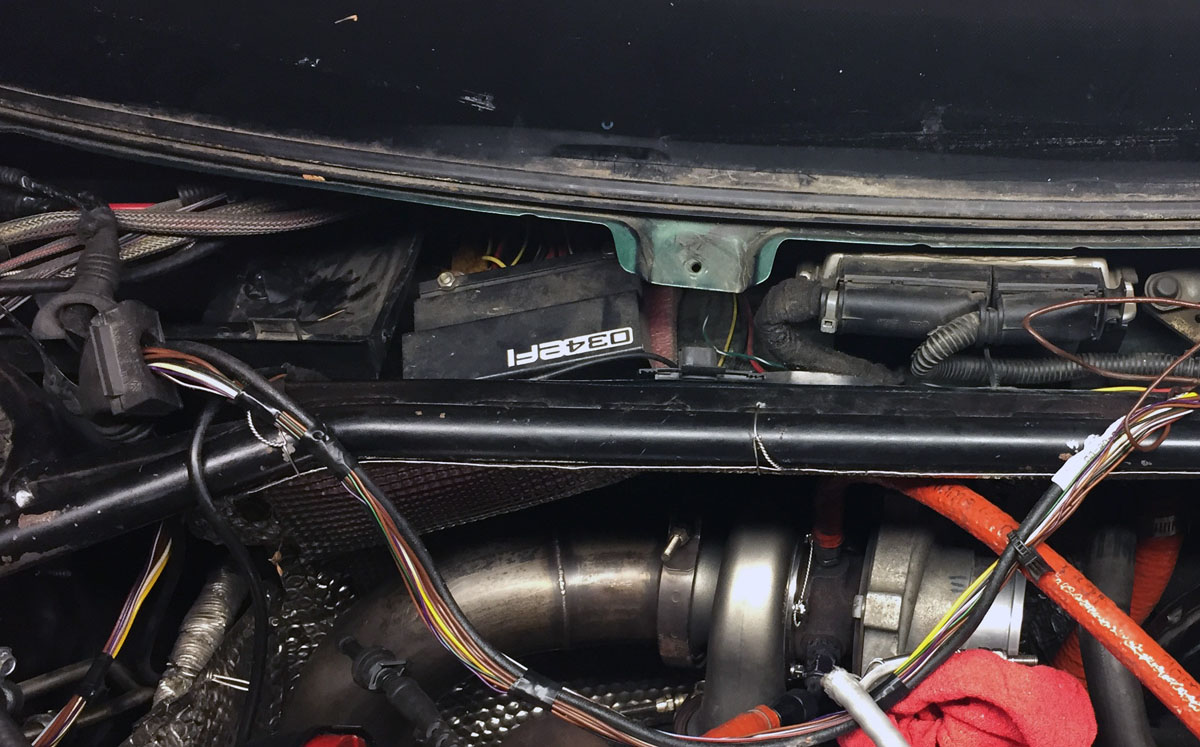
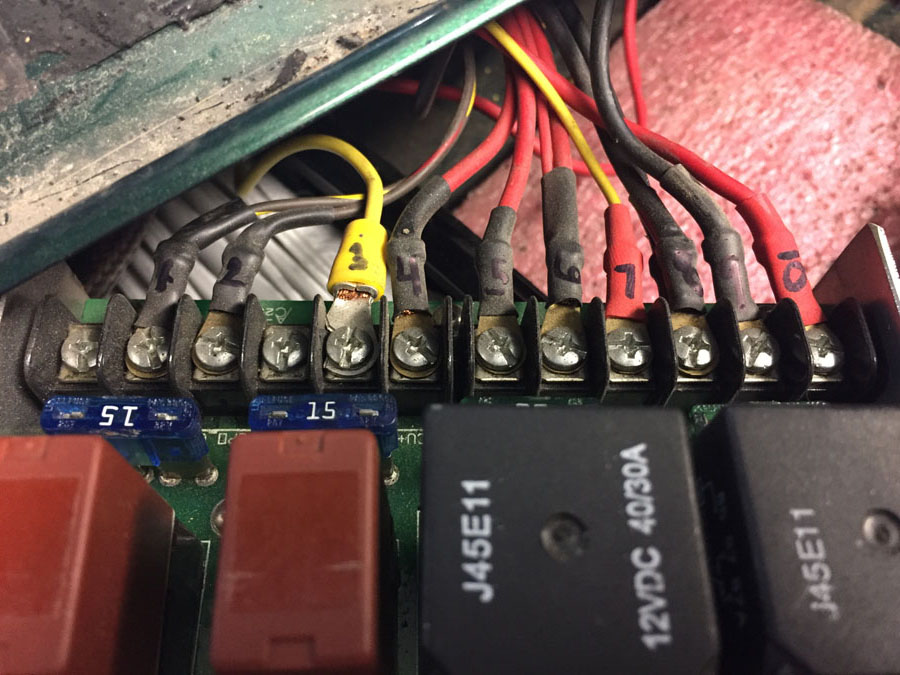
I followed the yellow wire from the fuse box on the driver's side, through the dash board, and out the hole in the fire wall to the rain tray. There sat the 034 relay board.
It has fuses in it. I can seem them. But access was not possible without pulling back the heat shield, removing the nuts that held the relay board, and then taking the little screws out of the relay board to access the fuse.
I couldn't see me wanting to do that at an event should I blow a fuse.
I marked the wires (should have use a paint pen) and removed all the screws so that I could run the wires through the firewall.
There is my yellow wire (marked #3)... and the fuse that was blown.
To reattach the heat shield, I picked up a safety wire twist pliers.... mixing "a" with a plural sounds funny. Can't have a pant or a plier. Easy to use and quite functional.
I started with a piece of aluminum stock that mounted to one of the bolts that supports the dash and then used an exhaust clamp for the outside mounting point.
Next, Bob at Vermont Custom Sheet Metal cut of a sheet of 090 aluminum plate for me. Seems the machine was a bit of an overkill for what I wanted. He didn't blink an eye when I asked him for the small sheet... I guess he has seen all sorts of requests over the years. The machine out back would cut a half-inch piece of steel. Don't get your fingers in that one.
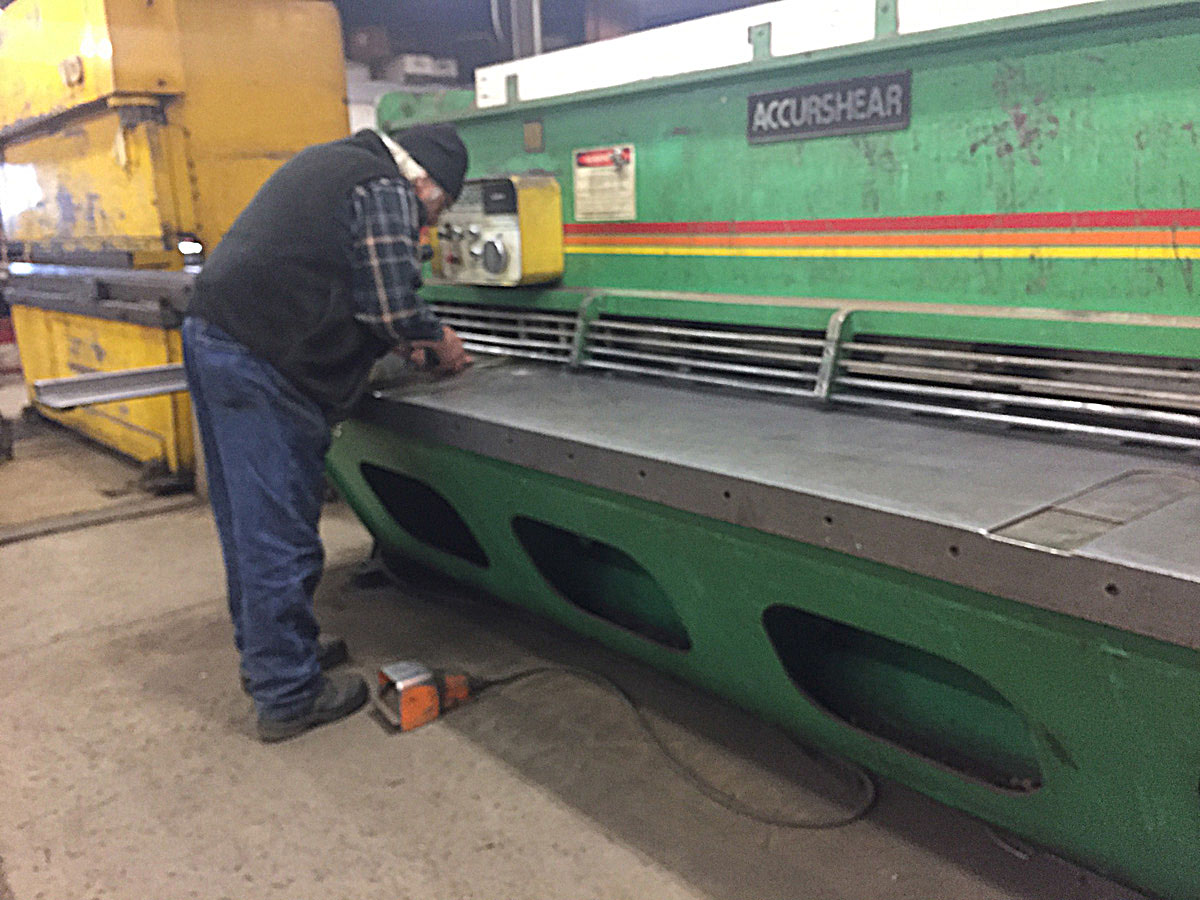
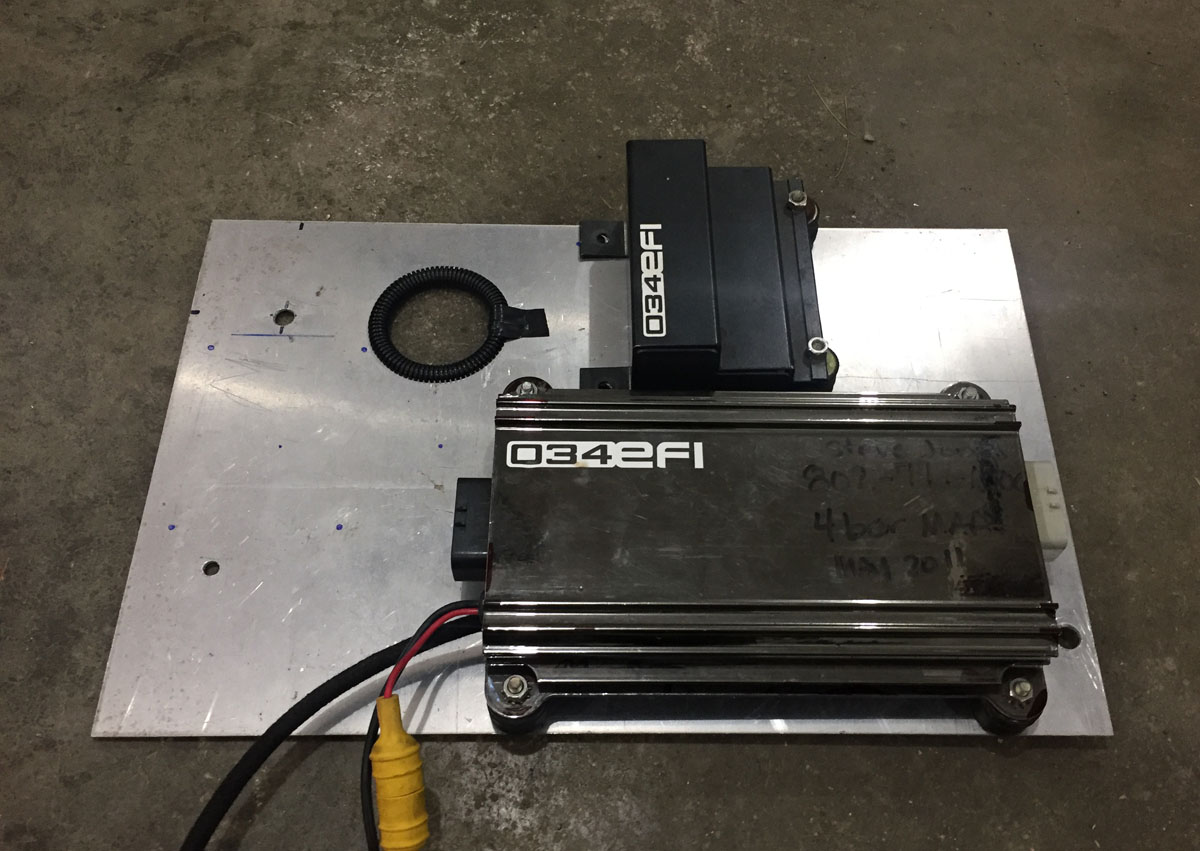
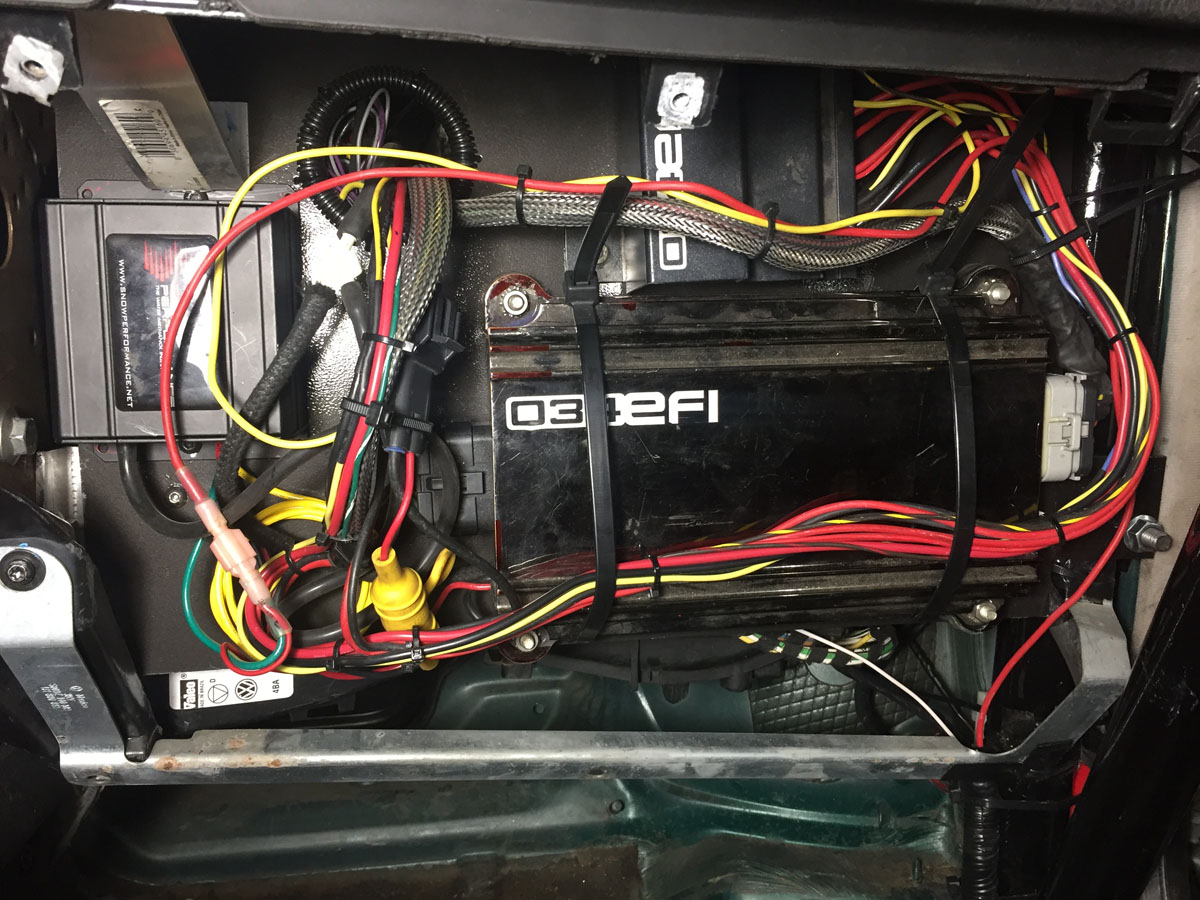
Plate in place... ran the wires through the 2.25" hole to determine placement of the 034EFC IIC ECU, 034 relay board, and the water injection system that I use to spray the radiator.

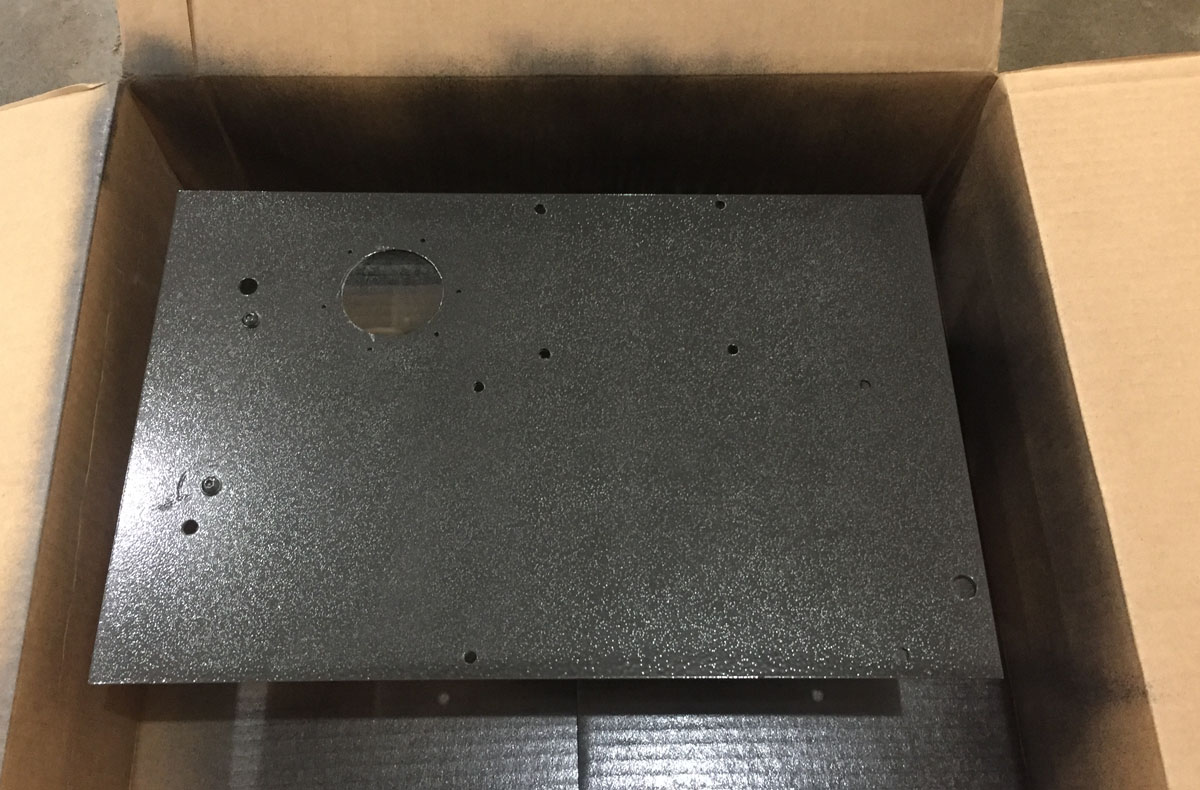
Determined location and drilled mounting holes.
Some Hammermill paint.
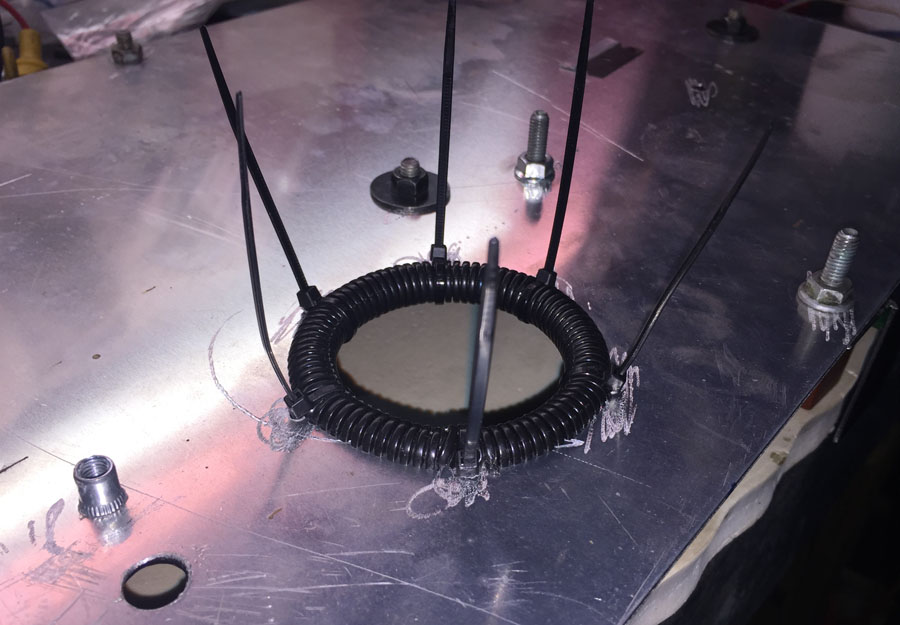
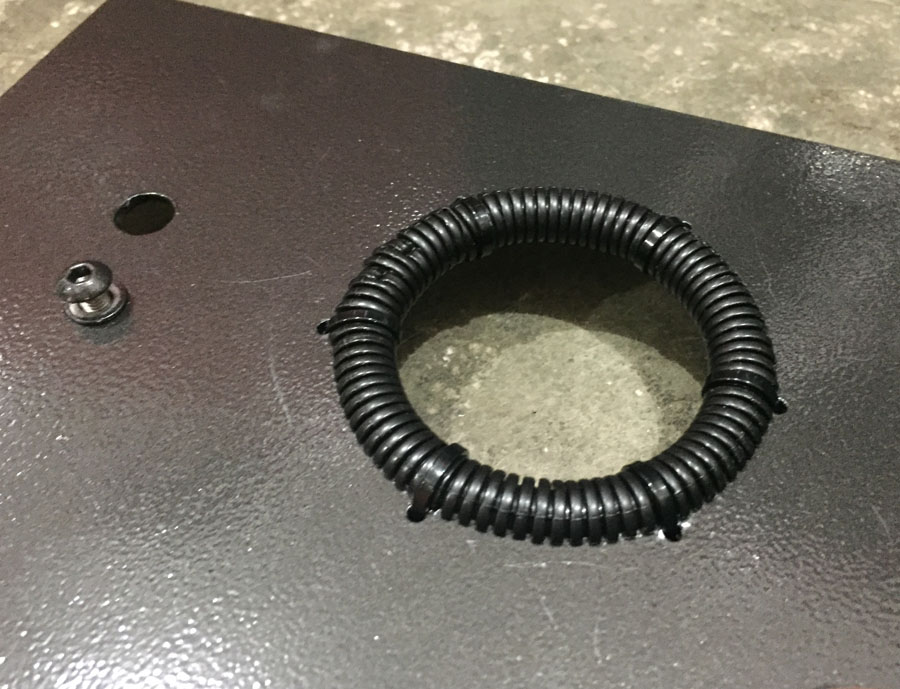
Custom grommet made from wire loom and zipties... it works.
Everything in place. If I was doing this from the start, I would have made all the wires the correct length. Large lip tires are holding the wires, not the ECU.
Dash coming together.
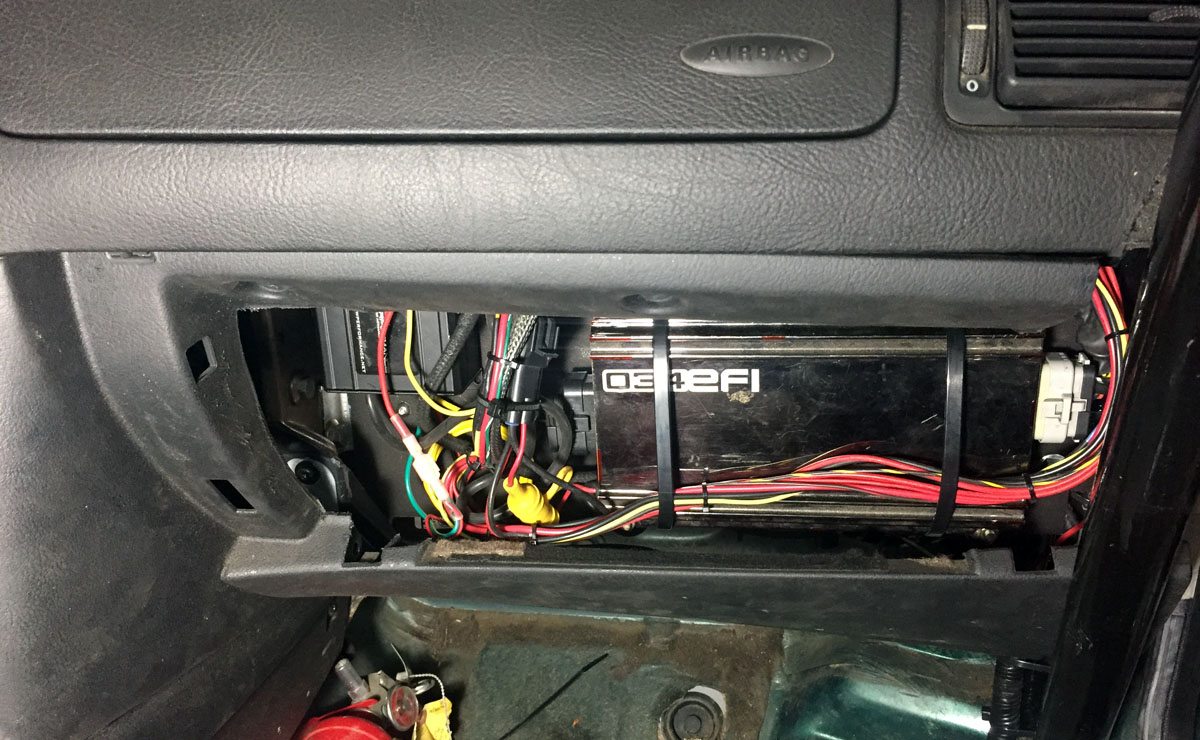
Glovebox door in place... I used an aluminum rod that goes through the gutted glovebox door and is held in place my the stock indentation where the factor latch goes. The rod is attached (VW part # Hose clamp) to the cage on the outside.
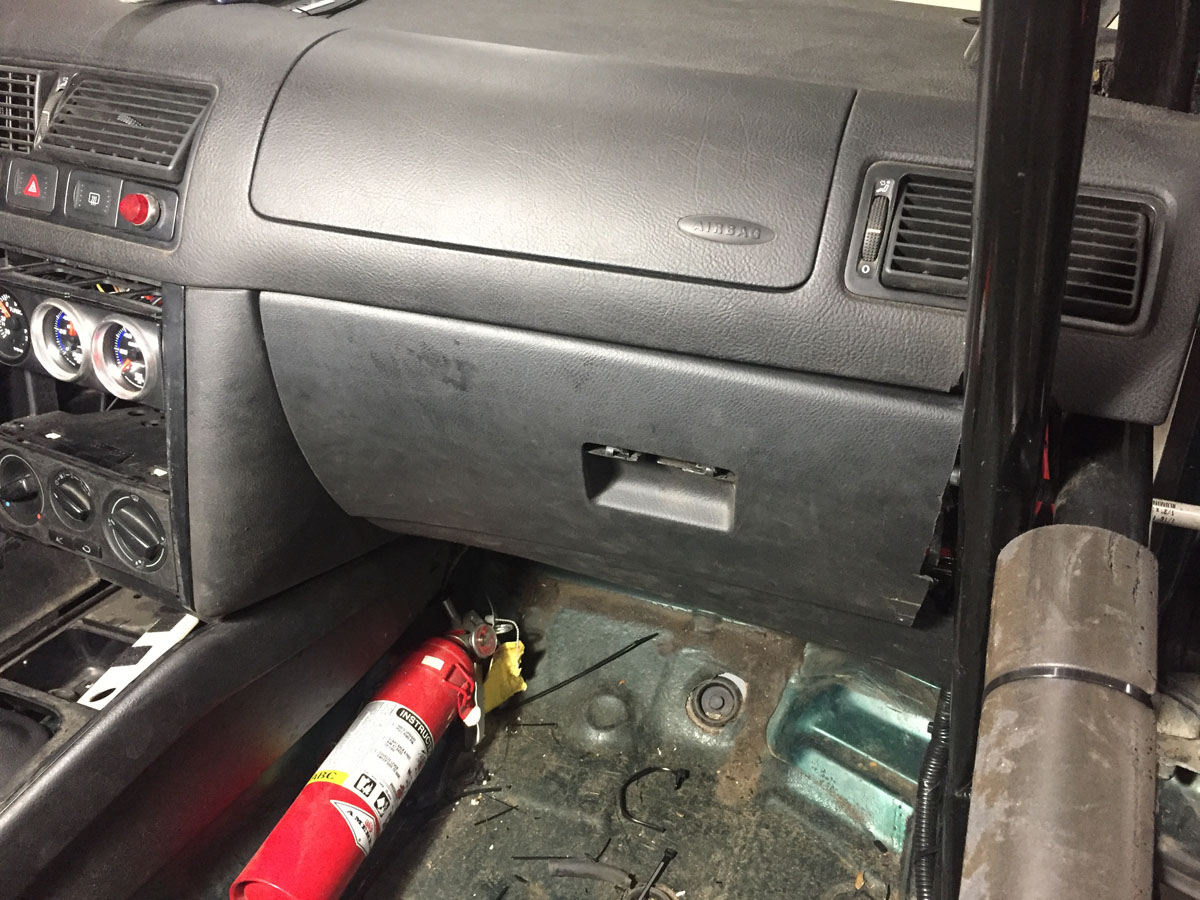
And done...
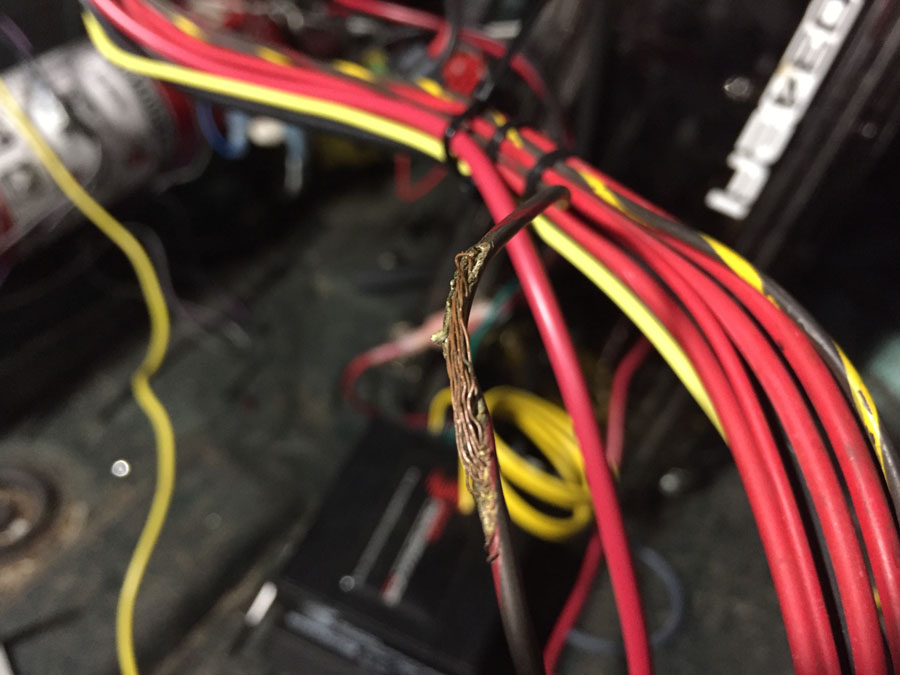
And... one good thing did come out of the fuse being blown on the relay board for the fuse pump. When pulling the relay board wires through the fire wall, I found a wire (went to GPO 0) that was less than healthy. Glad I found it now.
Engine turn over was the clutch switch not installed yet. I was planning on circumventing this control and wasn't planning on installing it. Of course, I should have either followed through with that plan or installed it prior to trying to start the car.
Then there was the fuel pump that was not... well, pumping.
I followed the yellow wire from the fuse box on the driver's side, through the dash board, and out the hole in the fire wall to the rain tray. There sat the 034 relay board.
It has fuses in it. I can seem them. But access was not possible without pulling back the heat shield, removing the nuts that held the relay board, and then taking the little screws out of the relay board to access the fuse.
I couldn't see me wanting to do that at an event should I blow a fuse.
I marked the wires (should have use a paint pen) and removed all the screws so that I could run the wires through the firewall.
There is my yellow wire (marked #3)... and the fuse that was blown.
To reattach the heat shield, I picked up a safety wire twist pliers.... mixing "a" with a plural sounds funny. Can't have a pant or a plier. Easy to use and quite functional.
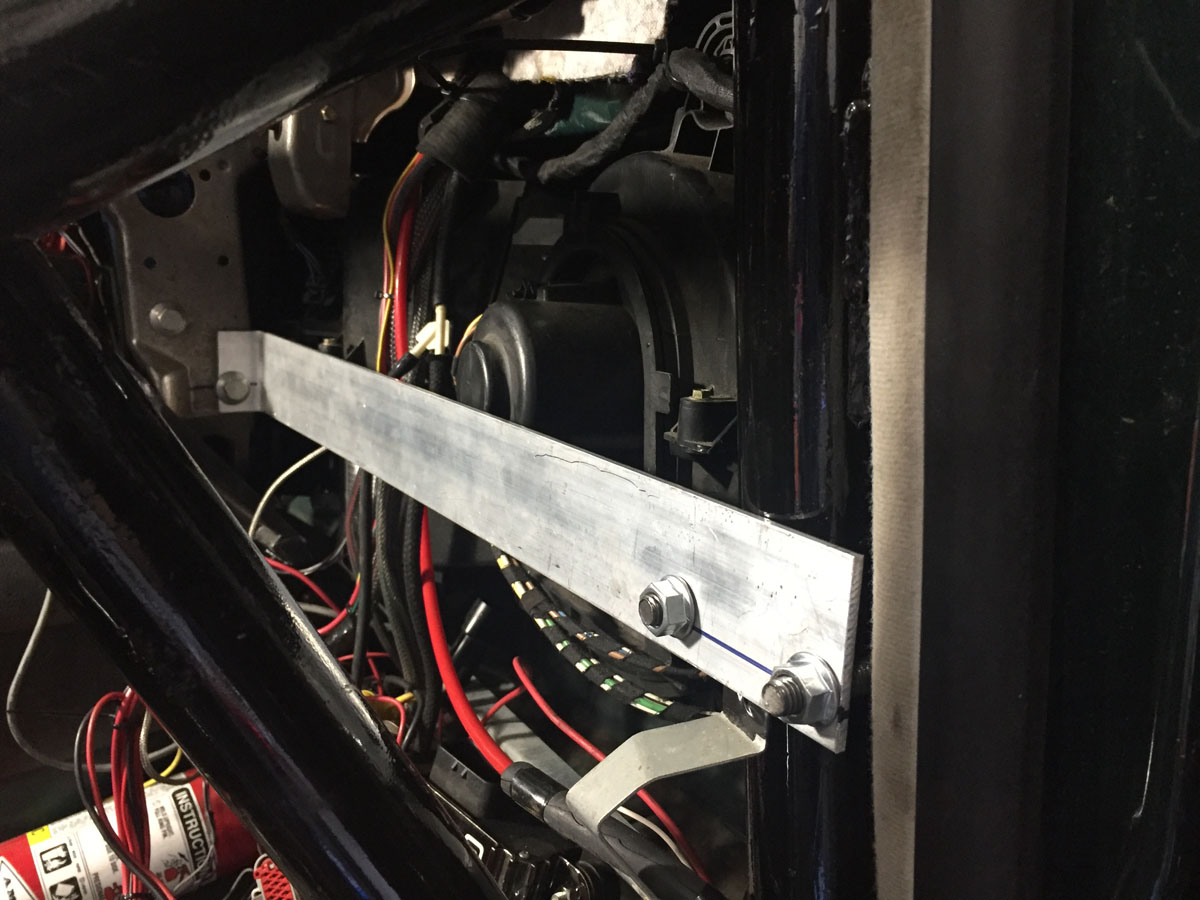
I started with a piece of aluminum stock that mounted to one of the bolts that supports the dash and then used an exhaust clamp for the outside mounting point.
Next, Bob at Vermont Custom Sheet Metal cut of a sheet of 090 aluminum plate for me. Seems the machine was a bit of an overkill for what I wanted. He didn't blink an eye when I asked him for the small sheet... I guess he has seen all sorts of requests over the years. The machine out back would cut a half-inch piece of steel. Don't get your fingers in that one.
Plate in place... ran the wires through the 2.25" hole to determine placement of the 034EFC IIC ECU, 034 relay board, and the water injection system that I use to spray the radiator.
Determined location and drilled mounting holes.
Some Hammermill paint.
Custom grommet made from wire loom and zipties... it works.
Everything in place. If I was doing this from the start, I would have made all the wires the correct length. Large lip tires are holding the wires, not the ECU.
Dash coming together.
Glovebox door in place... I used an aluminum rod that goes through the gutted glovebox door and is held in place my the stock indentation where the factor latch goes. The rod is attached (VW part # Hose clamp) to the cage on the outside.
And done...
And... one good thing did come out of the fuse being blown on the relay board for the fuse pump. When pulling the relay board wires through the fire wall, I found a wire (went to GPO 0) that was less than healthy. Glad I found it now.
Go Fast VW & Audi parts at FastAddiction.com
-
Rabbit Farmer
- Posts: 2261
- Joined: Wed Jun 25, 2003 11:37 pm
- AntiSpam: No
- Location: Earth
- Contact:
Re: Rabbit Farmer's various VW Projects
And to check something off my "to do" list for the day, some more photos.
Some of these are more for me to recall when I did something (who cares that I painted something or put fluid in something else?)
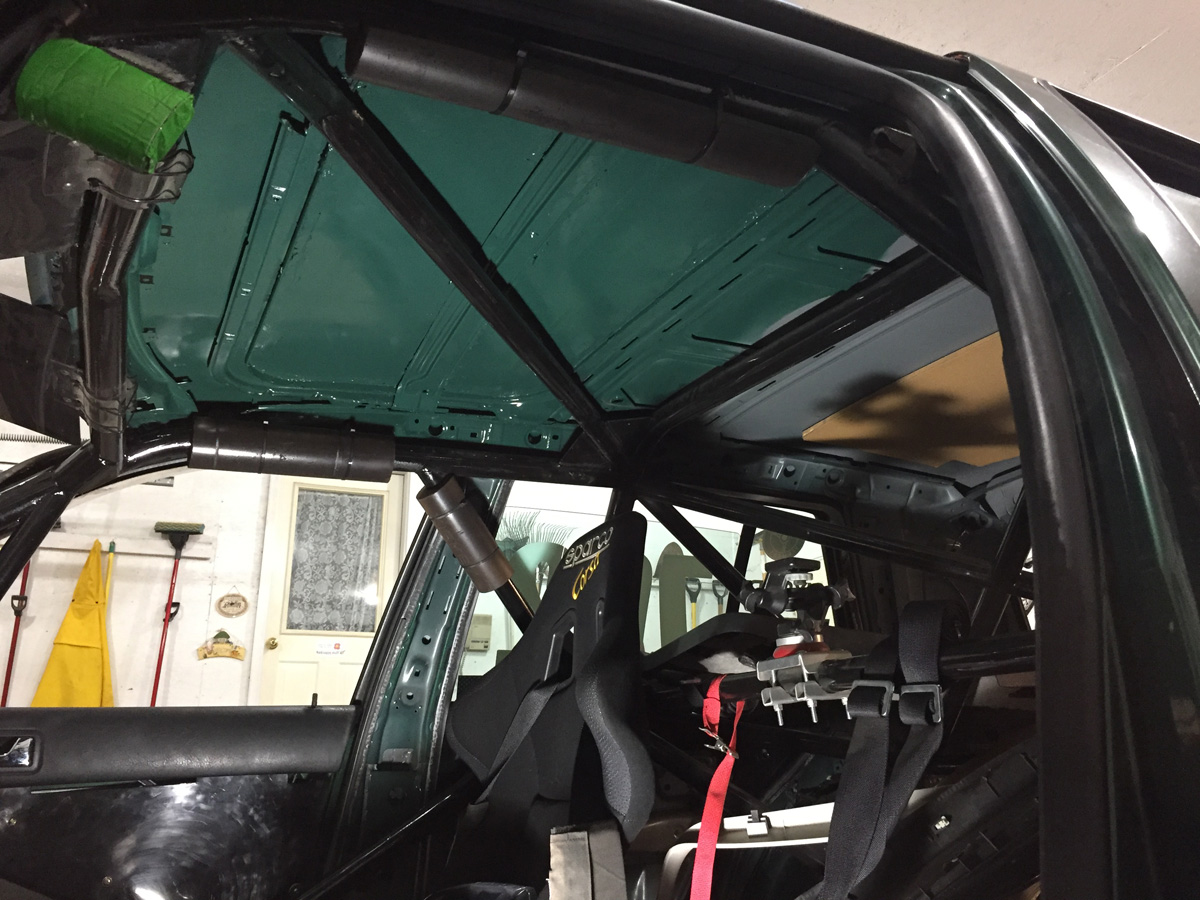
So... I painted the ceiling. I was going to replace the entire roof as I have a color-correct non-sunroof roof ready to install. Did not seem worth the effort. Instead, I painted over the mulit-color ceiling.
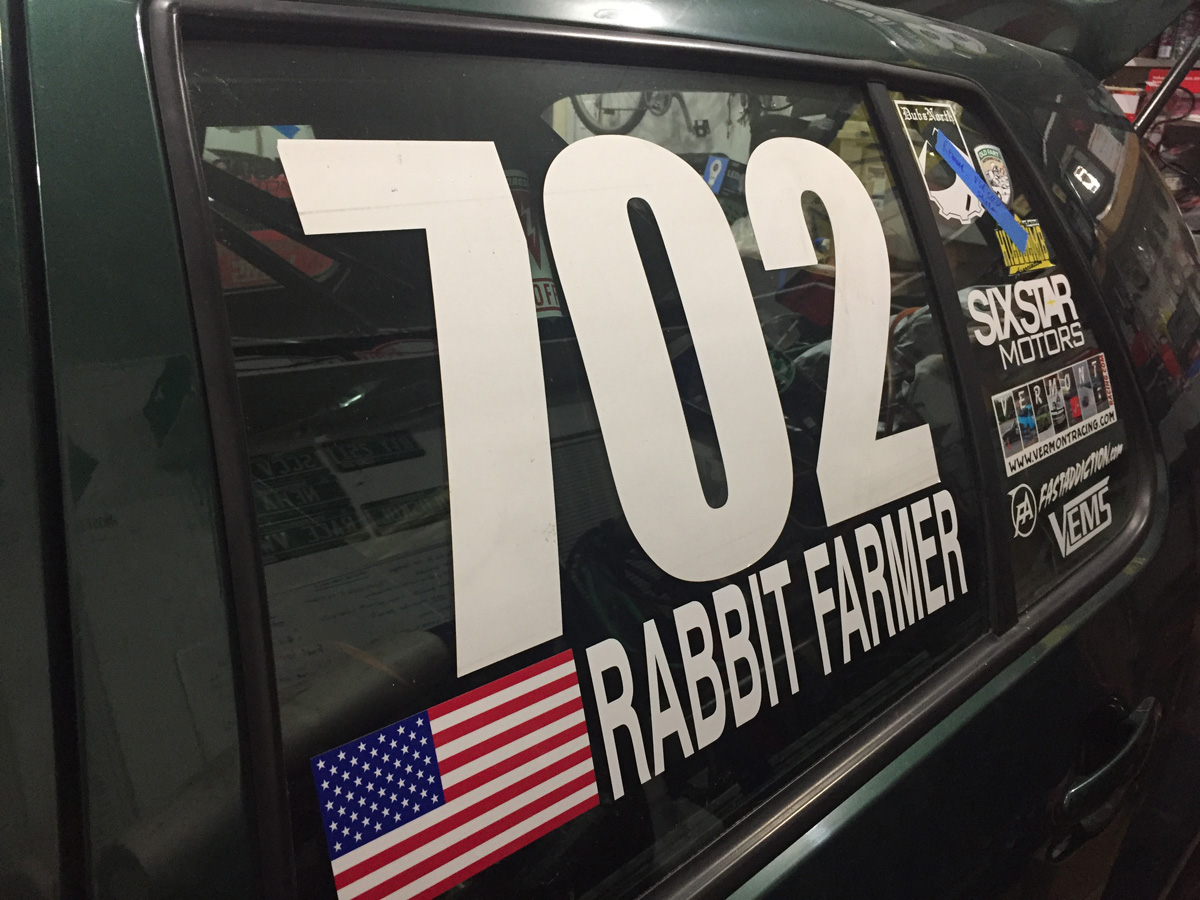
Who the heck is "S. JONES" anyway? Don't know... figure I would have better luck with "Rabbit Farmer". Why not?
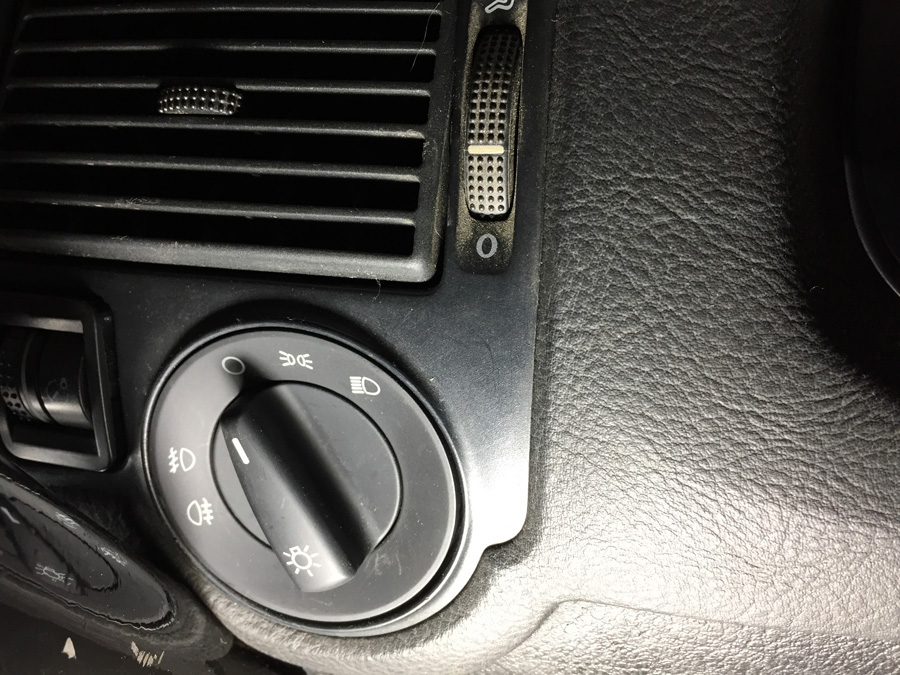
Seems minor, but a "Euro Switch" has its benefits. I was not able to change it in the past because one of the tubes for the rollcage was in the way; when the dash was out I changed the switch. This switch allows me to turn off the headlights, which is nice when you have a dead battery and the headlights keep coming on when trying to start the car. The e-brake switch is supposed to do the same, but for some reason they still came on.
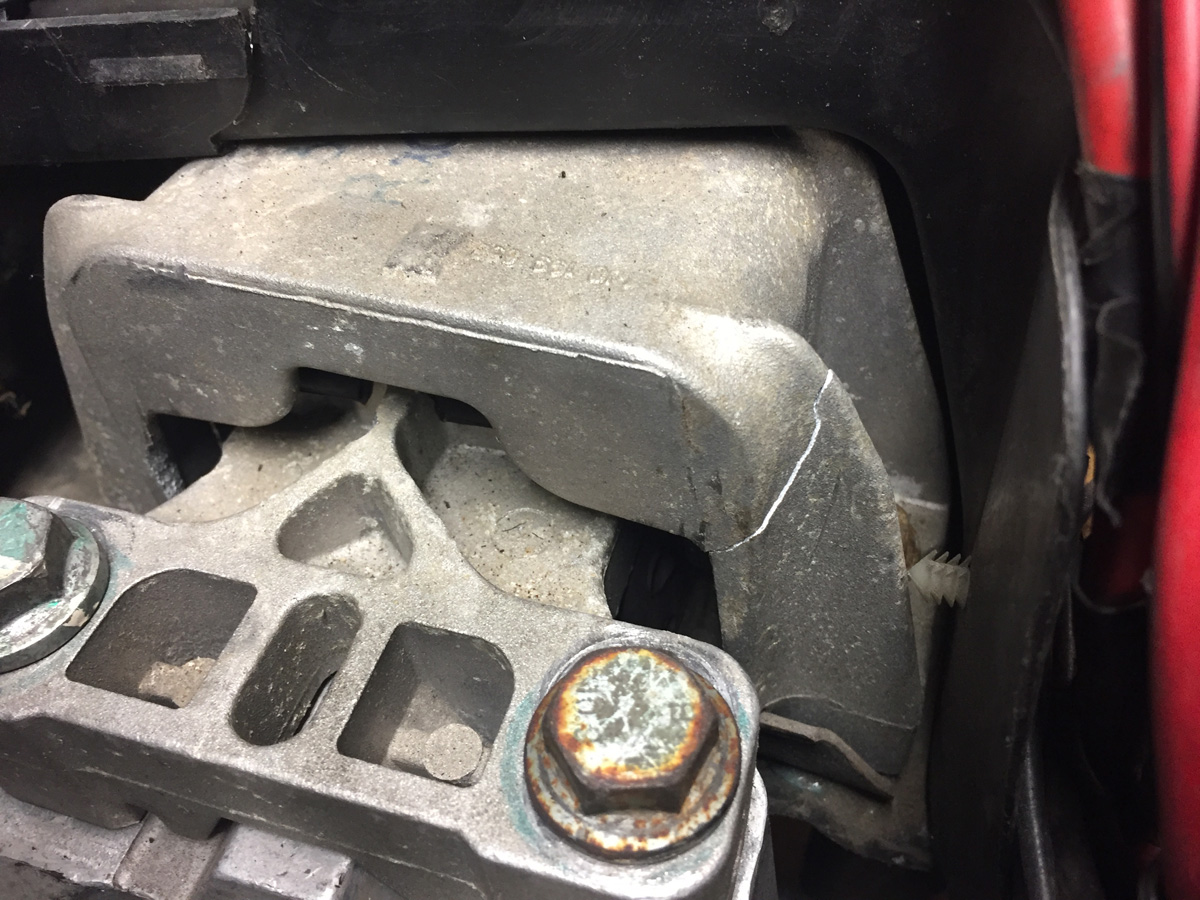
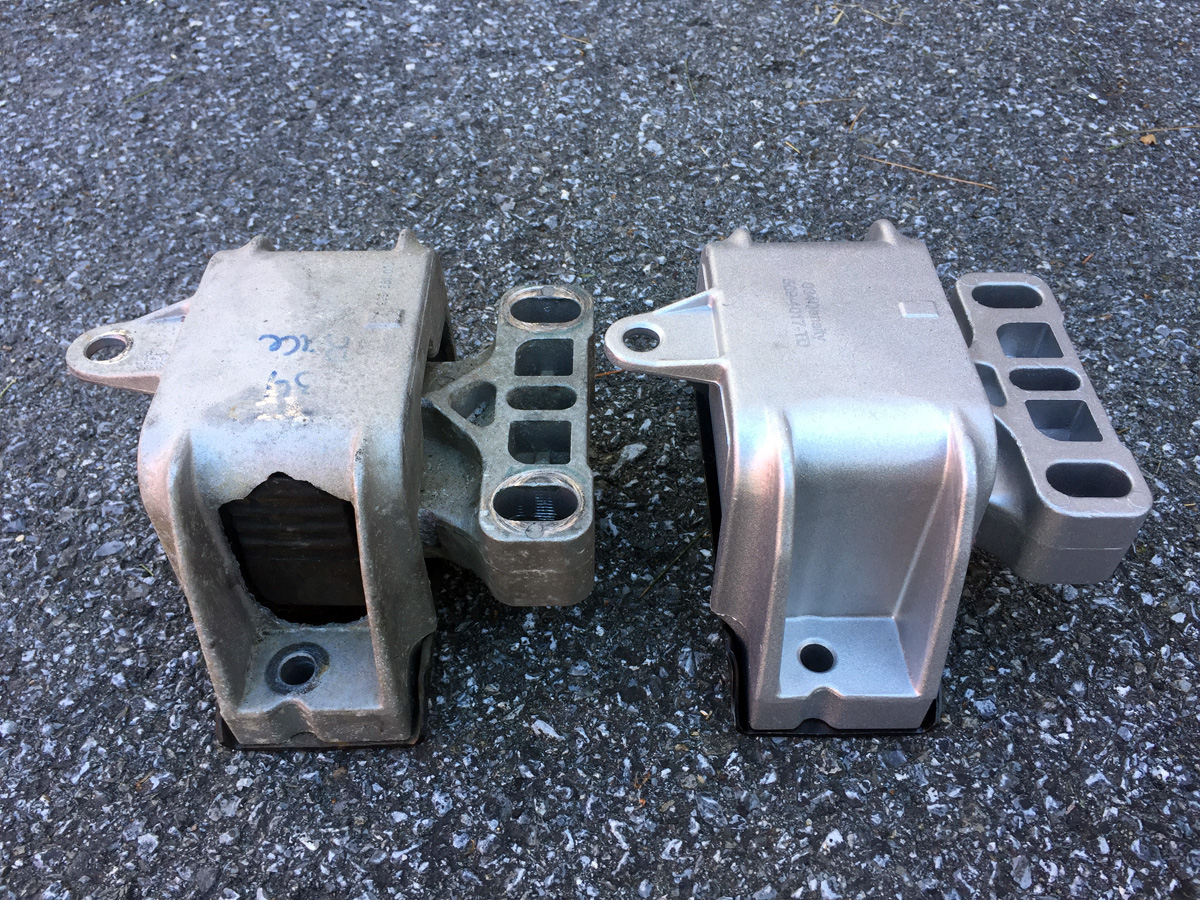
I noticed that the transmission mount had a crack in it. I assume this was from when the dogbone broke at Okemo (2015?) allowing the engine to swing freely (and cause the throttle to get stuck).
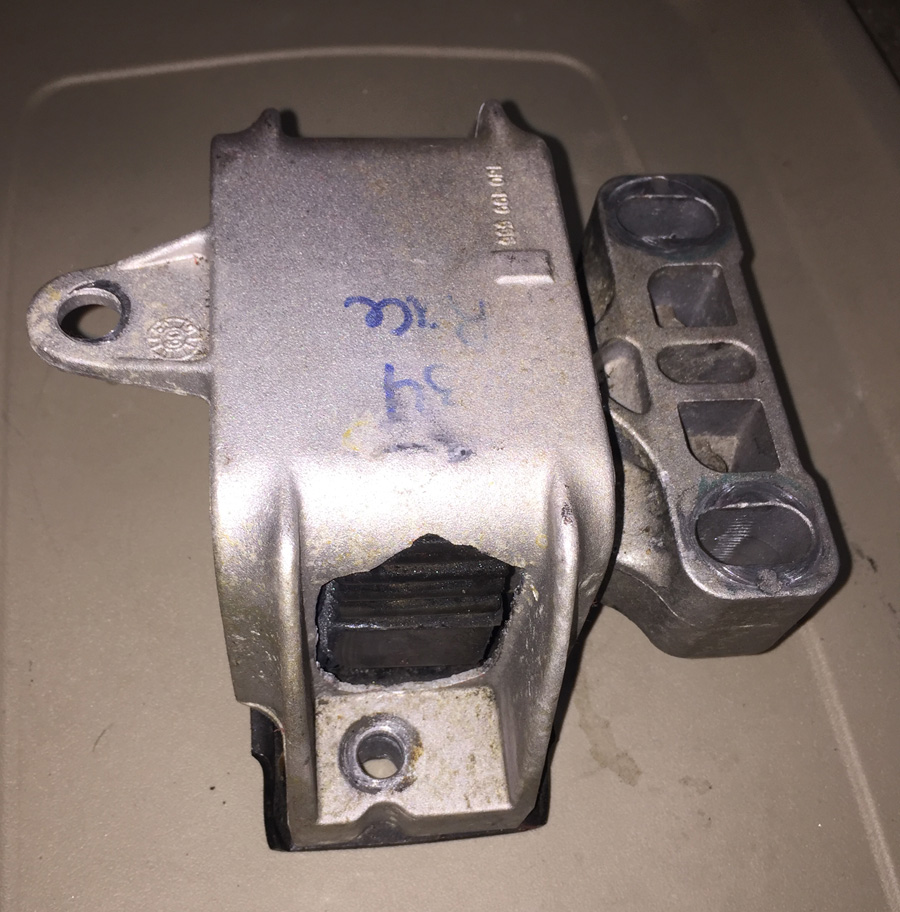
I was going to take it apart and salvage the high density rubber for another mount, but I could not find one. Plenty of engine mounts, nothing for the transmission.
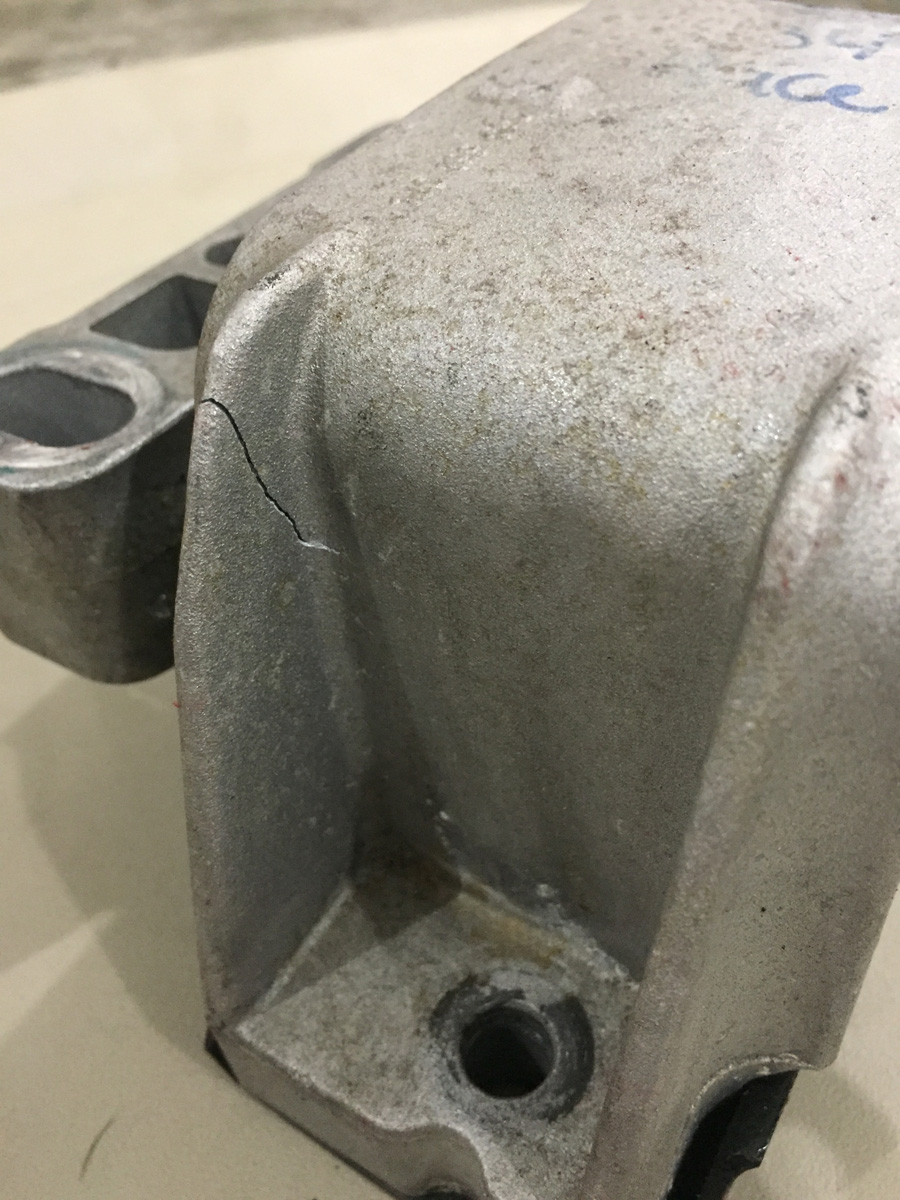
Glad I decided to replace it because the entire backside was blown out.
Enter a new set of "track density" 034EFI mounts. Now I have a spare engine mount.
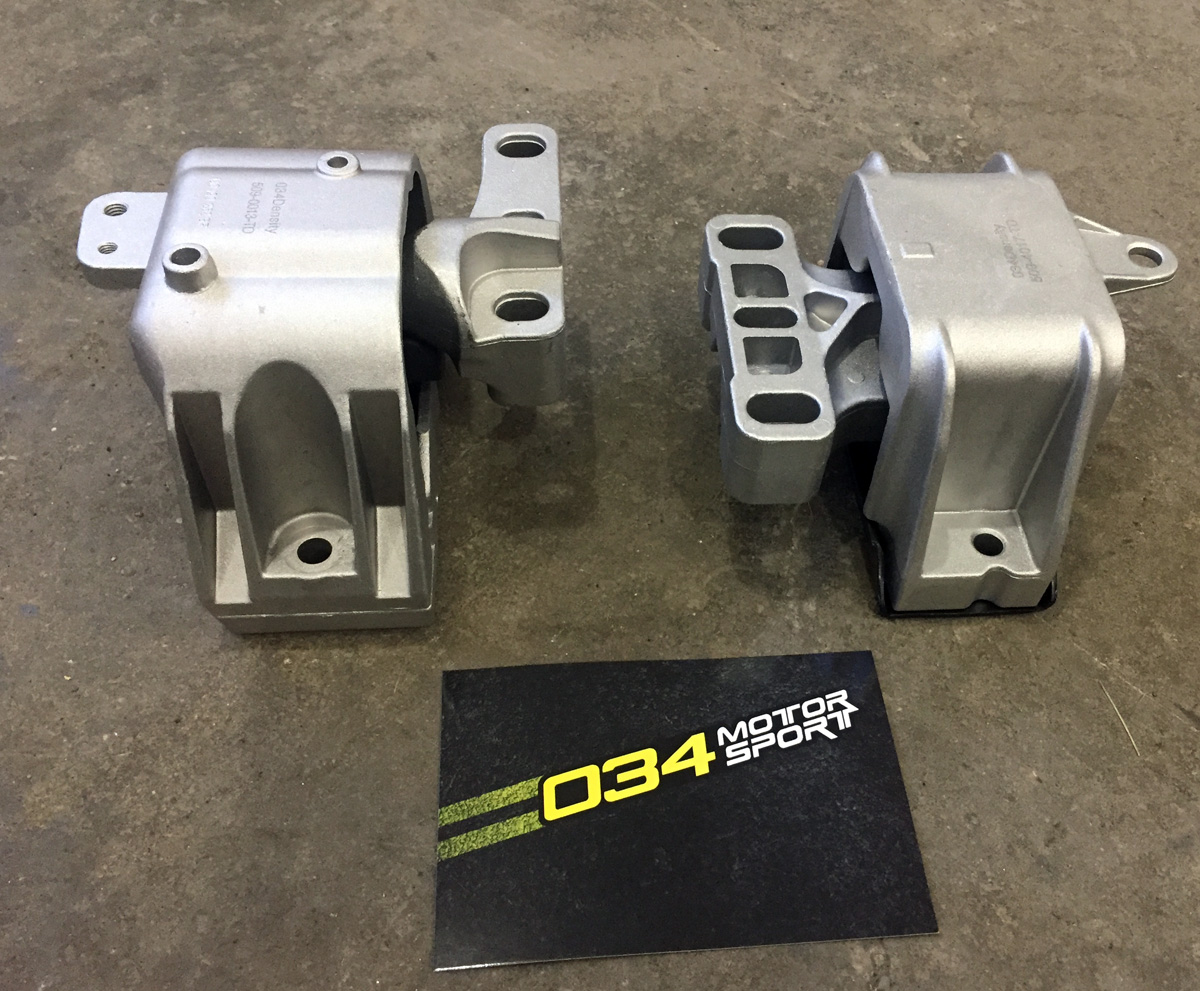
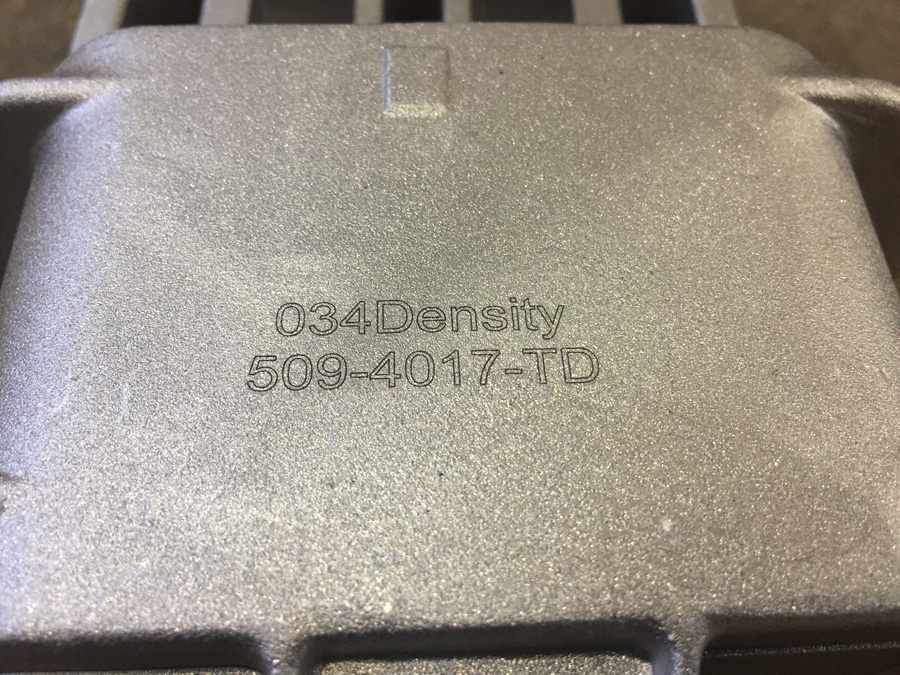
Broken mount and replacement.
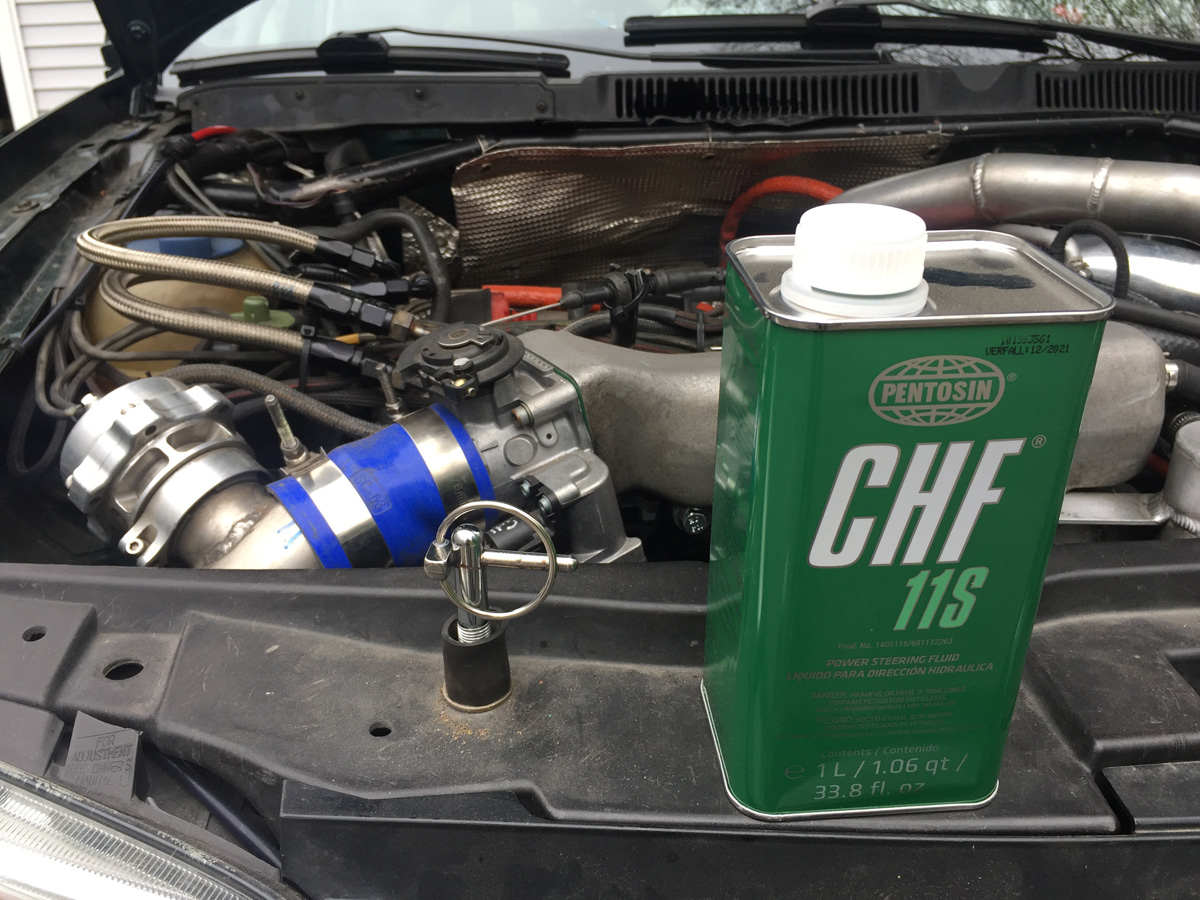
I put some fluid in something. Pentosin CHF 11S power steering fluid
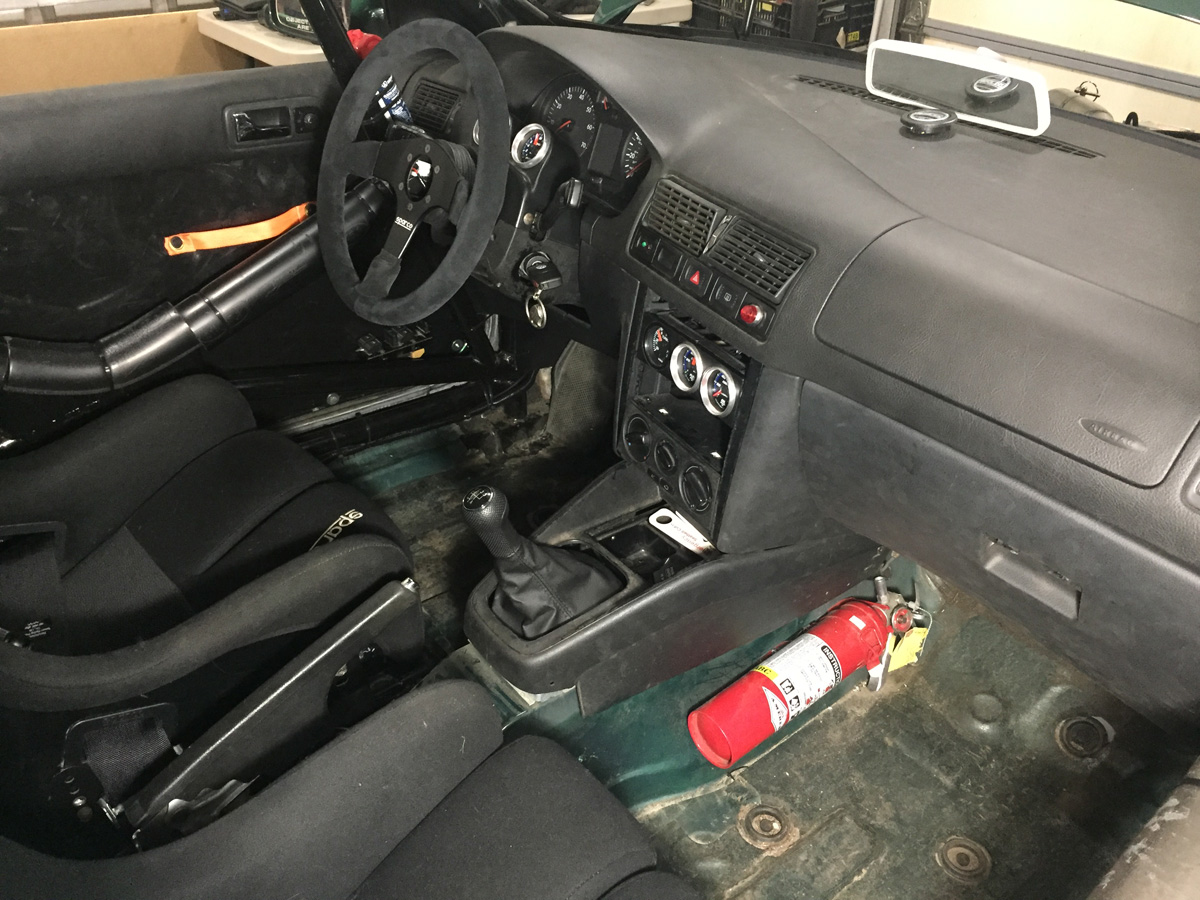
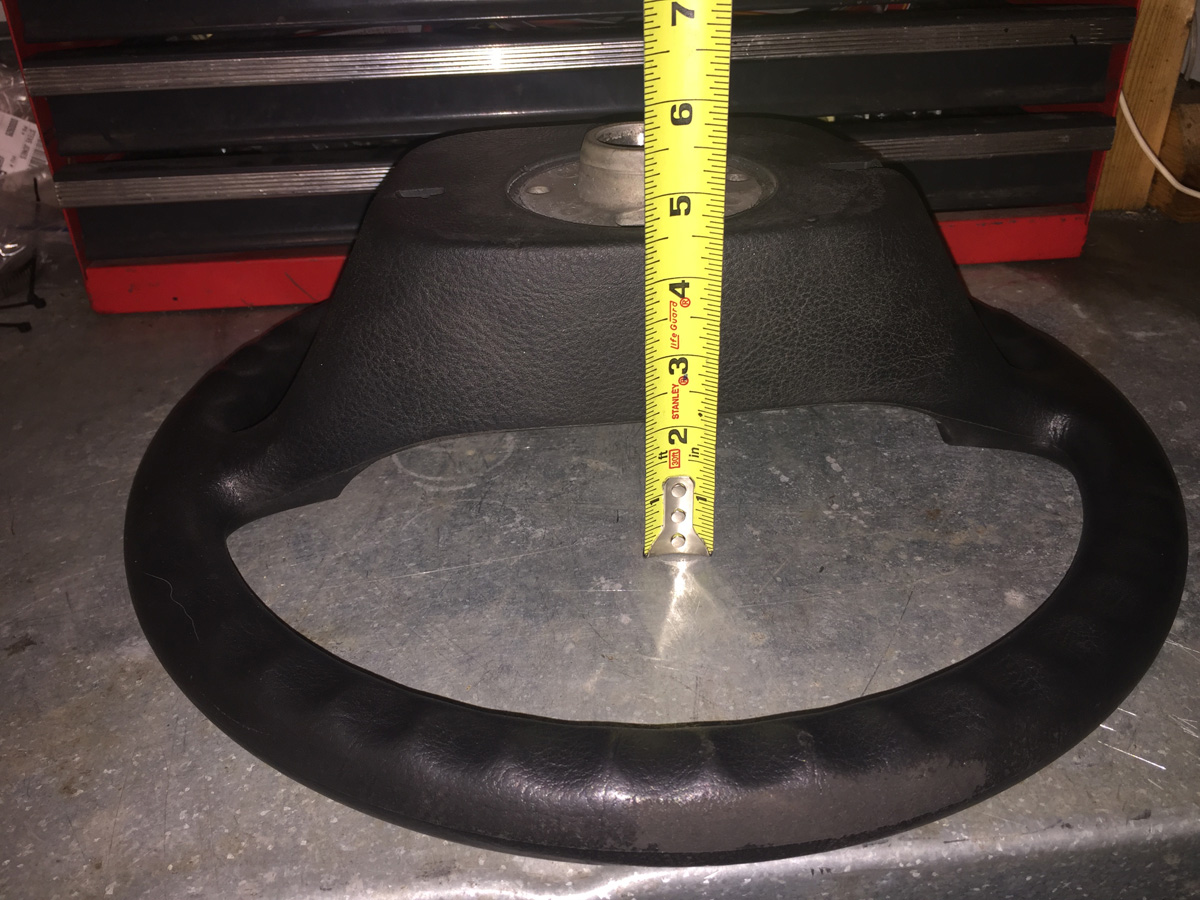
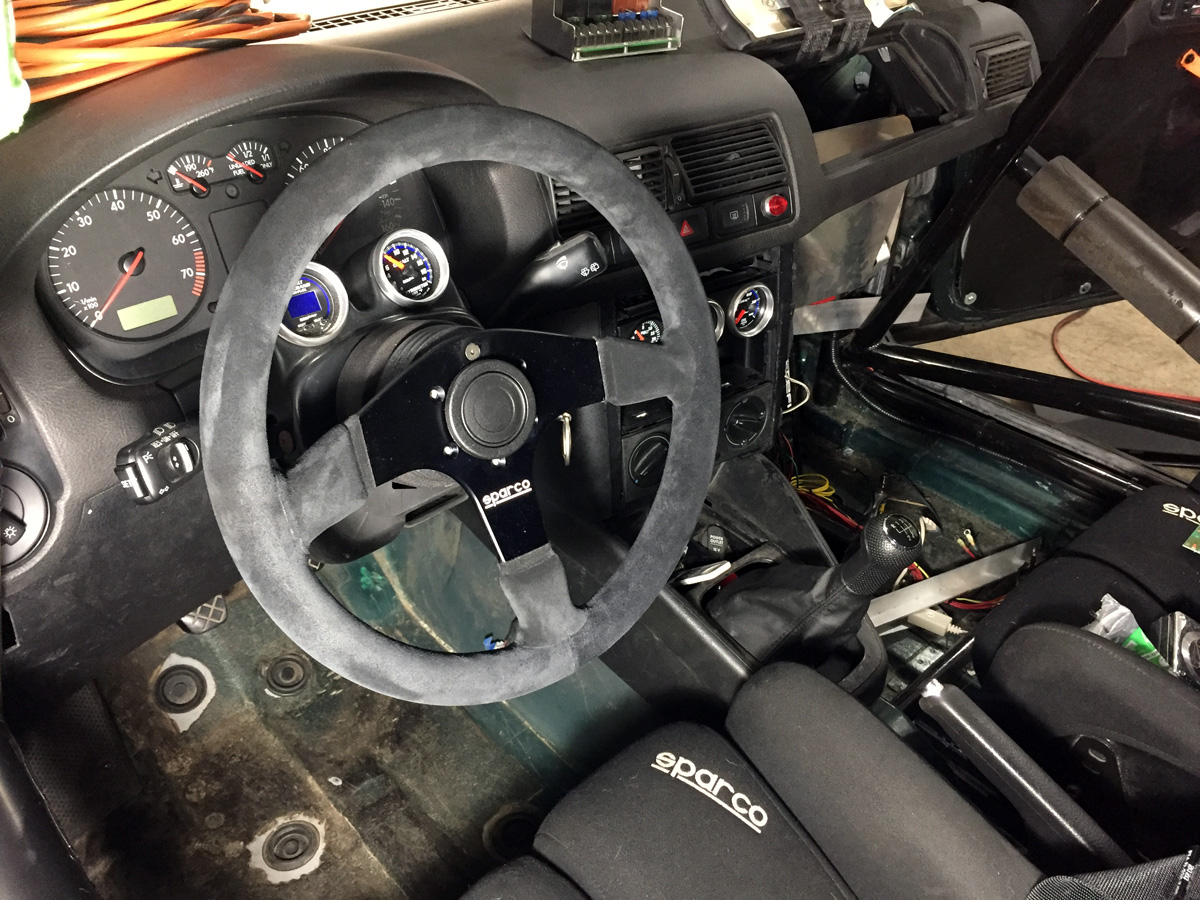
Time to address the steering wheel. Really, there was nothing wrong with the stock wheel as long as I was wearing my gloves. Without my gloves, it was a bit too smooth to ensure positive grip. Also, while it does not have any airbags, dealing with the airbag shell when I want to remove the steering wheel has always been a pain.
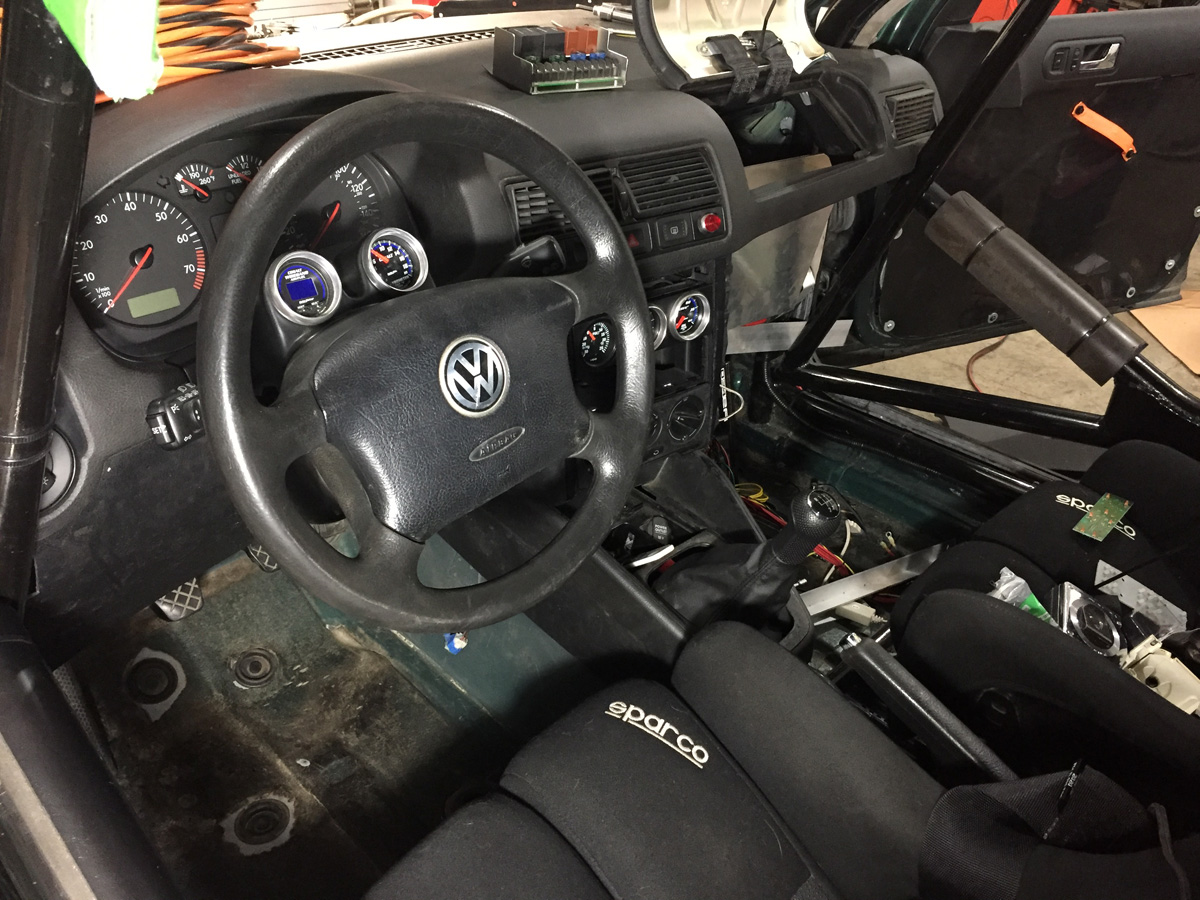
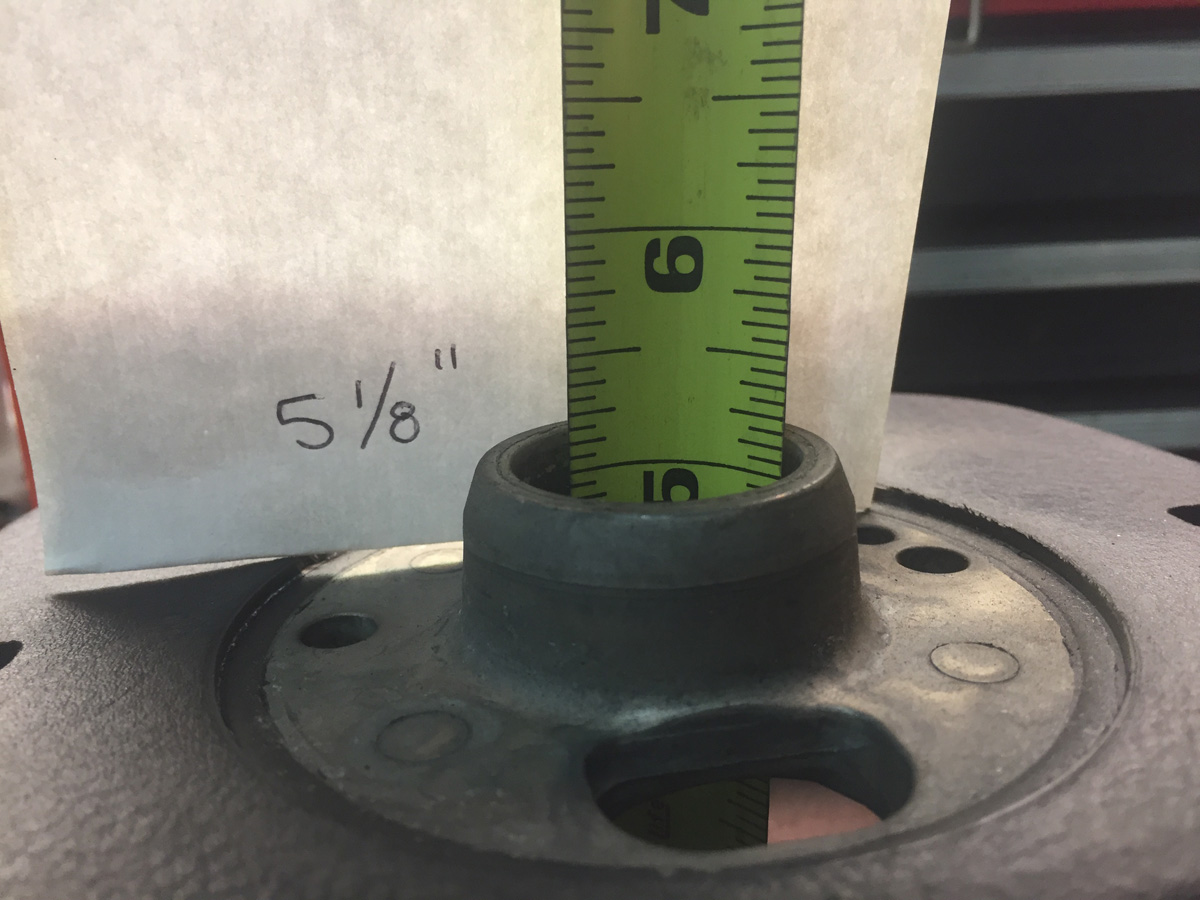
Measured the dish.... 5 1/8"
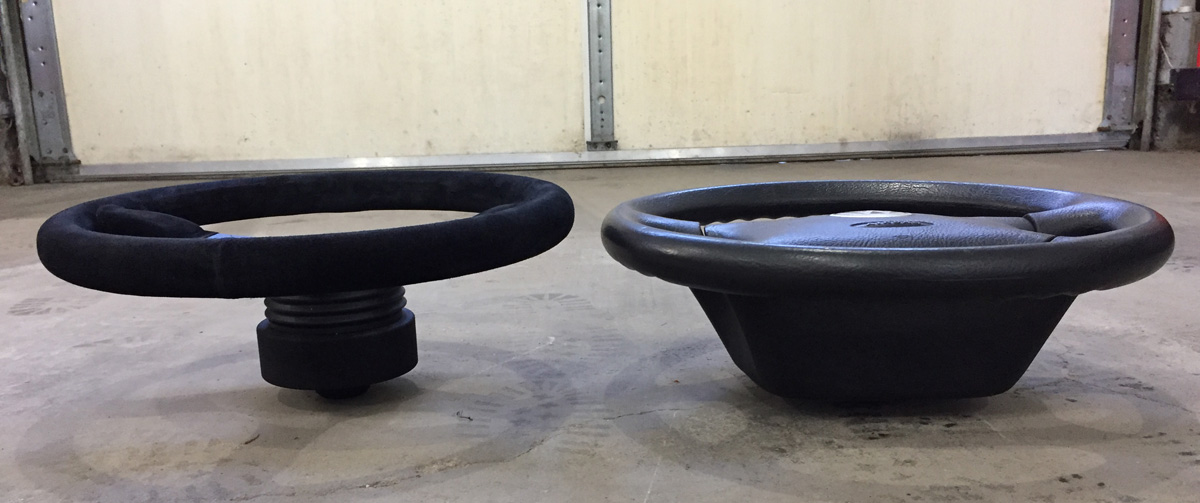
Sparco R-375 (360 mm diameter, 36mm dish, black suede, anodized black spokes, and 6 bolt mounting). Purchased from http://www.OGRacing.com
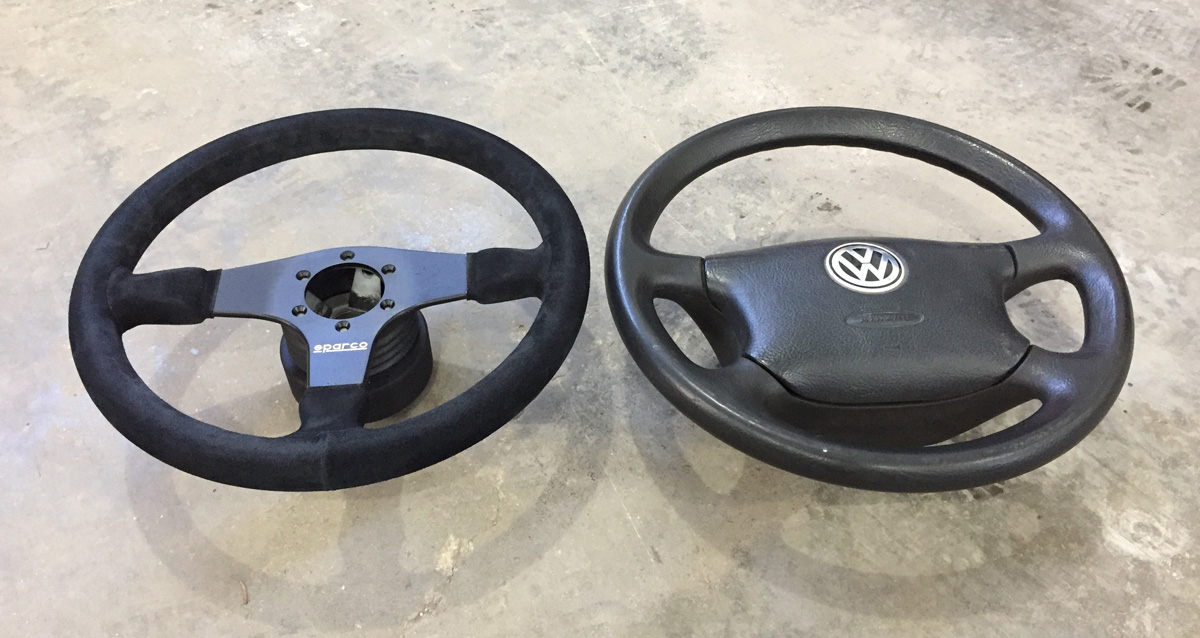
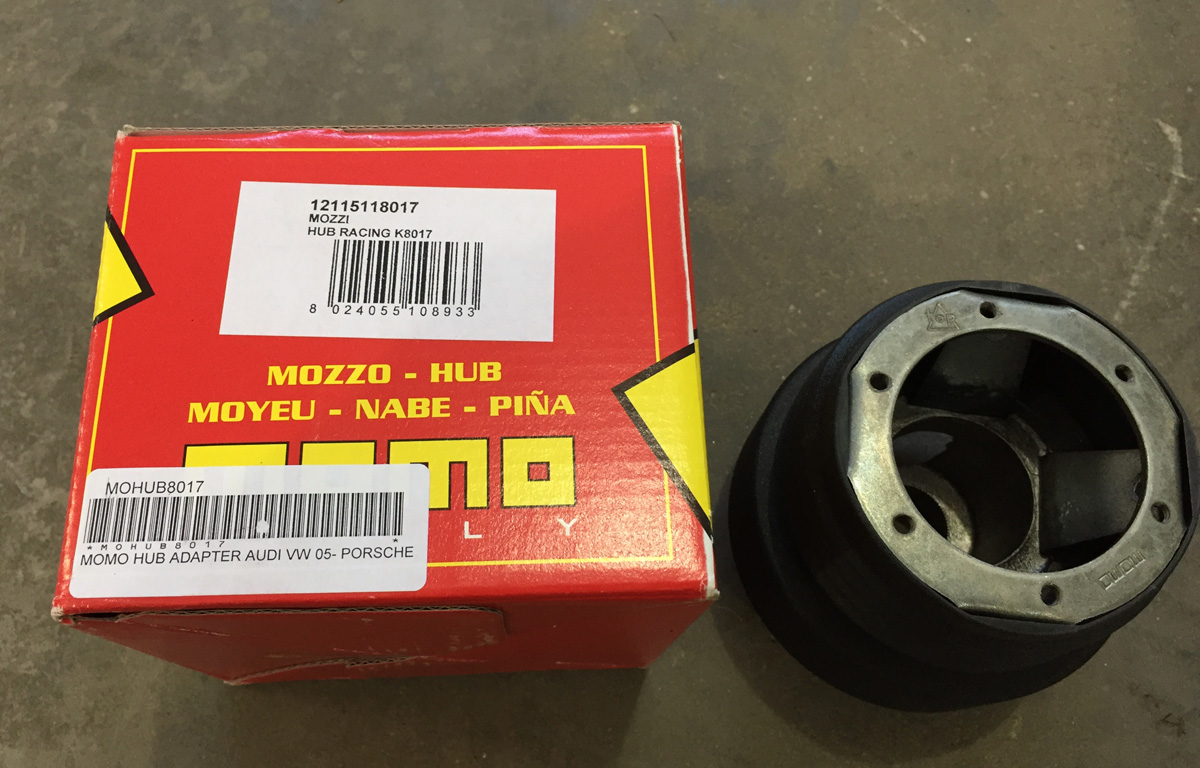
And the Momo (part 8017) 6-bolt mounting hub (adapter for Volkswagen, Audi, and Porsche)
Done... I did not get the quick release as my seats are on sliders.
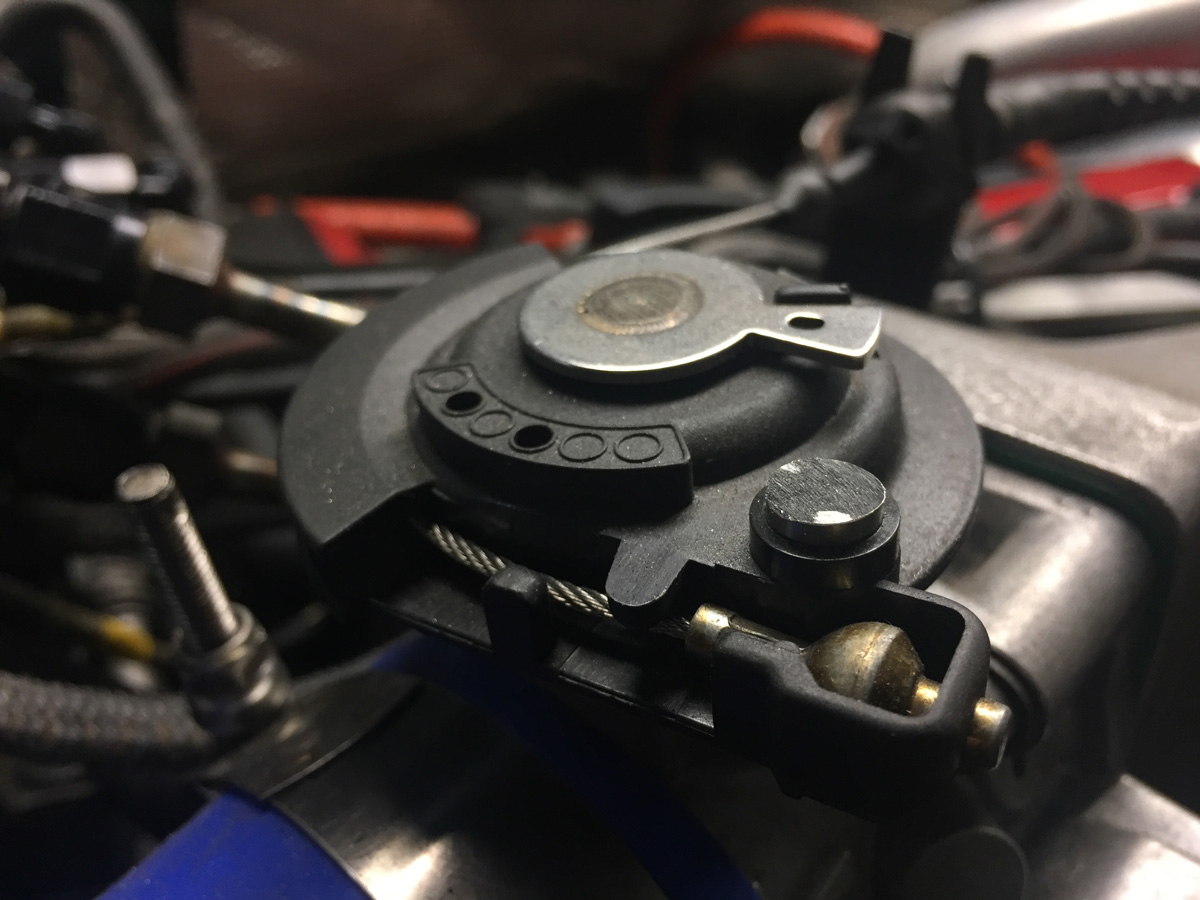
Now for a lesson in Cause and Effect and the realization that I haven't closed the hood on the car since July 2016 +/-.
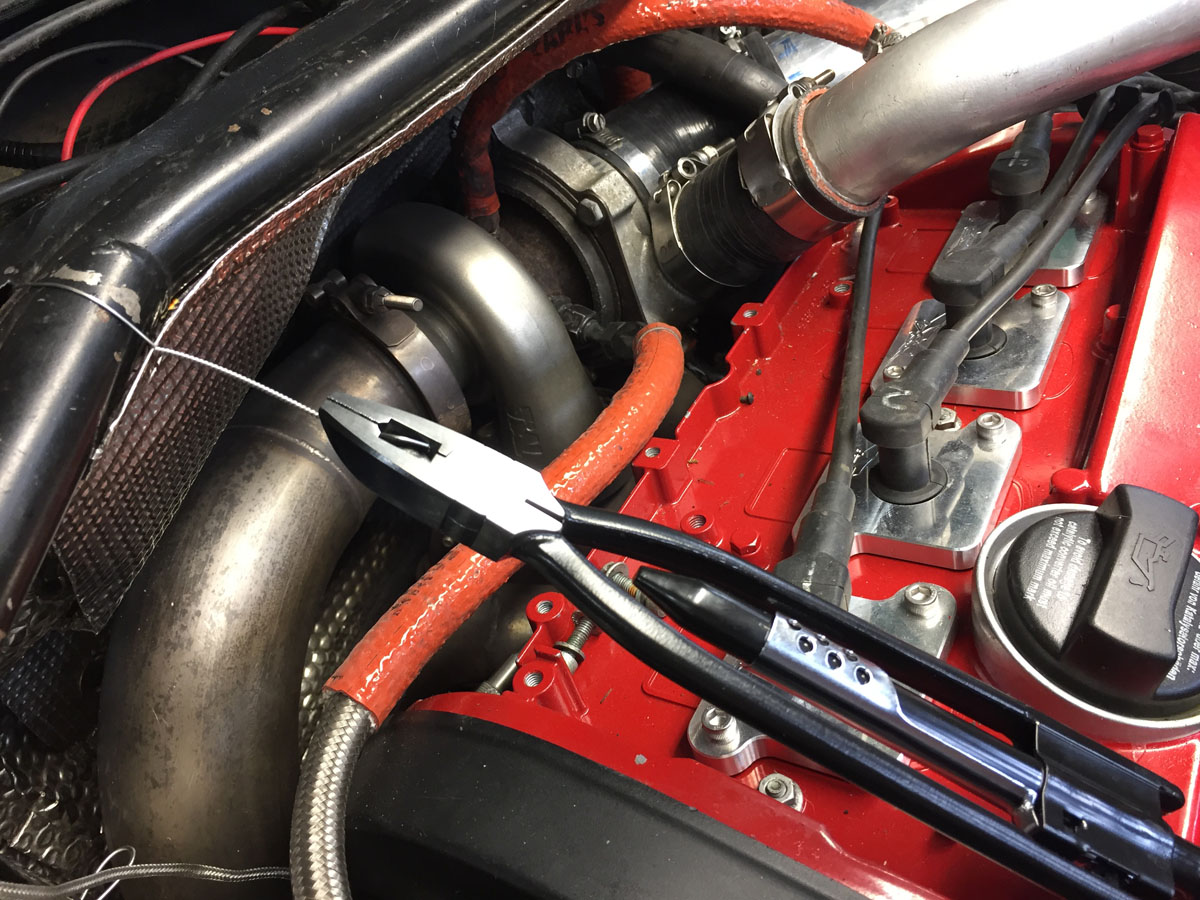
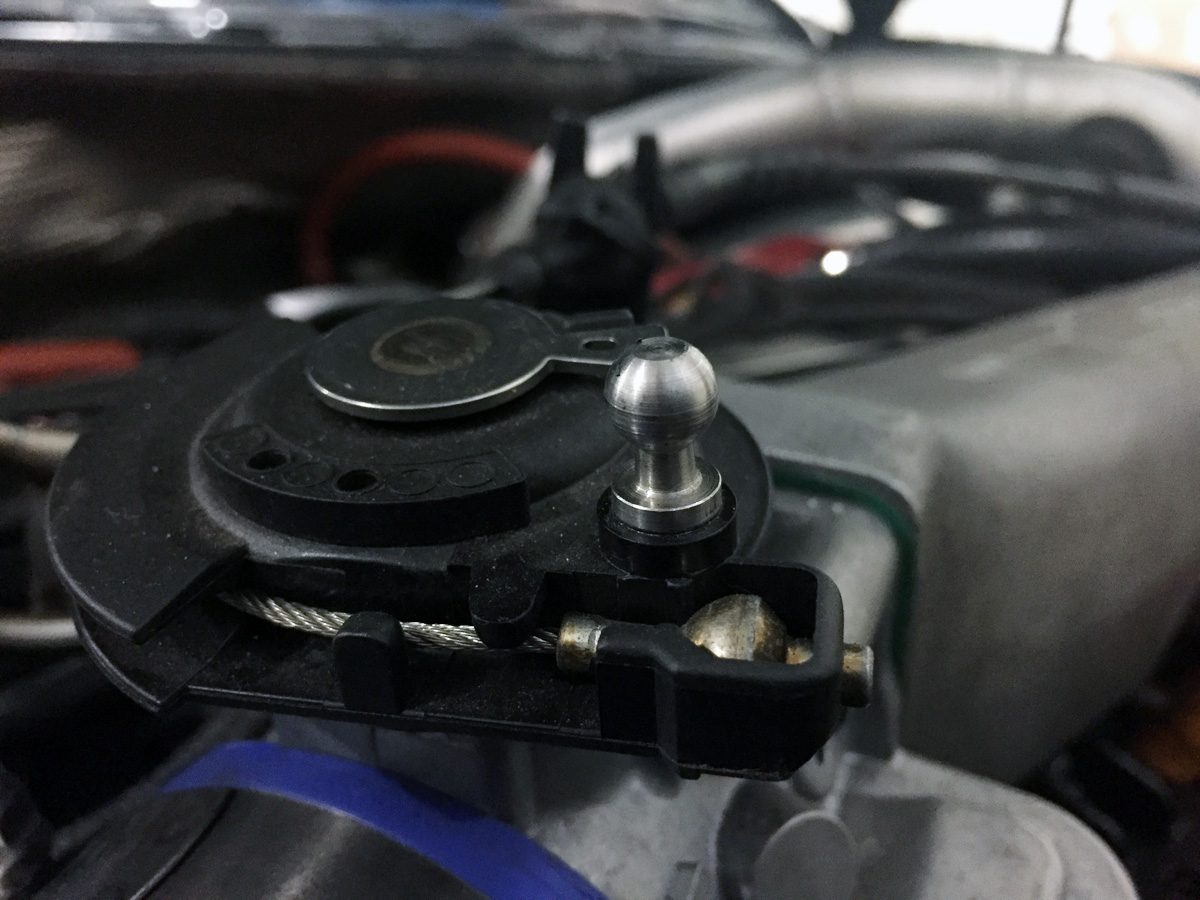
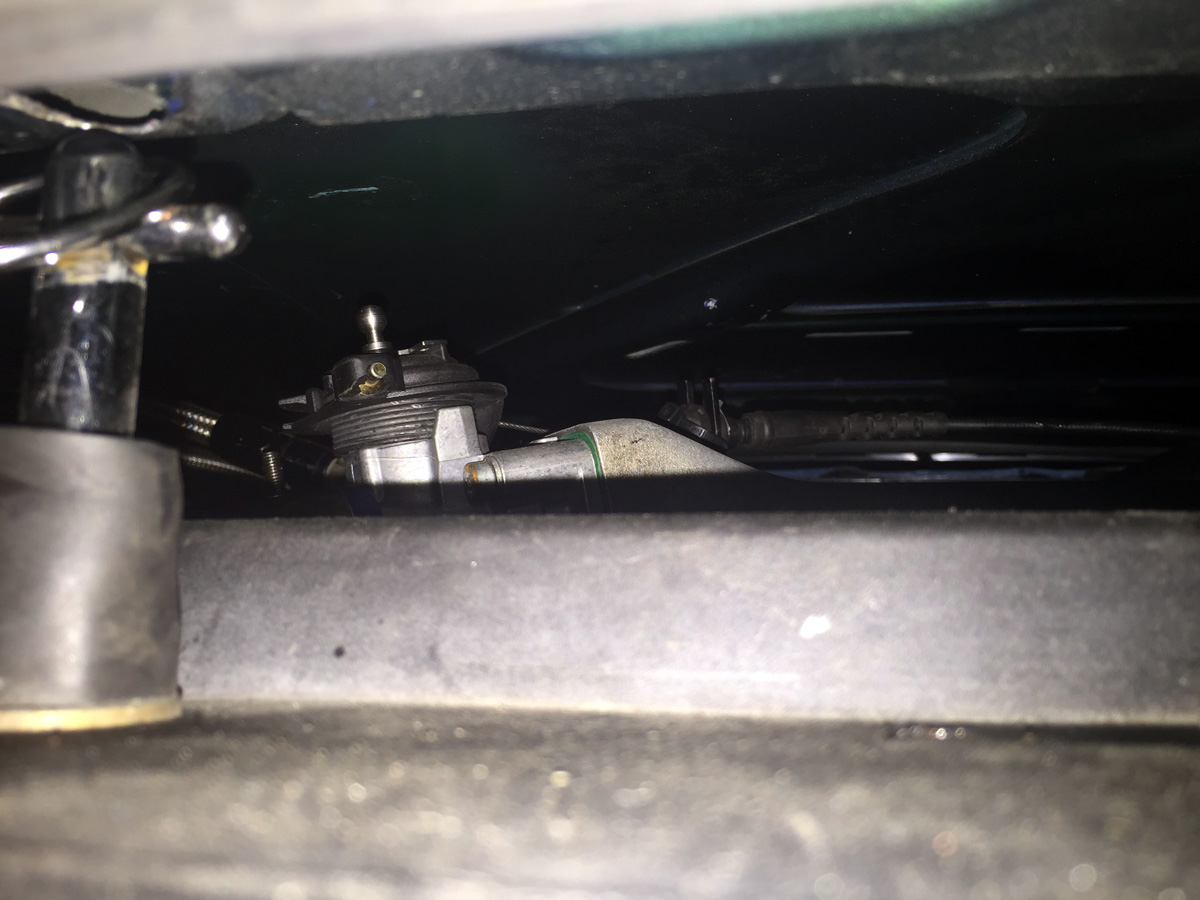
I added the Phenolic spacer to the intake manifold (cause) and now I can't close the hood because the part of the throttle body is hitting the hood. I am guessing the ball mount on the top is related to cruise control... just a guess.
First contact... with the hood
Opps... won't close enough to install the hoodpins.
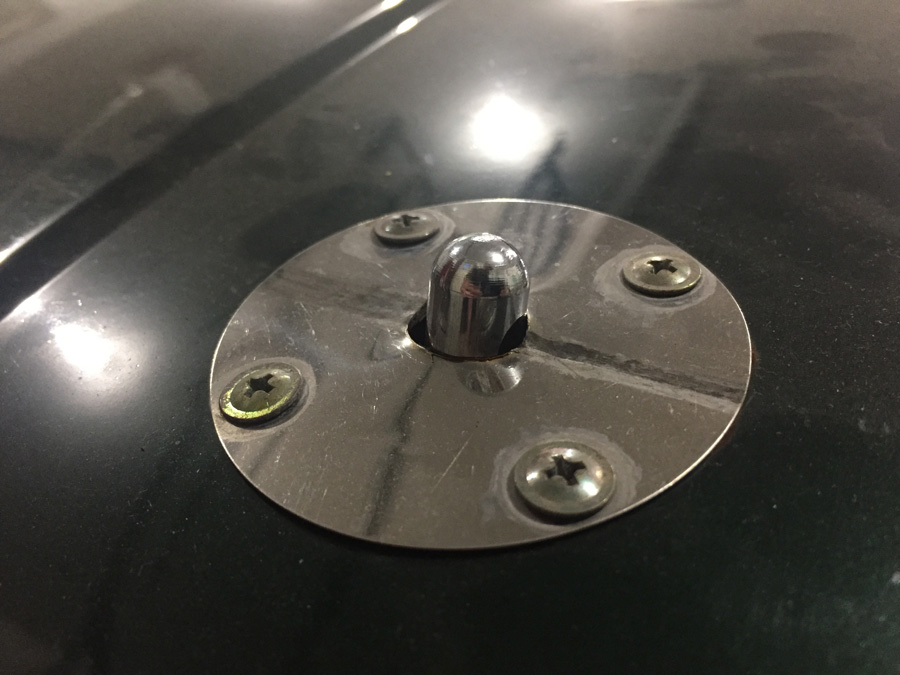
Enter Mr. Dremel. I also adjusted the hoodpins at the same time to ensure the hood was at the same level as the fenders.
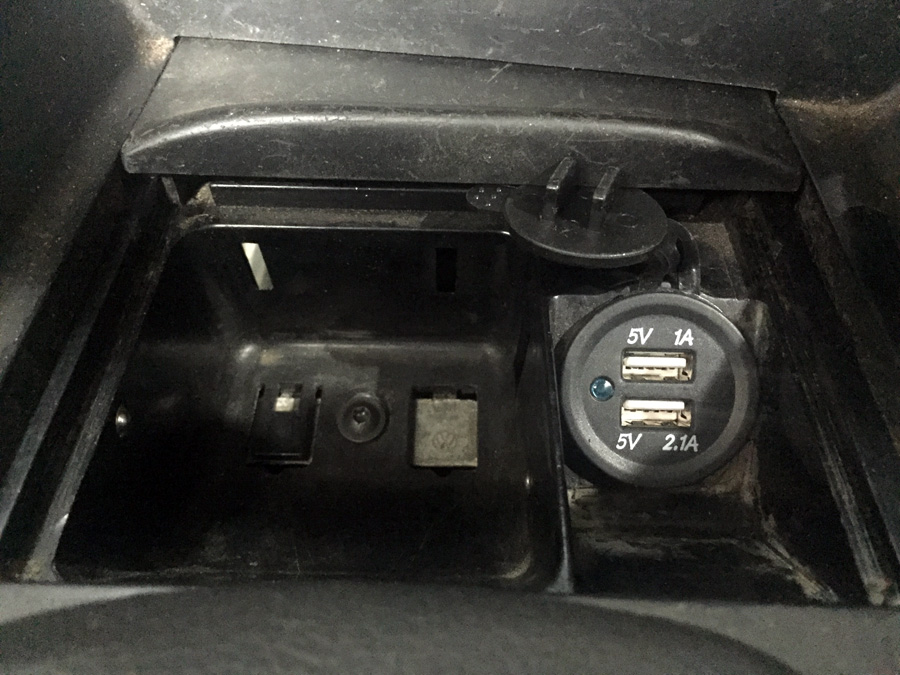
I used the cigarette lighter to charge my phone and camera. Then I came across a USB version that just made sense. I removed the stock lighter (thread body with nut on back), opened up the hole a little bit with the Dremel, and installed the USB ports. Nice.
Now I just need to find the little red coin tray that goes next to it. Somewhere in my garage, I hope.
This was actually the last thing I did to my car (yep, I know there is that whole unexciting "big wiring project" update that is still to come) before it was off to the dyno.
Started and ran great.

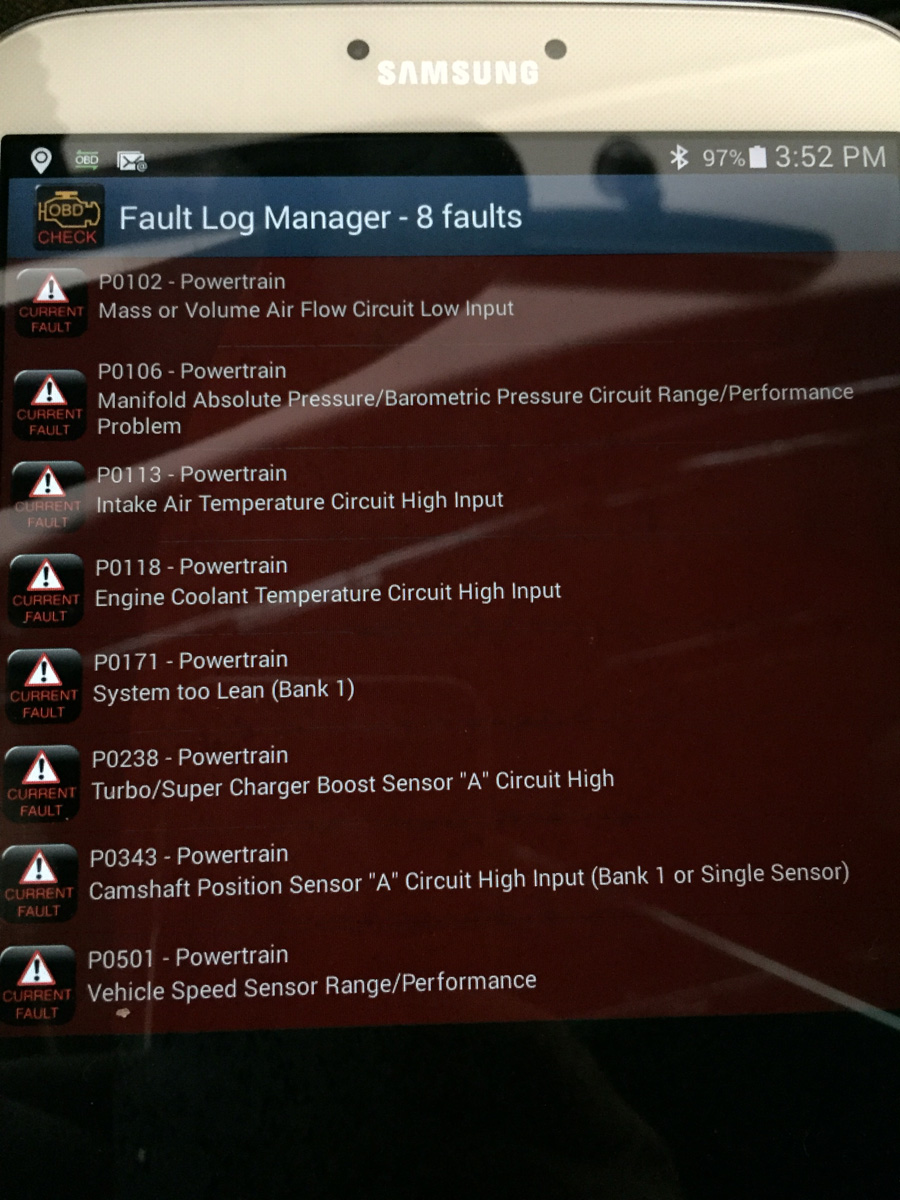
The Brake warning light is blinking and an occasional audible warning. Fluid level is fine. Borrowed a buddy's (Chris / vtgti) OBD2 scanner (Vgate Scan) and tablet to determine what codes the stock ECU could provide... nothing brake related.
Oh well, everything seems to work fine.
Some of these are more for me to recall when I did something (who cares that I painted something or put fluid in something else?)
So... I painted the ceiling. I was going to replace the entire roof as I have a color-correct non-sunroof roof ready to install. Did not seem worth the effort. Instead, I painted over the mulit-color ceiling.
Who the heck is "S. JONES" anyway? Don't know... figure I would have better luck with "Rabbit Farmer". Why not?
Seems minor, but a "Euro Switch" has its benefits. I was not able to change it in the past because one of the tubes for the rollcage was in the way; when the dash was out I changed the switch. This switch allows me to turn off the headlights, which is nice when you have a dead battery and the headlights keep coming on when trying to start the car. The e-brake switch is supposed to do the same, but for some reason they still came on.
I noticed that the transmission mount had a crack in it. I assume this was from when the dogbone broke at Okemo (2015?) allowing the engine to swing freely (and cause the throttle to get stuck).
I was going to take it apart and salvage the high density rubber for another mount, but I could not find one. Plenty of engine mounts, nothing for the transmission.
Glad I decided to replace it because the entire backside was blown out.
Enter a new set of "track density" 034EFI mounts. Now I have a spare engine mount.
Broken mount and replacement.
I put some fluid in something. Pentosin CHF 11S power steering fluid
Time to address the steering wheel. Really, there was nothing wrong with the stock wheel as long as I was wearing my gloves. Without my gloves, it was a bit too smooth to ensure positive grip. Also, while it does not have any airbags, dealing with the airbag shell when I want to remove the steering wheel has always been a pain.
Measured the dish.... 5 1/8"
Sparco R-375 (360 mm diameter, 36mm dish, black suede, anodized black spokes, and 6 bolt mounting). Purchased from http://www.OGRacing.com
And the Momo (part 8017) 6-bolt mounting hub (adapter for Volkswagen, Audi, and Porsche)
Done... I did not get the quick release as my seats are on sliders.
Now for a lesson in Cause and Effect and the realization that I haven't closed the hood on the car since July 2016 +/-.
I added the Phenolic spacer to the intake manifold (cause) and now I can't close the hood because the part of the throttle body is hitting the hood. I am guessing the ball mount on the top is related to cruise control... just a guess.
First contact... with the hood
Opps... won't close enough to install the hoodpins.
Enter Mr. Dremel. I also adjusted the hoodpins at the same time to ensure the hood was at the same level as the fenders.
I used the cigarette lighter to charge my phone and camera. Then I came across a USB version that just made sense. I removed the stock lighter (thread body with nut on back), opened up the hole a little bit with the Dremel, and installed the USB ports. Nice.
Now I just need to find the little red coin tray that goes next to it. Somewhere in my garage, I hope.
This was actually the last thing I did to my car (yep, I know there is that whole unexciting "big wiring project" update that is still to come) before it was off to the dyno.
Started and ran great.
The Brake warning light is blinking and an occasional audible warning. Fluid level is fine. Borrowed a buddy's (Chris / vtgti) OBD2 scanner (Vgate Scan) and tablet to determine what codes the stock ECU could provide... nothing brake related.
Oh well, everything seems to work fine.
Go Fast VW & Audi parts at FastAddiction.com
Re: Rabbit Farmer's various VW Projects
nice work, rabbit farmer
Jason Orzell
VW Rabbit turbo diesel, the green soot shooter
VW Rabbit turbo diesel, the green soot shooter
