Given what caused that, I would say you got lucky.
So...any plans for brake mods?
Rabbit Farmer's various VW Projects
-
walterclark

- Posts: 1442
- Joined: Sun Feb 08, 2009 12:57 pm
- Location: Dover, MA.
- Contact:
Re: Rabbit Farmer's various VW Projects
The older I get the better I was.
-
Rabbit Farmer
- Posts: 2260
- Joined: Wed Jun 25, 2003 11:37 pm
- AntiSpam: No
- Location: Earth
- Contact:
Re: Rabbit Farmer's various VW Projects
Unsure. My goal has been to sell this car.
This same issue bit me at Ascutney long course and Burke (check 3 or 4). I wish my reaction during the issue was the same as my Monday-morning-Quarterback reaction to it afterwards... i.e. pump the brakes.
I have looked at vacuum pumps. We will see.
Steve
This same issue bit me at Ascutney long course and Burke (check 3 or 4). I wish my reaction during the issue was the same as my Monday-morning-Quarterback reaction to it afterwards... i.e. pump the brakes.
I have looked at vacuum pumps. We will see.
Steve
Go Fast VW & Audi parts at FastAddiction.com
-
Rabbit Farmer
- Posts: 2260
- Joined: Wed Jun 25, 2003 11:37 pm
- AntiSpam: No
- Location: Earth
- Contact:
Re: Rabbit Farmer's various VW Projects
Well... it has been a crazy summer.
After Mt. Washington there wasn't much to post. There was nothing to fix on the car as it ran great all year.
With the mishap at Mt. Washington, and the issues of connecting to it with my phone since day one (grrrrrr!), I did not use the new GoPro5 much the rest of the season. I need to send it back for replacement (has a 2 year "return even if you intentionally mess it up" plan). Some pictures, some video, but nothing you haven't seen before.
Backing up a little to the preparation for the season, one thing we did notice was a loose ball joint or tie rod end.... ended up being the tie rod. Chris Cheeseman of Cheese Factory had the time to fix the car with my compressed/rushed schedule trying to get the car ready. I trust this man with my cars!
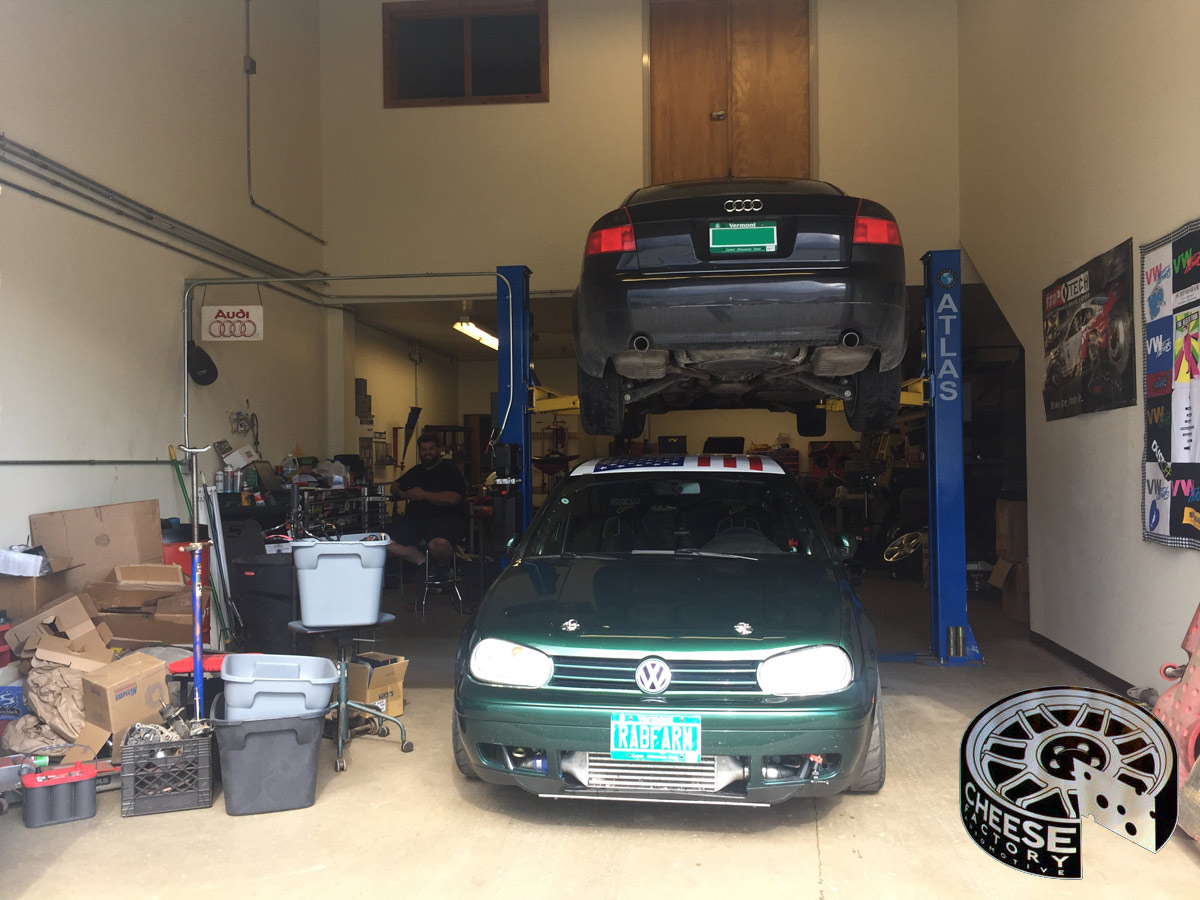
Car was aligned the next day with a shop down the road.
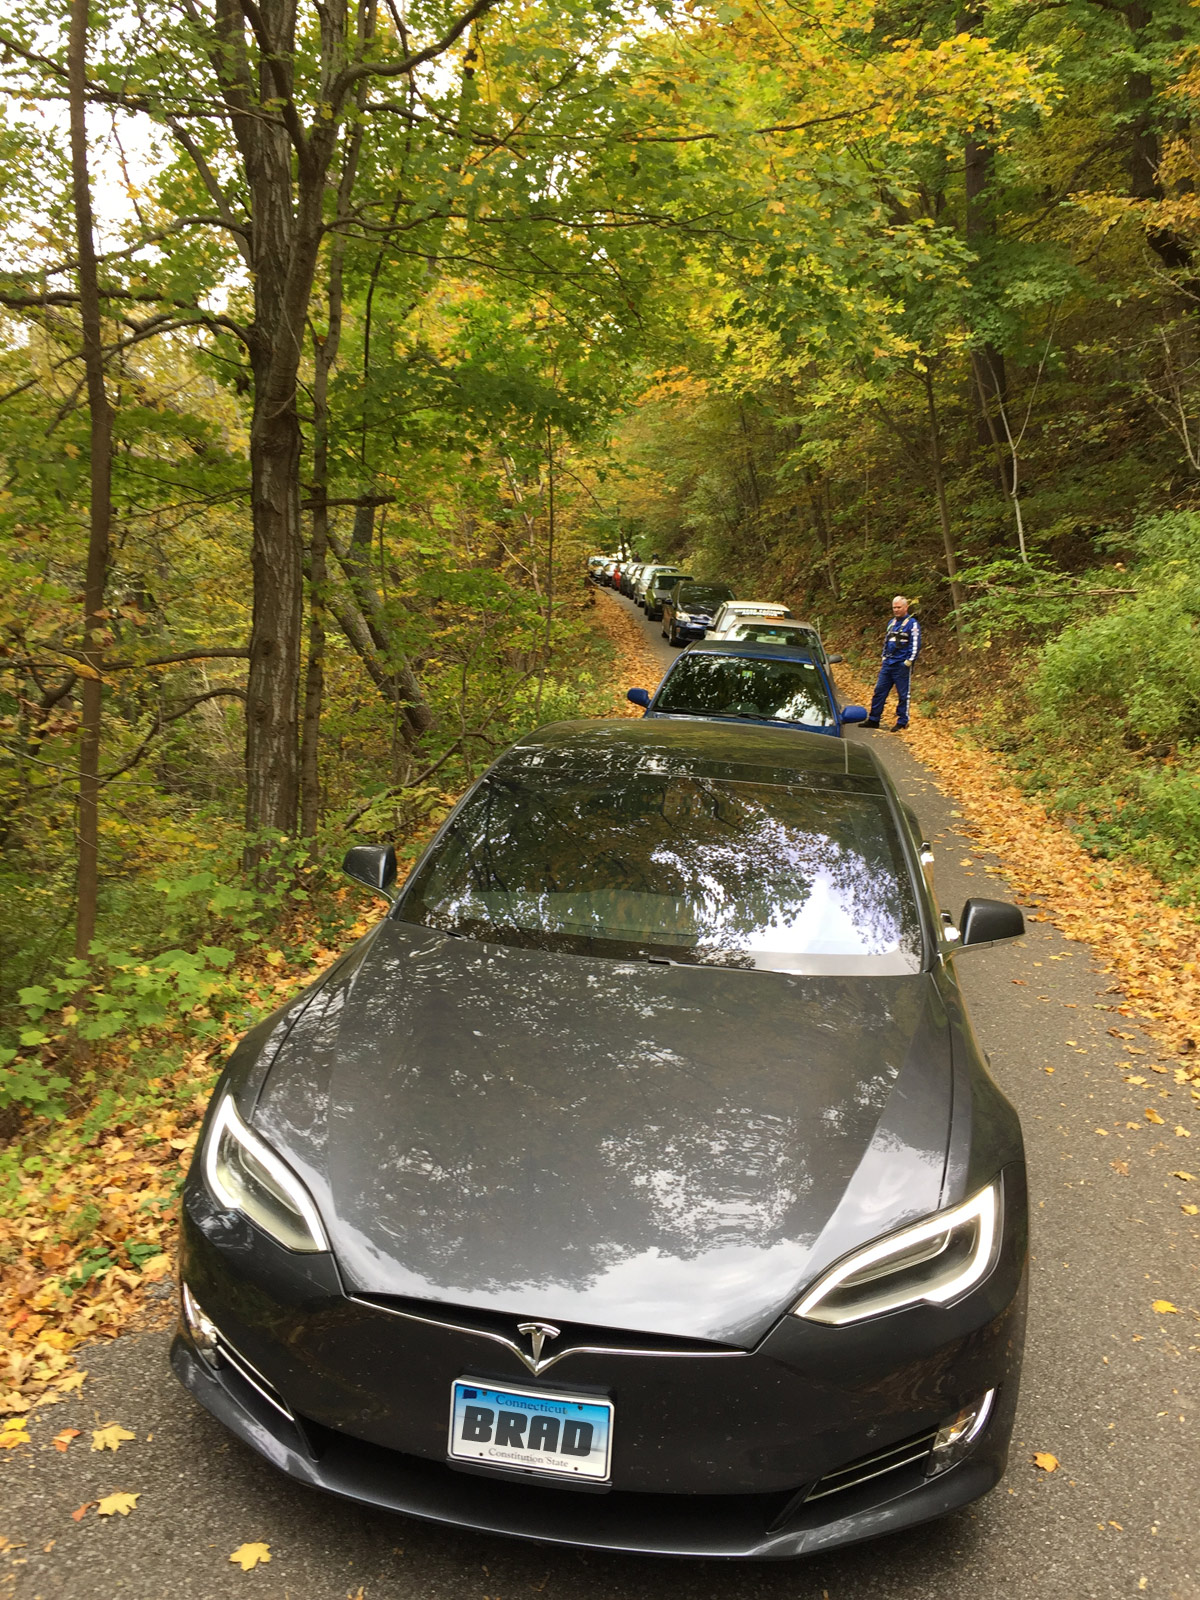
Highlight for me was at the historic Mt. Philo Hillclimb… passenger in a brand new Tesla Model “S” P100D driven at (almost) speed. Holy #$%@#$^ acceleration Batman! It was a rocket! First full electric car (I believe) at a New England Hillclimb Association event. Sweet!
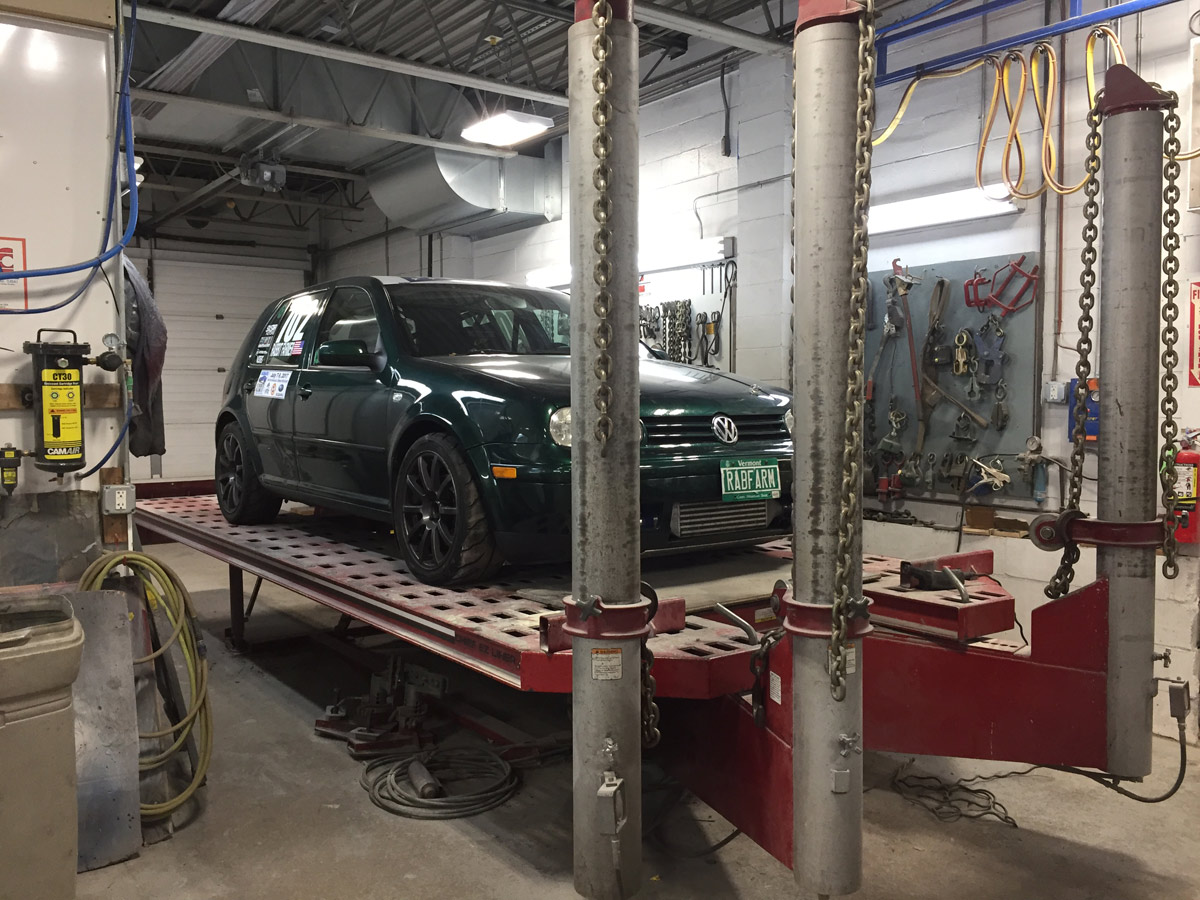
Winding down after a fun and successful season. Decided that a good friend of mine (Kyle) could take a look at the Golf to see if there were any major issues caused from the little excursion at Mt Washington. All fixed (need an alignment). There were still some issues with the car from the 2010 Ascutney incident that were not addressed (because we did not have a good frame machine).
Then the summer got really busy as we packed up and moved across town. No time for cars or play. Winter rolled around.
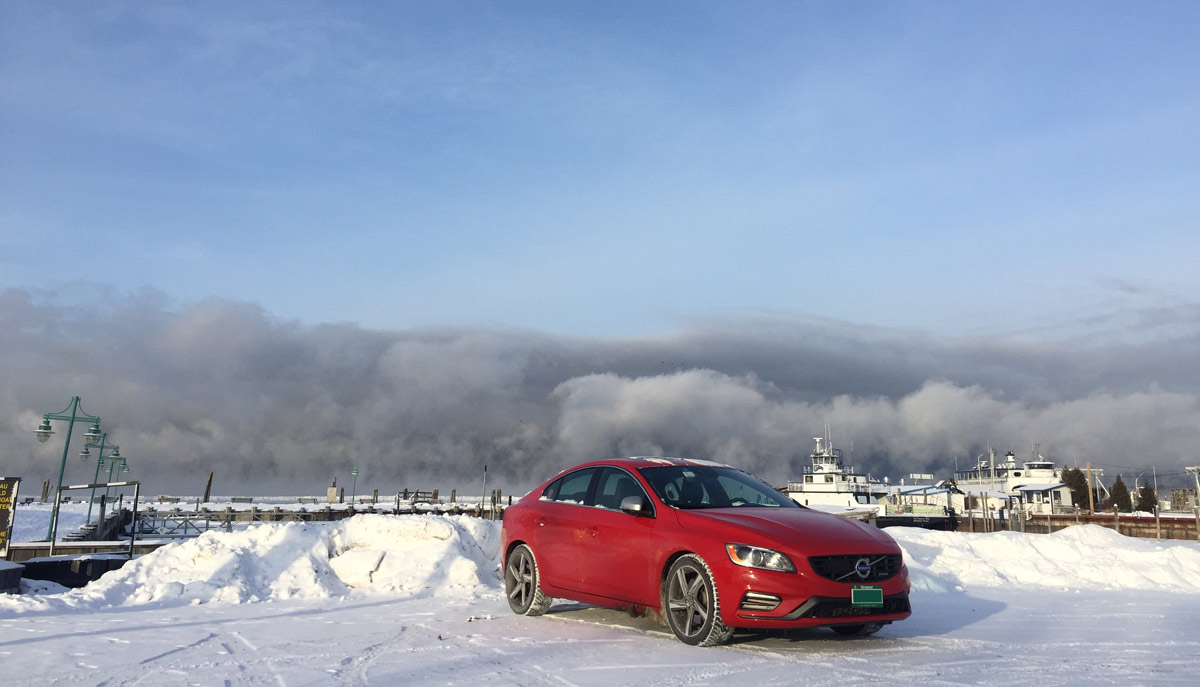
The Volvo looking good with some snow fog over Lake Champlain.
Now that it is almost March, it is time to retrieve the Scirocco (don’t get excited) from the storage facility where we stored during the transition to the new house.
I’m going to just start building the engine for the little MK1…. At least I can get that done so that the car is mobile.
Looking forward to the 2018 season.
Oh… Here is the video from the 2017 Mt. Washington hillclimb. At the end I included the “incident” and some pictures of it stuck on the rocks. Enjoy.
(it will be a while until it is posted as we are on really really really really really sloooooooowwwwwww DSL instead of our very very very fast Cable we had at the old house)
Youtube tells me the link will be here:
After Mt. Washington there wasn't much to post. There was nothing to fix on the car as it ran great all year.
With the mishap at Mt. Washington, and the issues of connecting to it with my phone since day one (grrrrrr!), I did not use the new GoPro5 much the rest of the season. I need to send it back for replacement (has a 2 year "return even if you intentionally mess it up" plan). Some pictures, some video, but nothing you haven't seen before.
Backing up a little to the preparation for the season, one thing we did notice was a loose ball joint or tie rod end.... ended up being the tie rod. Chris Cheeseman of Cheese Factory had the time to fix the car with my compressed/rushed schedule trying to get the car ready. I trust this man with my cars!
Car was aligned the next day with a shop down the road.
Highlight for me was at the historic Mt. Philo Hillclimb… passenger in a brand new Tesla Model “S” P100D driven at (almost) speed. Holy #$%@#$^ acceleration Batman! It was a rocket! First full electric car (I believe) at a New England Hillclimb Association event. Sweet!
Winding down after a fun and successful season. Decided that a good friend of mine (Kyle) could take a look at the Golf to see if there were any major issues caused from the little excursion at Mt Washington. All fixed (need an alignment). There were still some issues with the car from the 2010 Ascutney incident that were not addressed (because we did not have a good frame machine).
Then the summer got really busy as we packed up and moved across town. No time for cars or play. Winter rolled around.
The Volvo looking good with some snow fog over Lake Champlain.
Now that it is almost March, it is time to retrieve the Scirocco (don’t get excited) from the storage facility where we stored during the transition to the new house.
I’m going to just start building the engine for the little MK1…. At least I can get that done so that the car is mobile.
Looking forward to the 2018 season.
Oh… Here is the video from the 2017 Mt. Washington hillclimb. At the end I included the “incident” and some pictures of it stuck on the rocks. Enjoy.
(it will be a while until it is posted as we are on really really really really really sloooooooowwwwwww DSL instead of our very very very fast Cable we had at the old house)
Youtube tells me the link will be here:
Go Fast VW & Audi parts at FastAddiction.com
-
Rabbit Farmer
- Posts: 2260
- Joined: Wed Jun 25, 2003 11:37 pm
- AntiSpam: No
- Location: Earth
- Contact:
Re: Rabbit Farmer's various VW Projects
I had a coupon or gift card... something that effectively made this (nearly) free.
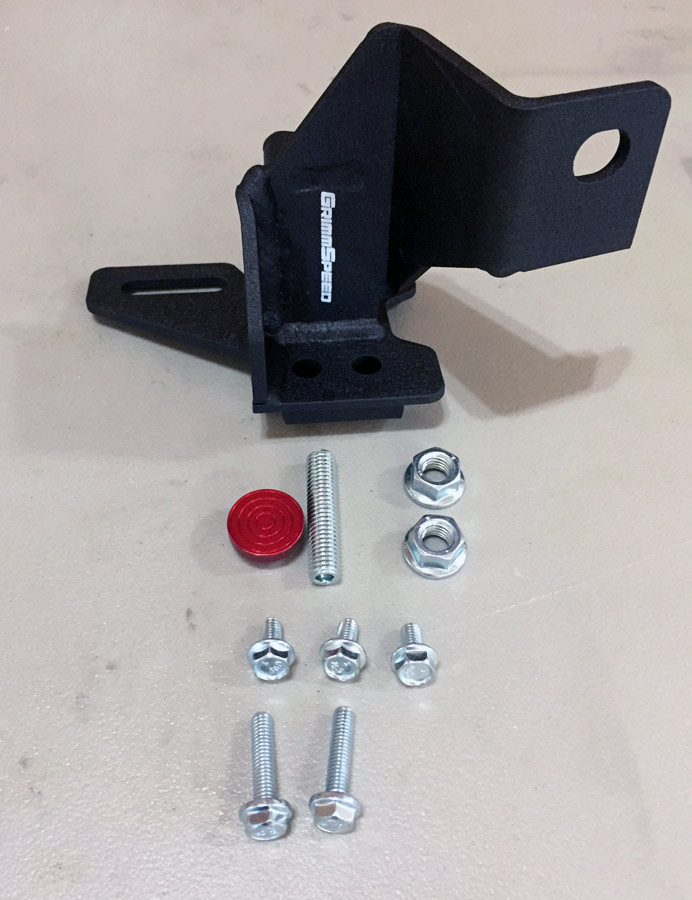
This is the GrimmSpeed "Master Cylinder Brace" that is supposed to firm up the brake pedal as this brace prevents the master cylinder from moving (firewall flex).
The website states that this will make the pedal feel firmer just like SS brake lines would do... but I already have SS brake lines, so I wasn't sure if there would be a huge difference.
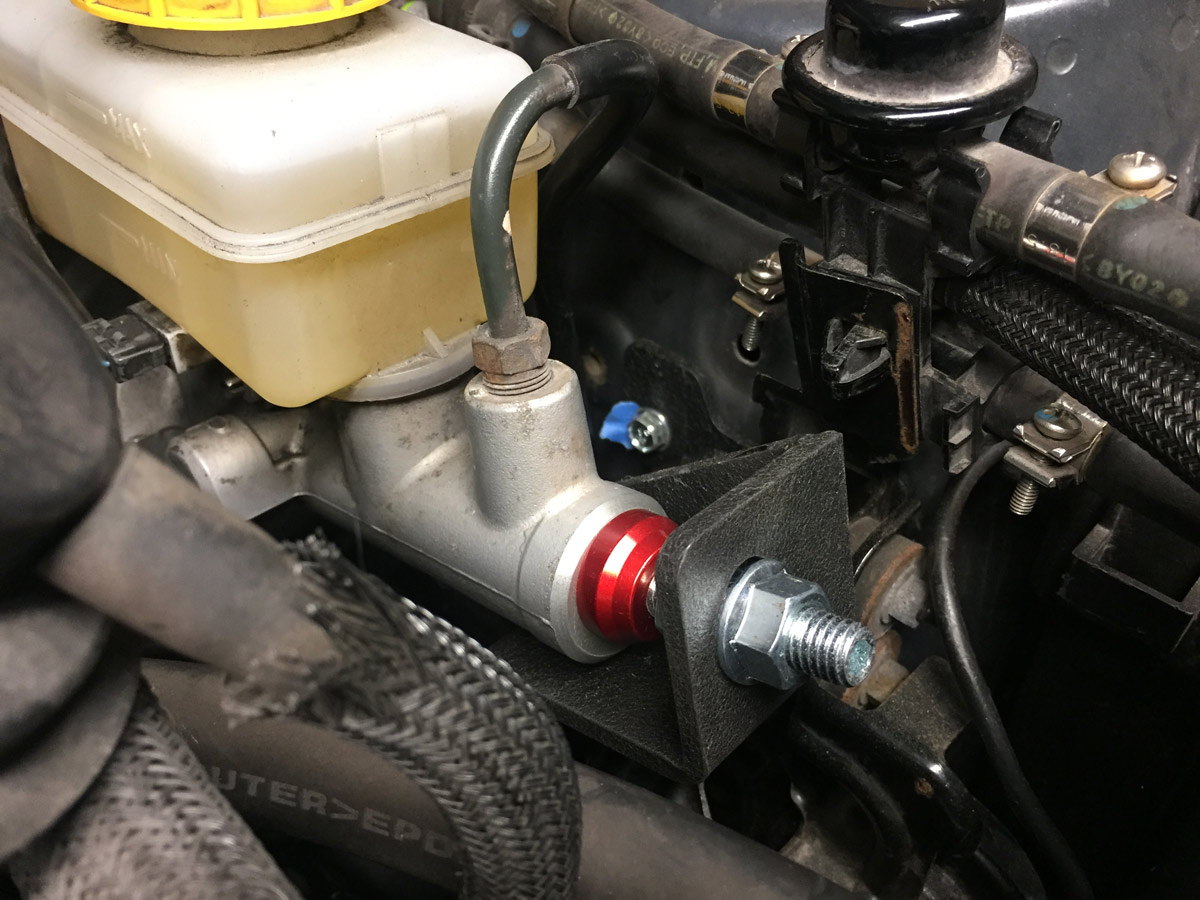
It wasn't too difficult to install, but I was having some challenges because I could not quite visualize the end game... how it should look when installed. I am told this should be a 15 minute job (seems it should take longer since I had to chase some holes, remove some stuff, switch some things around, and have a beer). Just saying...
The Kit...
Installed...
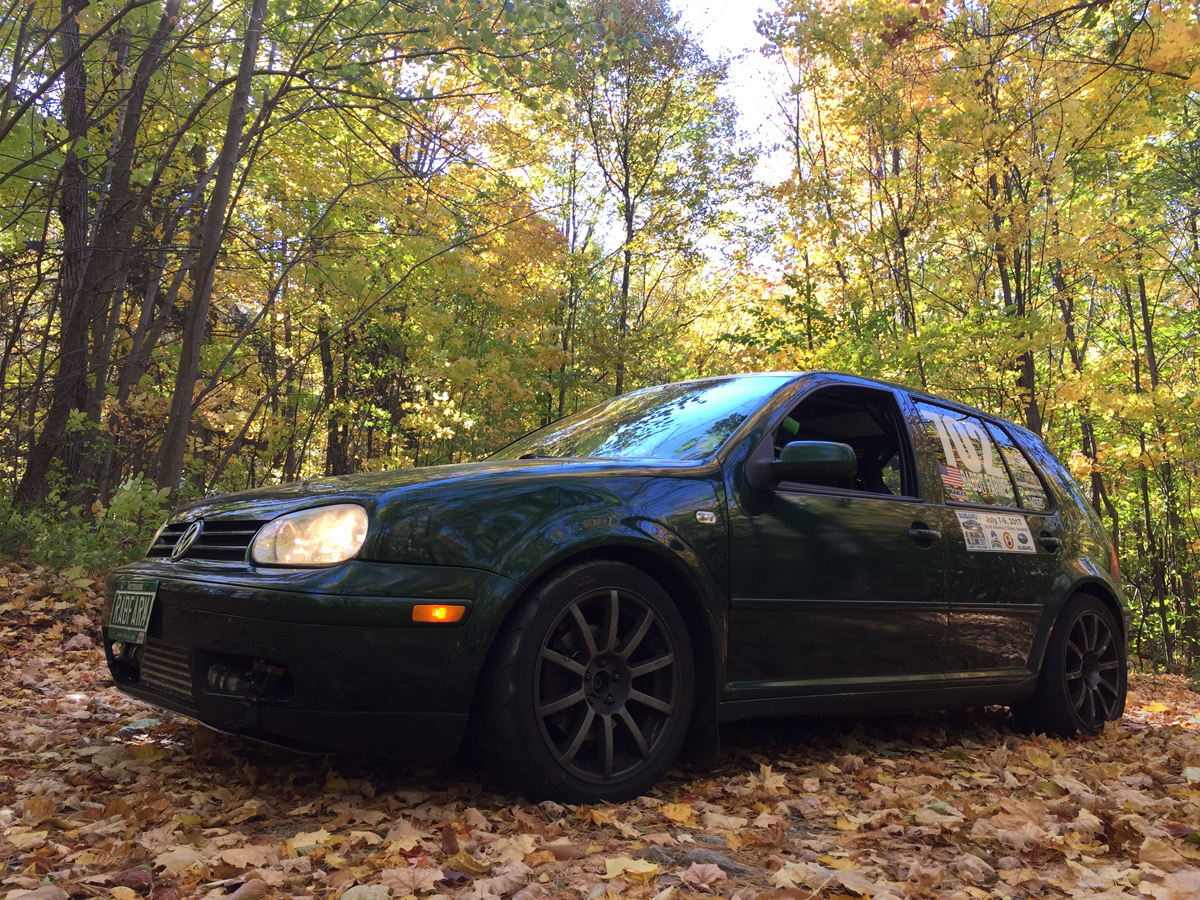
The car... just begging for its gun metal stock rims with summer (not all season) tires.
Now, let’s get to the good stuff.
Steel bottom oil pan, Raxles axles, and removing the steering lock on the Golf
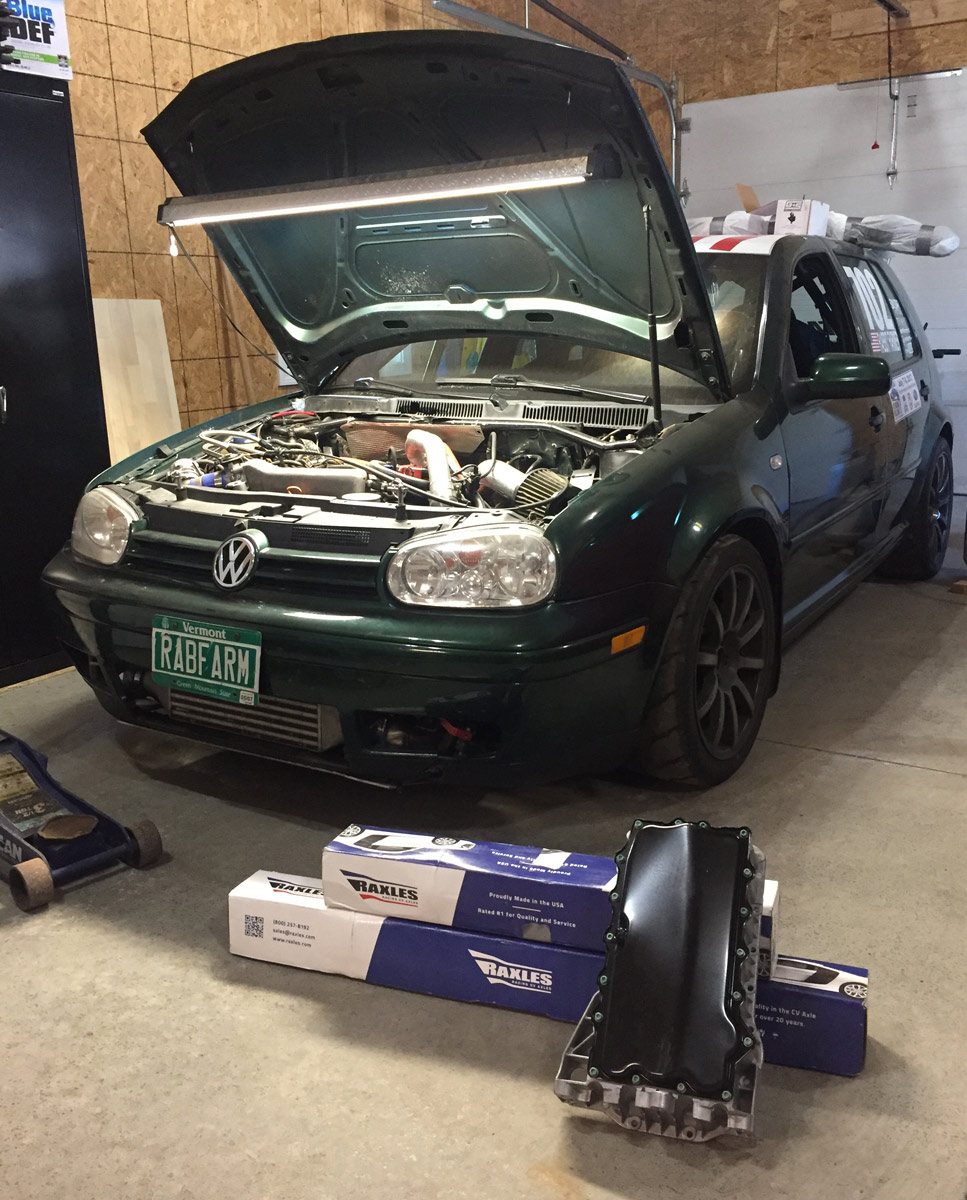
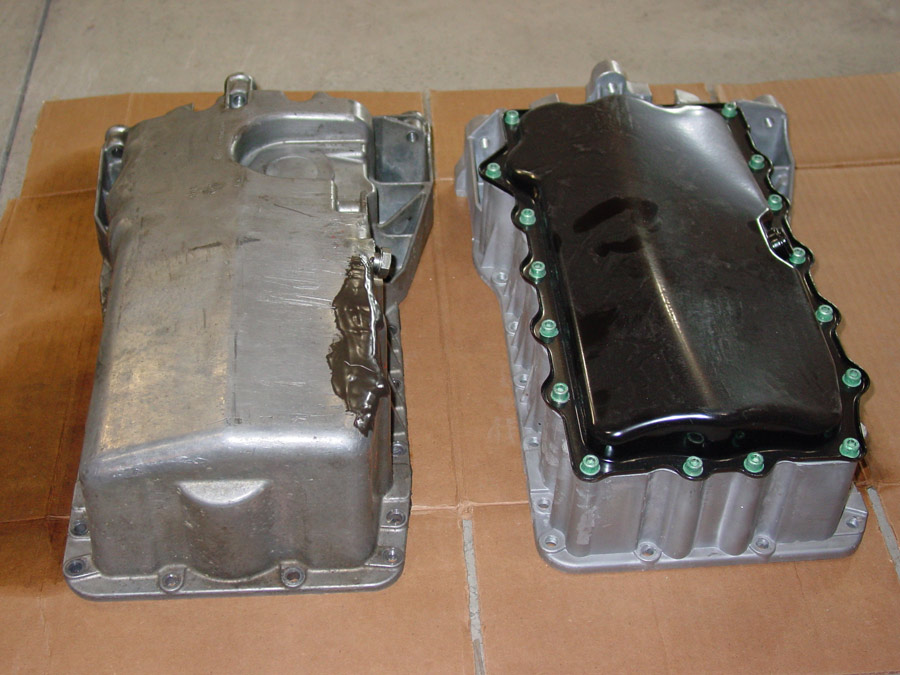
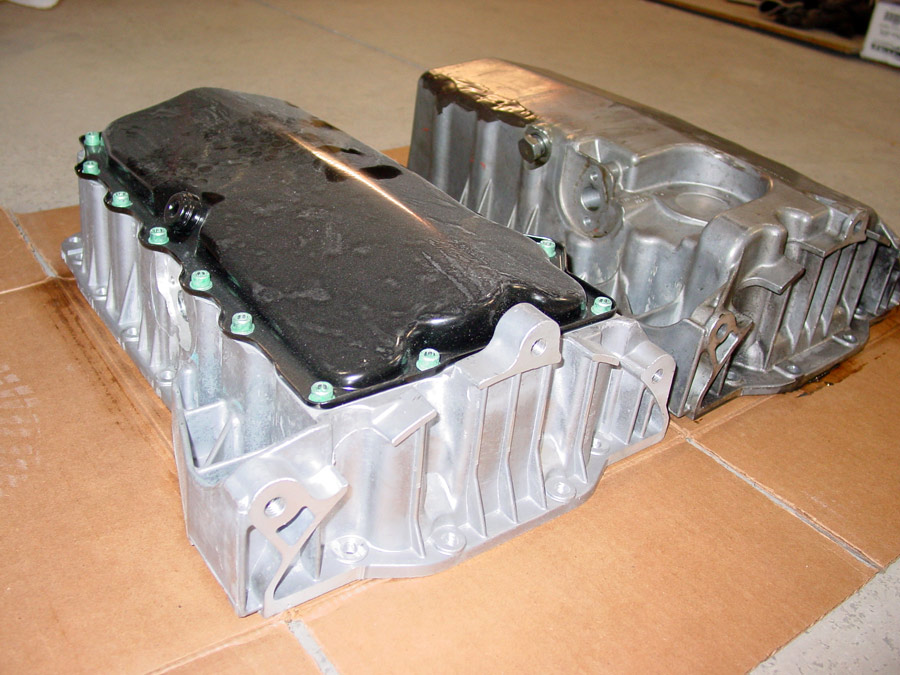
The steel bottom pan is called a hybrid pan. Whatever…. It isn’t all aluminum and it is shorter. It seems to make up for oil volume in the width (front to back) of the bottom of the pan.
Naturally, with the shorter pan, it came with a slightly shorter oil pick up tube.
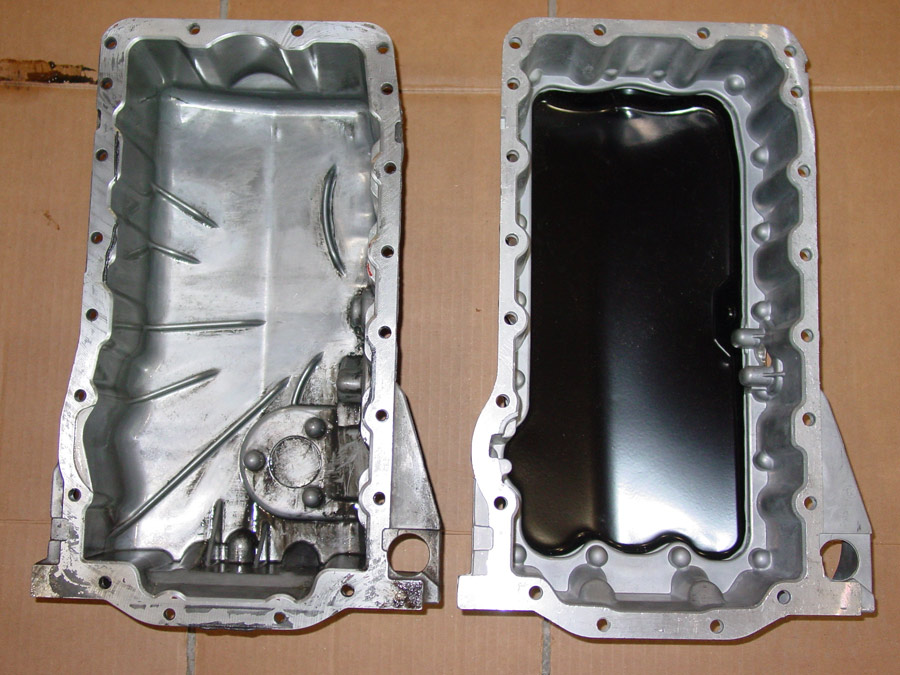
The gray stuff on the old pan is JB Weld that I used to seal a hairline crack for the last hillclimb (Philo) of the 2017 hillclimb season. This is the reason I was replacing the pan.
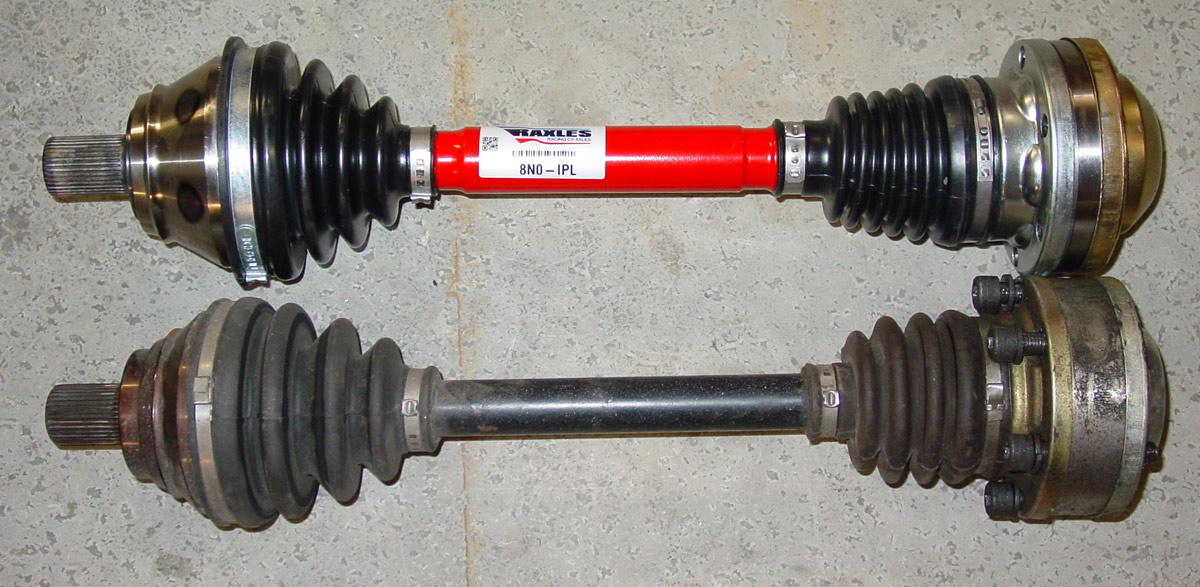
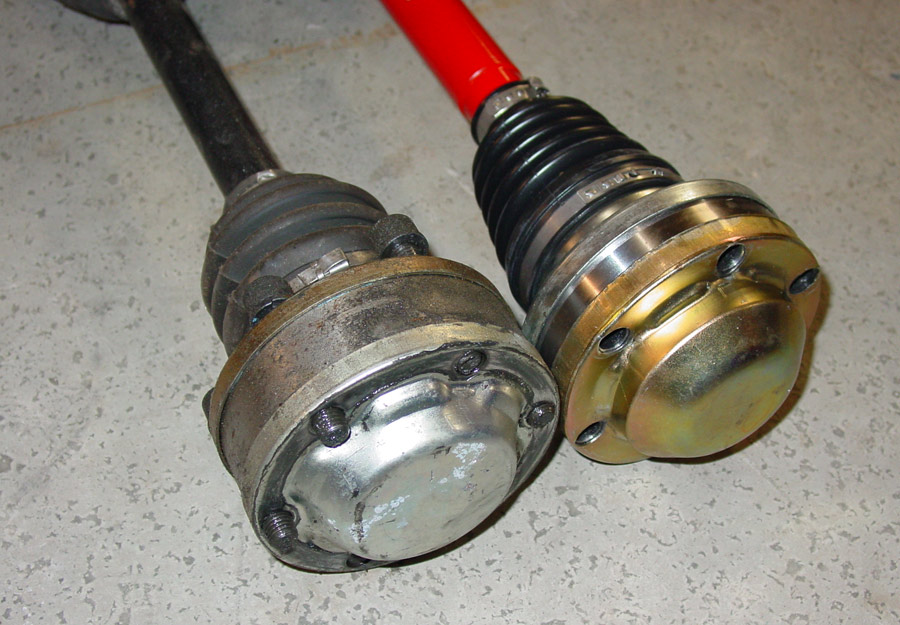
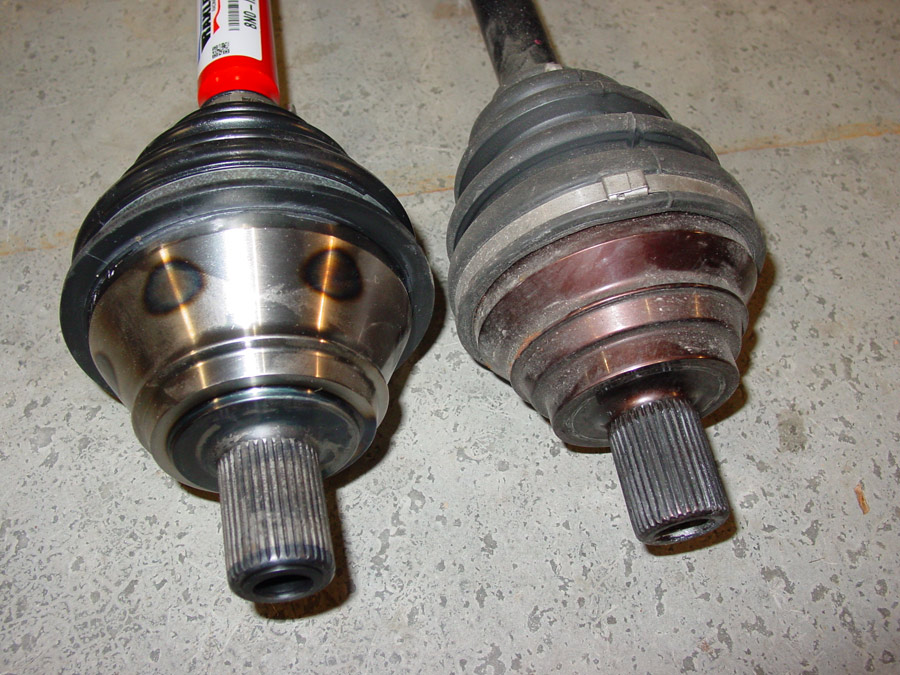
Next…. Some Raxles axles. I spoke about them earlier. Very pleased with everything so far. The 2018 hillclimb season with be the ultimate test.
Pan and both axles are installed!

Okay… this is where the “way too much information, man!” section starts. If you have no interest in seeing how to remove the steering wheel lock on a MK4 Volkswagen, stop here and spend your time doing more useful things like getting lost on Youtube.
The disclaimer: I had no idea what I needed to do and was not able to find information on the internet. I even searched the dark web (my order of hookers should be here in 5-7 business days) with no luck.
First… You do NOT need to cut the snap bolts on the ignition as you do NOT need to remove it.
If you are removing the entire switch and do not need any part of it (electrical ignition switch or the chipped key), then you CAN cut off the bolts and consider this project done.
Read on….
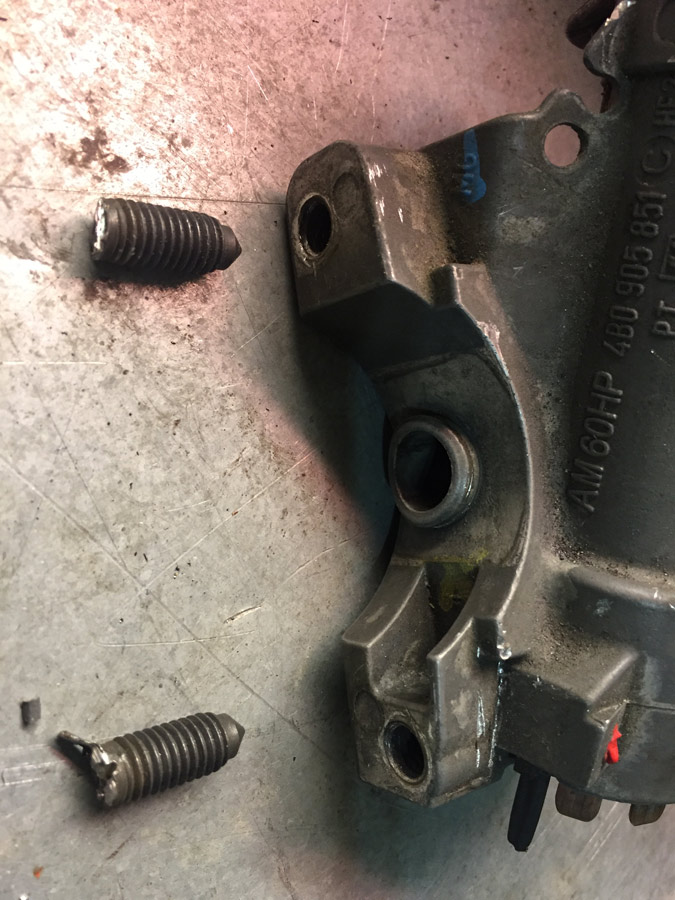
Taking the Dremel to each of the snap bolts. I sliced the bolt head into little sections that then introduced blunt force trauma (well, it wasn’t blunt) via a chisel to shear off the heads.
Both snap bolts removed, unplugged the chip key, unscrewed the single ground, and would normally remove the ignition switch plug on the back, but that was already removed as I have a separate flip-switch ignition switch.
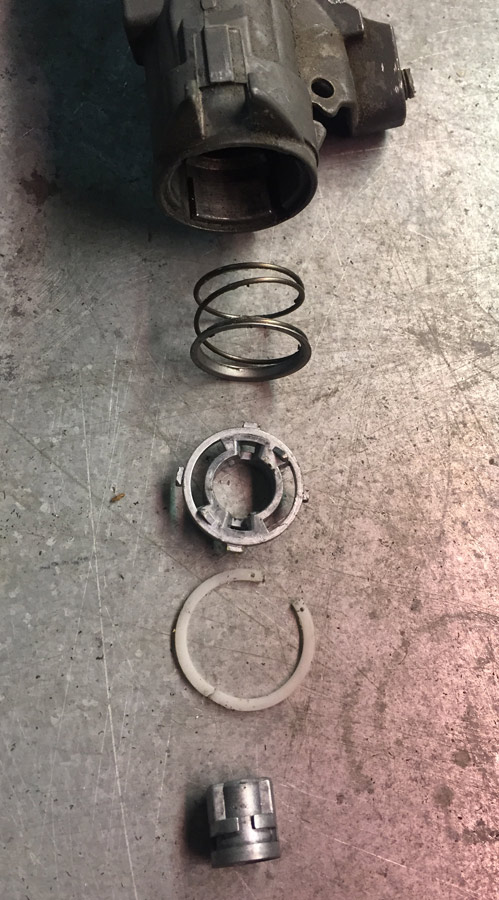
This is the steering lock pin.
There are a lot of video tutorials online on how to remove the chipped key ring (black ring). Short version: Turn the key to on, insert paperclip/mechanics wire/etc. into the little hole next to the key. This will release the lock on the black ring.

If you are planning to reassemble the key section of the ignition switch, pay attention to the orientation of the insides and be careful with the two plastic clips. I knew that I did not need any of this so I just focused on removal.
Remove the plastic ring. It is brittle.
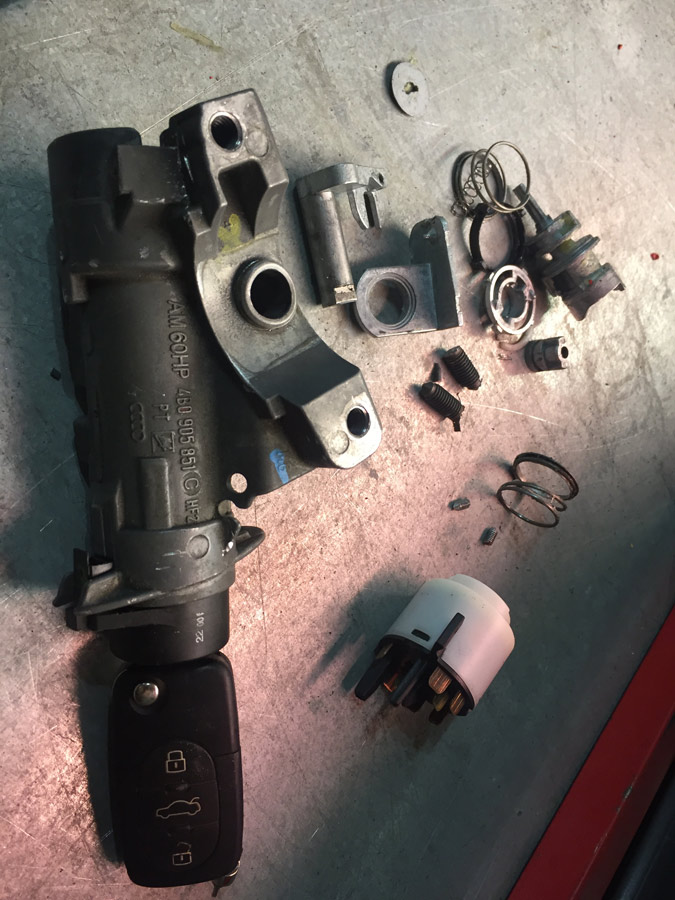
The bits and pieces… yep, that is the technical name. Look it up.
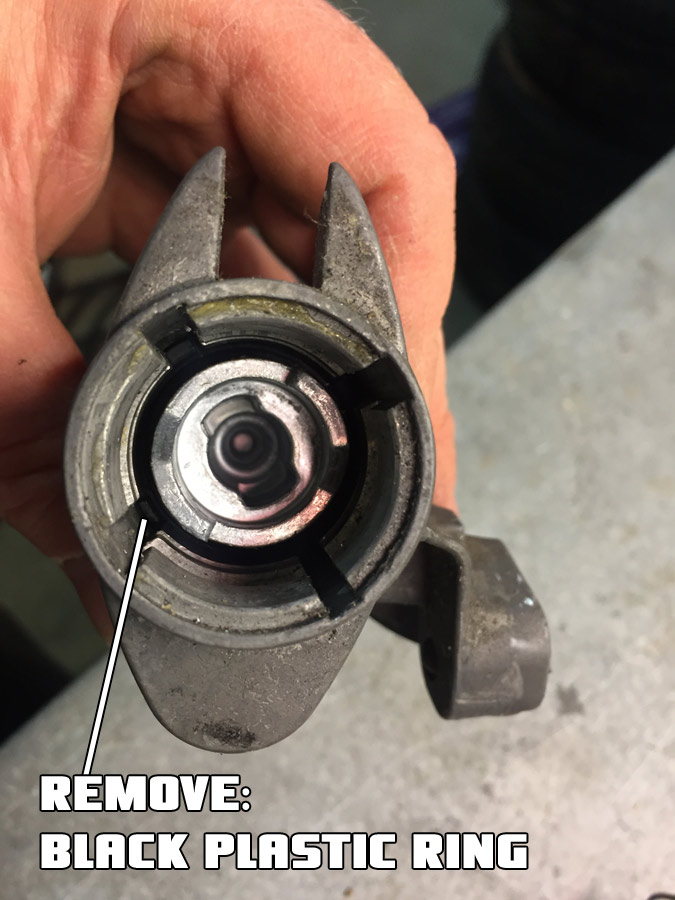
Next is a hard to see black plastic ring. This needs to be removed so that the largest part of this assembly can be removed. This is the piece that is preventing you from removing the metal plate on the bottom of the switch where the actual steering lock pin lives.
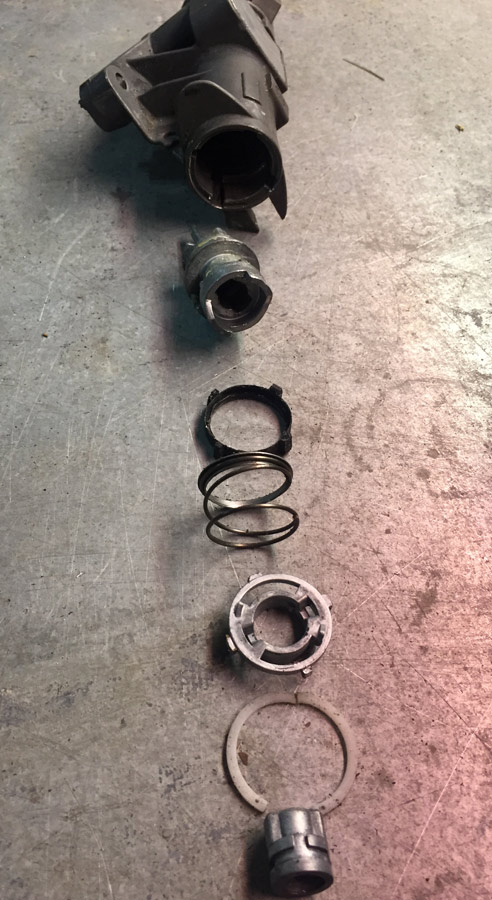
More bits and pieces… this is everything that comes out of this end.
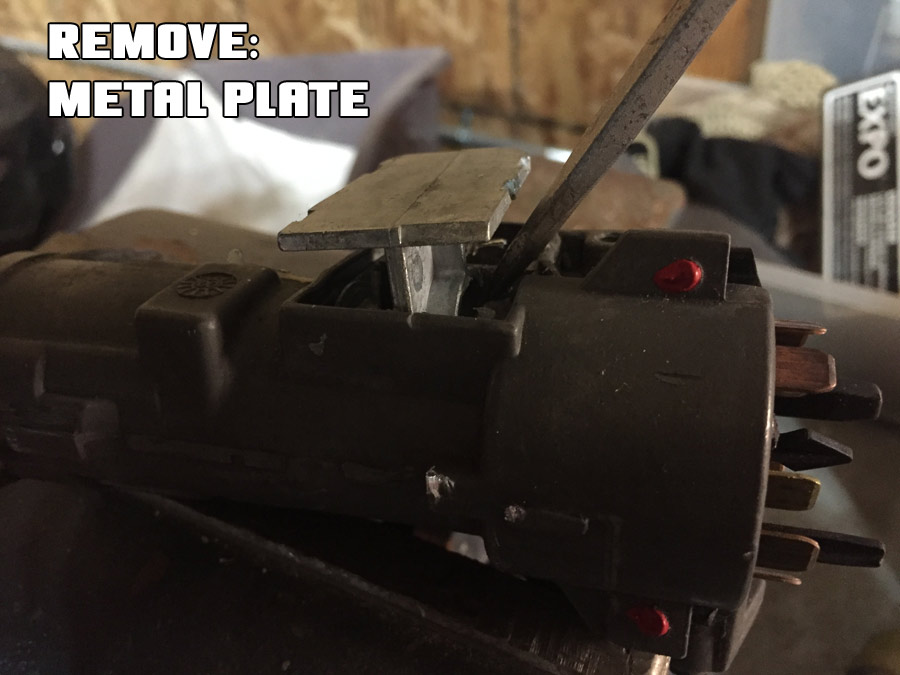
Pry off the metal plate. You will see that the plate has a ring that the previously removed part went through that prevents you from removing the plate. Note the two red dots in the image… this is red paint (or something along those lines) that cover set screws for the electrical part of the switch. More on this later.
Remove the spring and the steering wheel lock pin.
Removed!
If you do not need the electrical plug, tap off the red paint and remove the two set screws.
Remove what remains of the two snap bolts. These were easy to remove… I think you could grab onto them with vise grips. I used the vise. They were not tight at all.
Chipped key ring reinstalled… nothing else was installed. The metal housing is completely void of all bits and pieces.
Wait… why am I putting this switch back together after removing all the bits and pieces!?!?
Three reasons:
1. I am unsure if the chipped key is needed to run something on this car, so I reinstalled it.
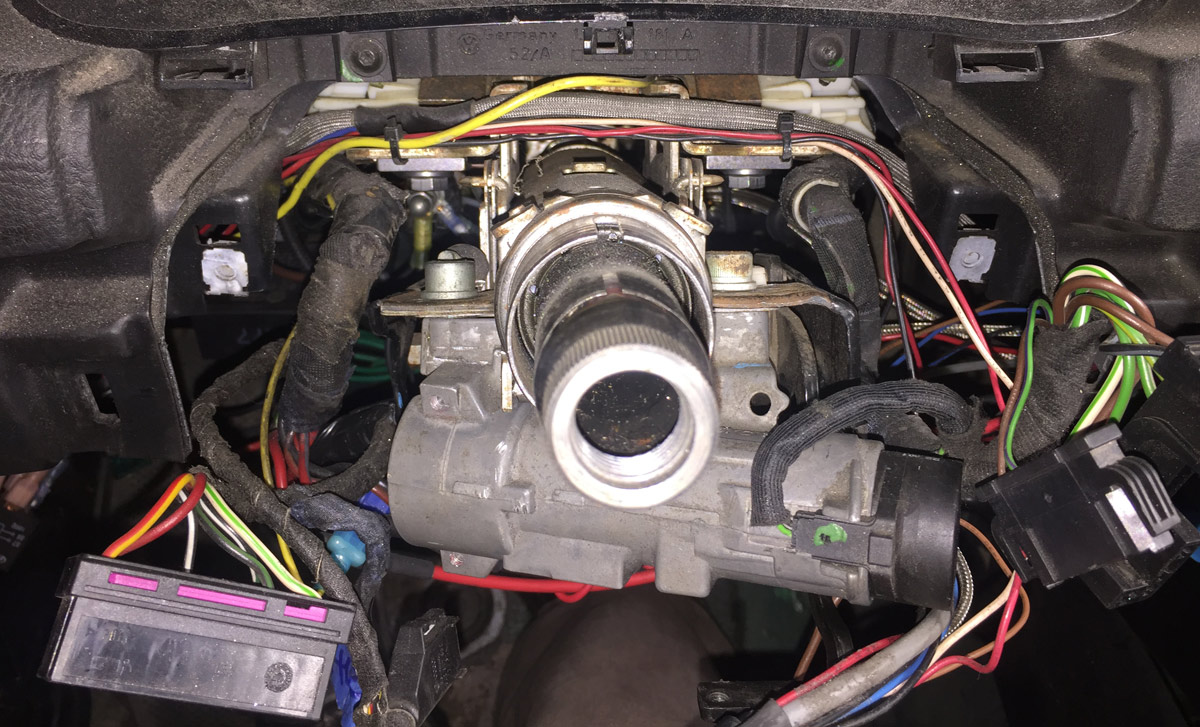
2. The snap bolts also held the braces for the wiring harness on either side of the steering column.
3. There was a single ground wire that I didn’t feel like trying to find a new home.
It just seemed easier to remount the empty shell of the ignition switch instead of trying to solve all these new, albeit relatively simple, problems.
What’s left…
1. Reinstall steering wheel
2. Install front tires
3. Install skid plate (left it off to check for leaks with the new oil pan)
4. Alignment
5. Wash the car
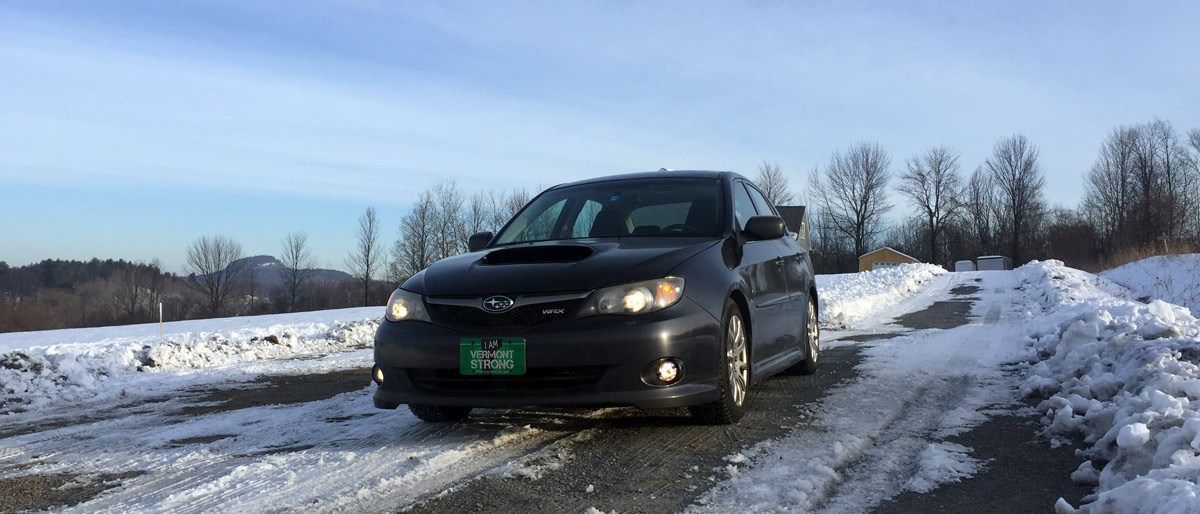
All easy stuff. I hope that it is for the list. I have some minor work to do to the Subaru WRX (new headlights and fix some plastic bits on the front end that did not like the snowbank in the middle of the road) and then have THE project (the Scirocco) to jump into. Damn it… I am going to work on it this year?
And speaking of the Scirocco.
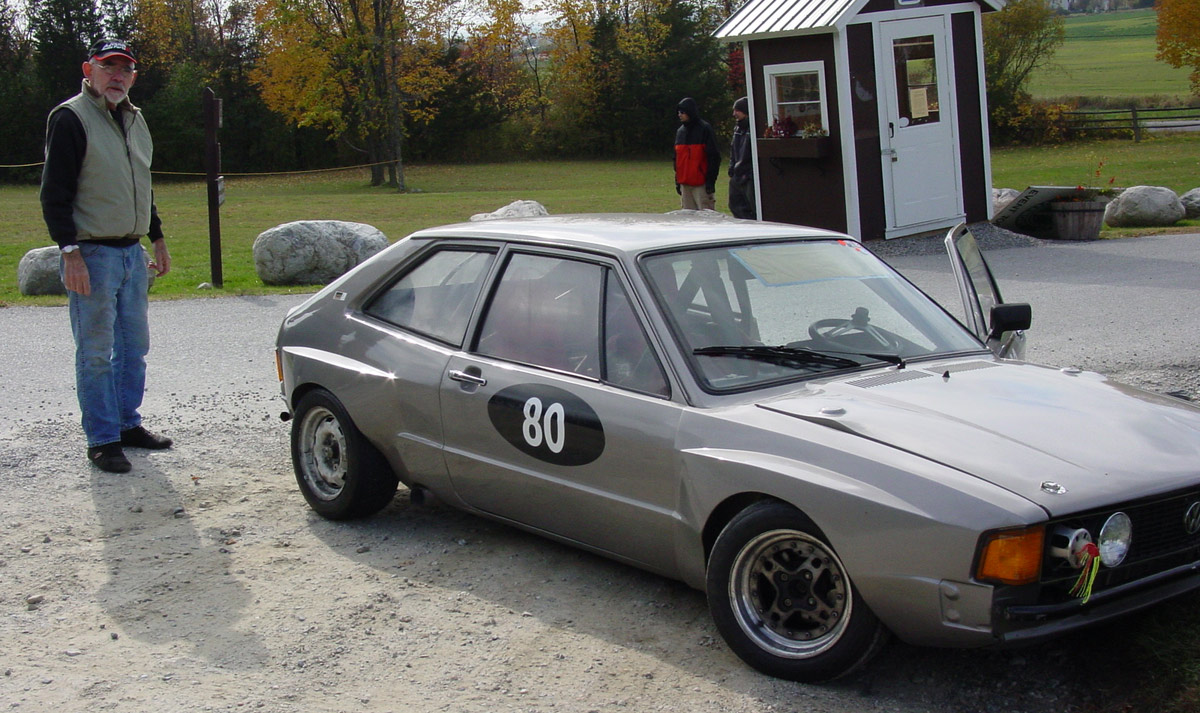
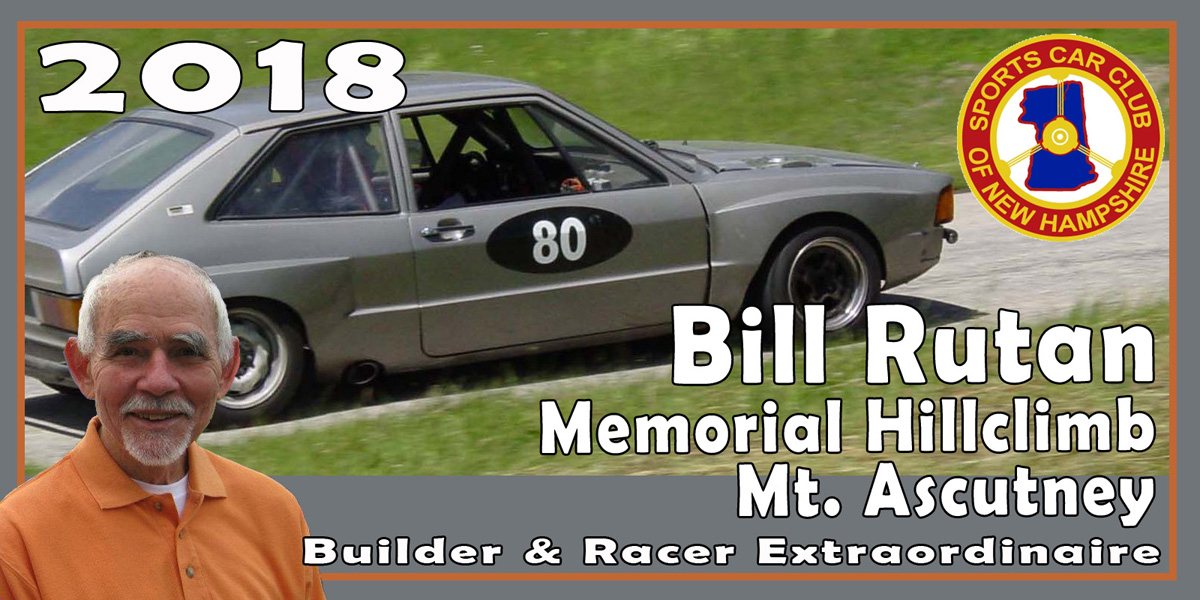
Bill Rutan, the builder and racer of the Scirocco, passed away early this month. He had a very, very, very successful racing career and built some very successful cars. I paid very close attention to his advice on how to make my Volkswagens go faster and how to drive faster.
Race on Bill, race on!

This is the GrimmSpeed "Master Cylinder Brace" that is supposed to firm up the brake pedal as this brace prevents the master cylinder from moving (firewall flex).
The website states that this will make the pedal feel firmer just like SS brake lines would do... but I already have SS brake lines, so I wasn't sure if there would be a huge difference.
It wasn't too difficult to install, but I was having some challenges because I could not quite visualize the end game... how it should look when installed. I am told this should be a 15 minute job (seems it should take longer since I had to chase some holes, remove some stuff, switch some things around, and have a beer). Just saying...
The Kit...
Installed...
The car... just begging for its gun metal stock rims with summer (not all season) tires.
Now, let’s get to the good stuff.
Steel bottom oil pan, Raxles axles, and removing the steering lock on the Golf
The steel bottom pan is called a hybrid pan. Whatever…. It isn’t all aluminum and it is shorter. It seems to make up for oil volume in the width (front to back) of the bottom of the pan.
Naturally, with the shorter pan, it came with a slightly shorter oil pick up tube.
The gray stuff on the old pan is JB Weld that I used to seal a hairline crack for the last hillclimb (Philo) of the 2017 hillclimb season. This is the reason I was replacing the pan.
Next…. Some Raxles axles. I spoke about them earlier. Very pleased with everything so far. The 2018 hillclimb season with be the ultimate test.
Pan and both axles are installed!
Okay… this is where the “way too much information, man!” section starts. If you have no interest in seeing how to remove the steering wheel lock on a MK4 Volkswagen, stop here and spend your time doing more useful things like getting lost on Youtube.
The disclaimer: I had no idea what I needed to do and was not able to find information on the internet. I even searched the dark web (my order of hookers should be here in 5-7 business days) with no luck.
First… You do NOT need to cut the snap bolts on the ignition as you do NOT need to remove it.
If you are removing the entire switch and do not need any part of it (electrical ignition switch or the chipped key), then you CAN cut off the bolts and consider this project done.
Read on….
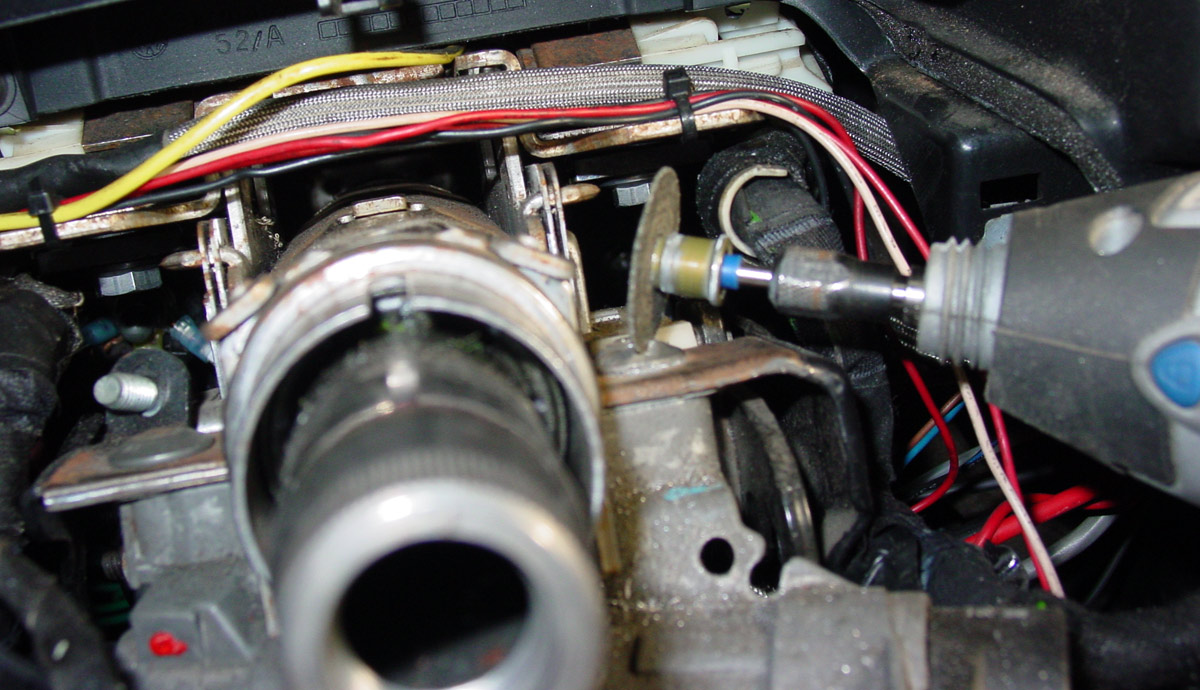
Taking the Dremel to each of the snap bolts. I sliced the bolt head into little sections that then introduced blunt force trauma (well, it wasn’t blunt) via a chisel to shear off the heads.
Both snap bolts removed, unplugged the chip key, unscrewed the single ground, and would normally remove the ignition switch plug on the back, but that was already removed as I have a separate flip-switch ignition switch.
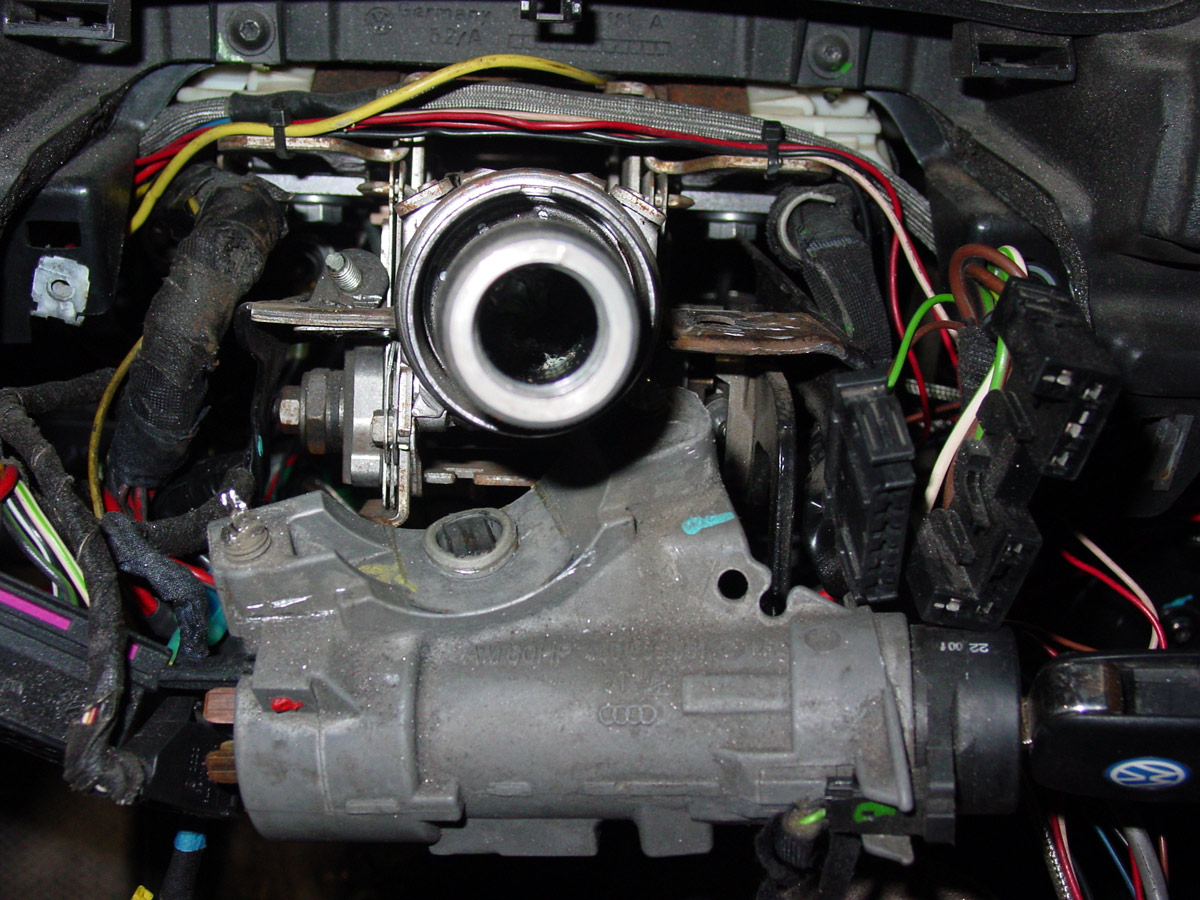
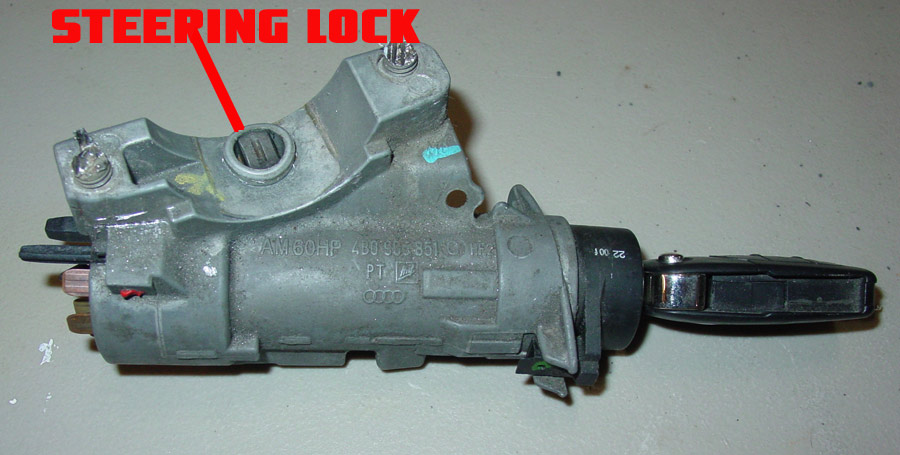
This is the steering lock pin.
There are a lot of video tutorials online on how to remove the chipped key ring (black ring). Short version: Turn the key to on, insert paperclip/mechanics wire/etc. into the little hole next to the key. This will release the lock on the black ring.
If you are planning to reassemble the key section of the ignition switch, pay attention to the orientation of the insides and be careful with the two plastic clips. I knew that I did not need any of this so I just focused on removal.
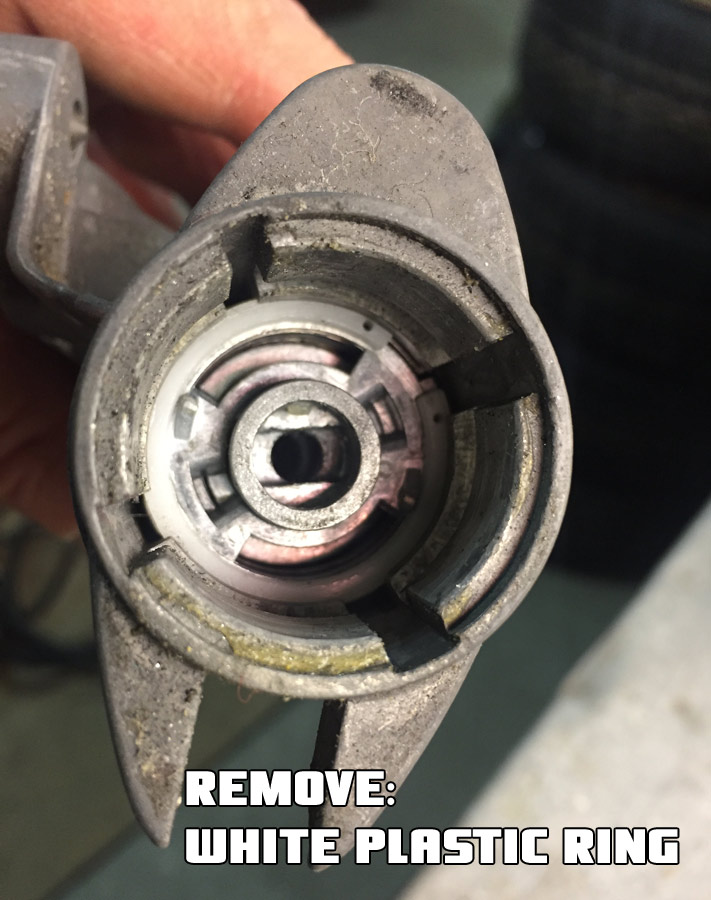
Remove the plastic ring. It is brittle.
The bits and pieces… yep, that is the technical name. Look it up.
Next is a hard to see black plastic ring. This needs to be removed so that the largest part of this assembly can be removed. This is the piece that is preventing you from removing the metal plate on the bottom of the switch where the actual steering lock pin lives.
More bits and pieces… this is everything that comes out of this end.
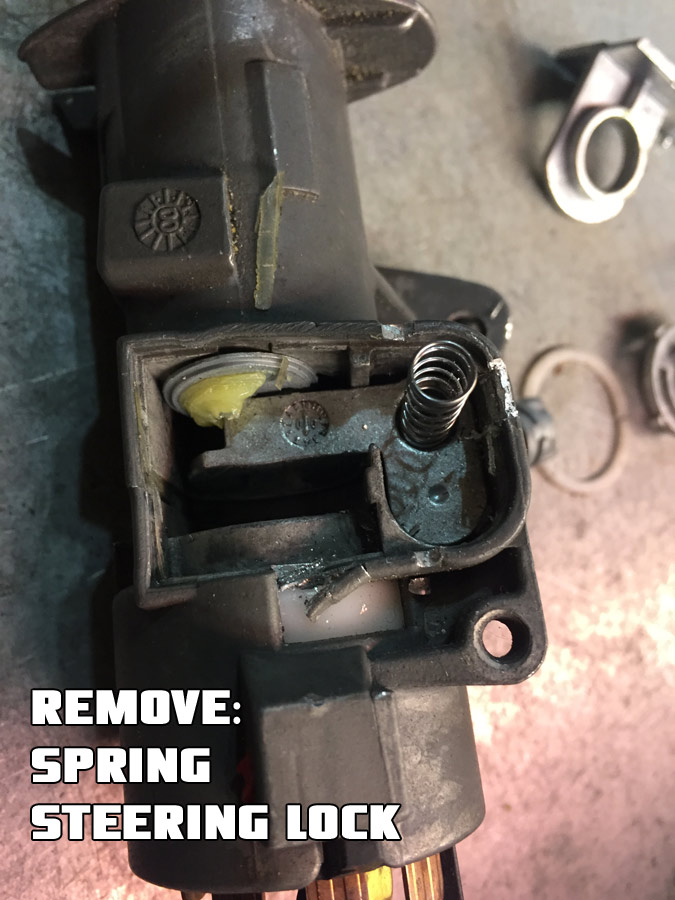
Pry off the metal plate. You will see that the plate has a ring that the previously removed part went through that prevents you from removing the plate. Note the two red dots in the image… this is red paint (or something along those lines) that cover set screws for the electrical part of the switch. More on this later.
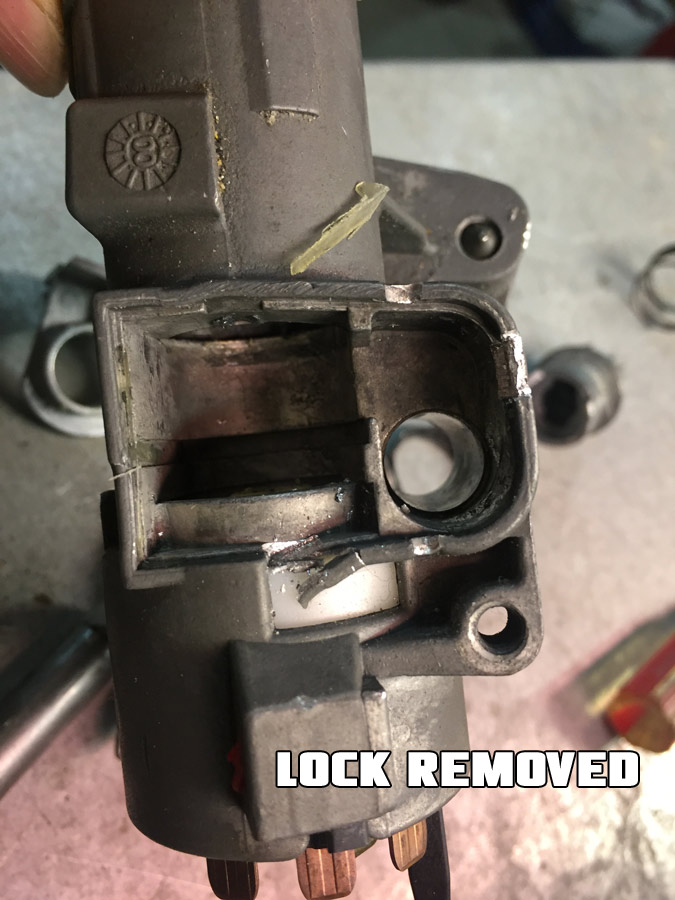
Remove the spring and the steering wheel lock pin.
Removed!
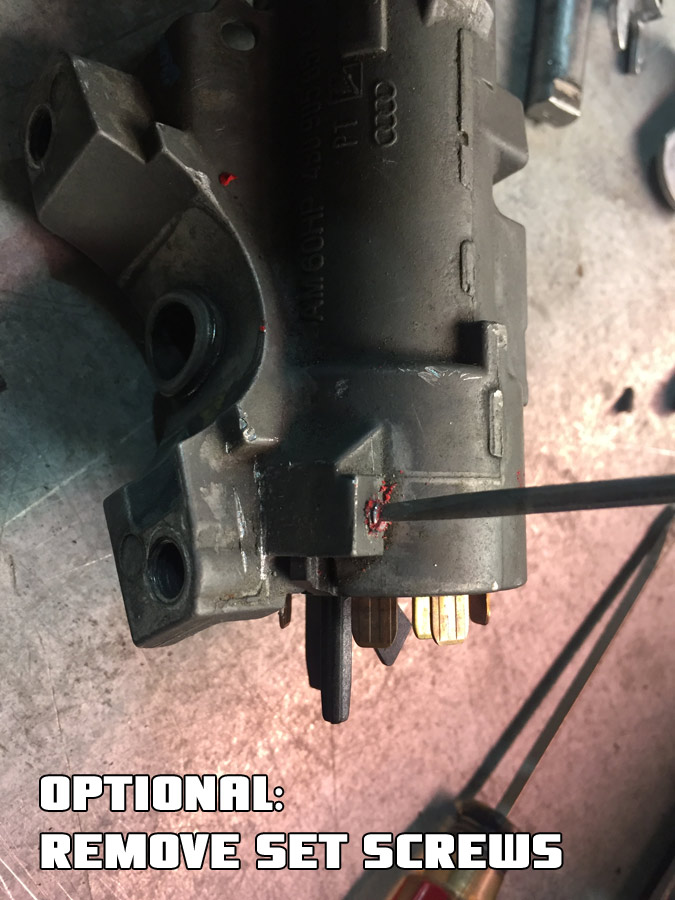
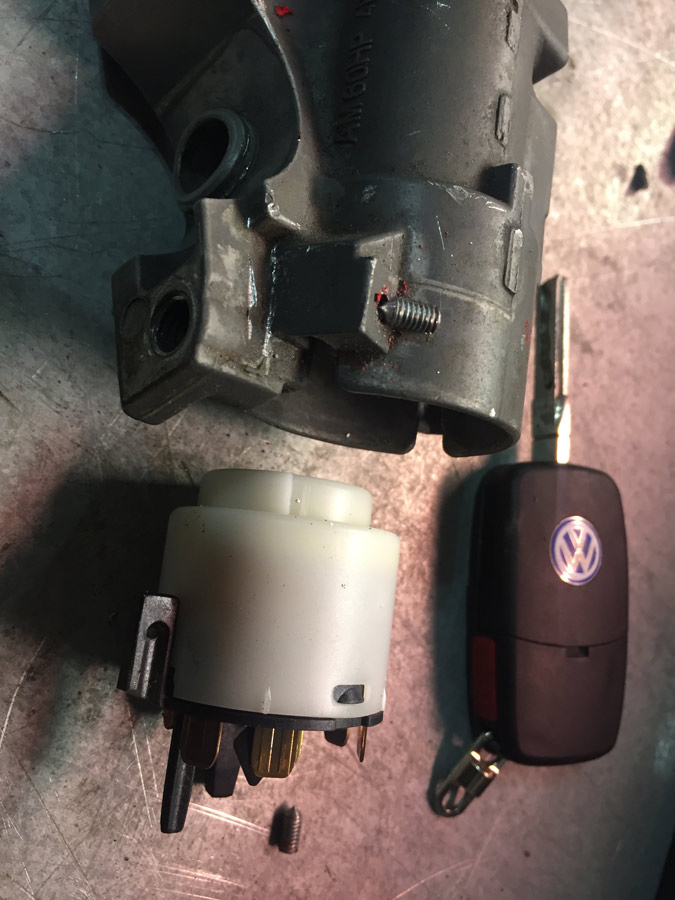
If you do not need the electrical plug, tap off the red paint and remove the two set screws.
Remove what remains of the two snap bolts. These were easy to remove… I think you could grab onto them with vise grips. I used the vise. They were not tight at all.
Chipped key ring reinstalled… nothing else was installed. The metal housing is completely void of all bits and pieces.
Wait… why am I putting this switch back together after removing all the bits and pieces!?!?
Three reasons:
1. I am unsure if the chipped key is needed to run something on this car, so I reinstalled it.
2. The snap bolts also held the braces for the wiring harness on either side of the steering column.
3. There was a single ground wire that I didn’t feel like trying to find a new home.
It just seemed easier to remount the empty shell of the ignition switch instead of trying to solve all these new, albeit relatively simple, problems.
What’s left…
1. Reinstall steering wheel
2. Install front tires
3. Install skid plate (left it off to check for leaks with the new oil pan)
4. Alignment
5. Wash the car
All easy stuff. I hope that it is for the list. I have some minor work to do to the Subaru WRX (new headlights and fix some plastic bits on the front end that did not like the snowbank in the middle of the road) and then have THE project (the Scirocco) to jump into. Damn it… I am going to work on it this year?
And speaking of the Scirocco.
Bill Rutan, the builder and racer of the Scirocco, passed away early this month. He had a very, very, very successful racing career and built some very successful cars. I paid very close attention to his advice on how to make my Volkswagens go faster and how to drive faster.
Race on Bill, race on!
Go Fast VW & Audi parts at FastAddiction.com
-
Rabbit Farmer
- Posts: 2260
- Joined: Wed Jun 25, 2003 11:37 pm
- AntiSpam: No
- Location: Earth
- Contact:
Re: Rabbit Farmer's various VW Projects
Short update just to get caught up. Unsure if I will do videos for the Ascutney or Okemo hillclimbs.... we will see.
Before Ascutney....
I purchased the "QuickTrick Pro Series Alignment System for 13" to 18" Wheels" and the "QuickTrick Ball Bearing Turn Plates" to help me do my own alignment. Use it five times and it pays for itself.
First time doing alignment (caster, camber, and toe) on any car so there was a bit of a learning curve. It turns out it is quite easy.
Good enough to drive 30,000 miles on the road during the year? Unsure about that, but it is fine for racing.
Alignment tool is pretty simple (yep, you could get away with a much cheaper alternative like strings, spider webs, and other mumbo jumbo, but I needed something more idiot proof).
Metal arms mount to rim and tape measures determine toe.
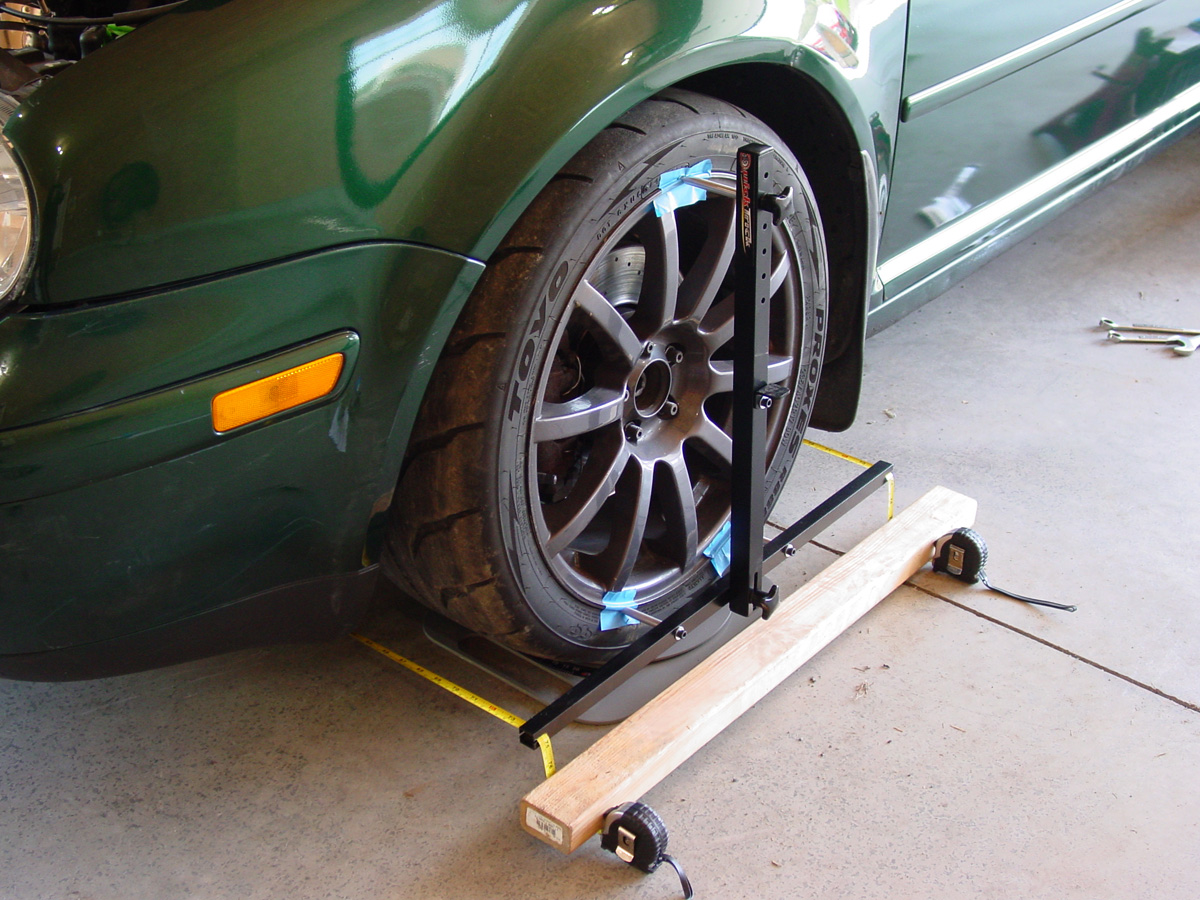
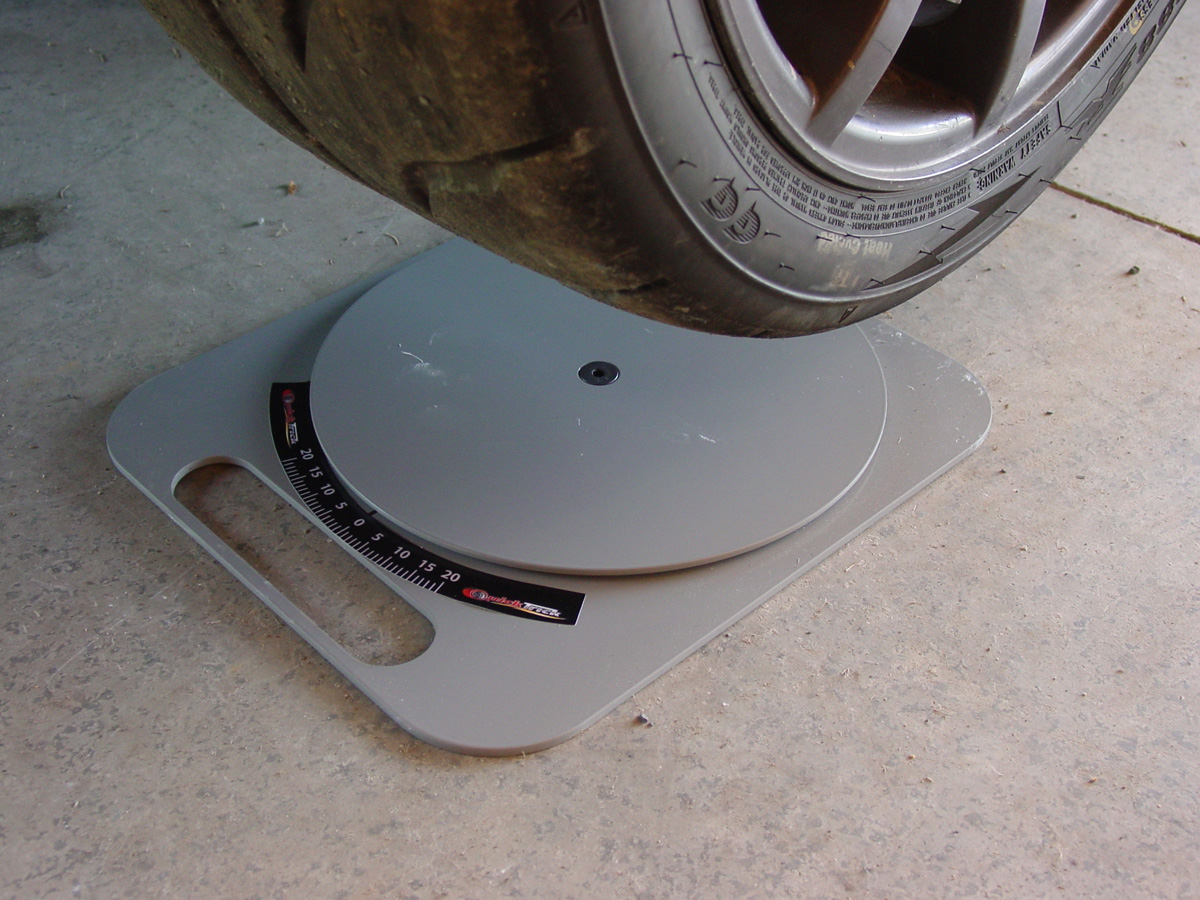
The turn plate makes it easy to rotate the wheel when adjusting toe. You could also use two pieces of metal with sand or oil in between them).
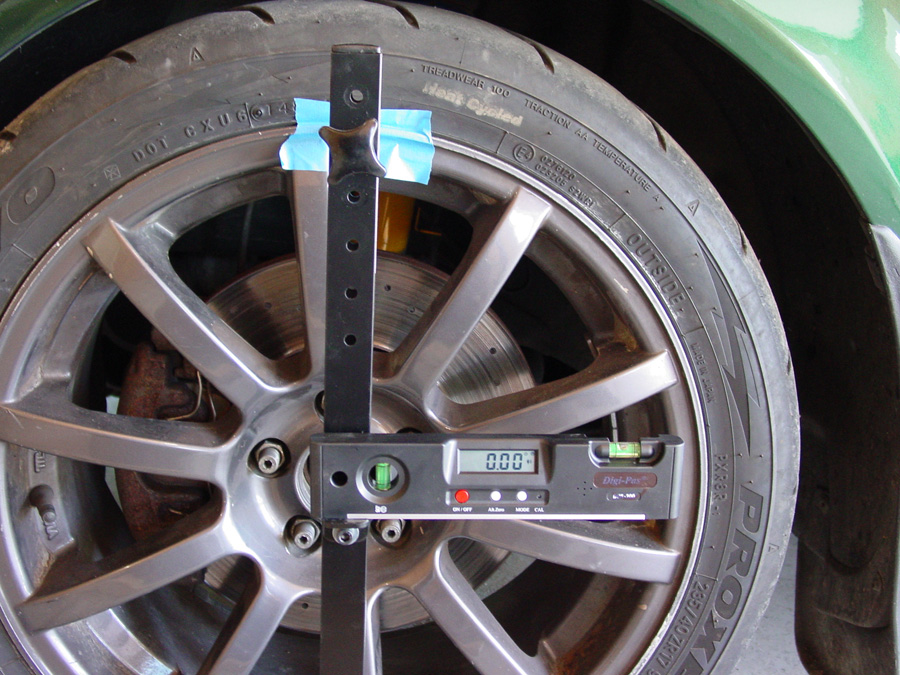
Digital gauge that you first zero-out on the floor to take into account any angle on the work surface and then you can use it for caster (no adjustment on my car) and camber.
Worked great... car handled as expected at Ascutney.
I did have an electrical issue with the wire going to the fuel pump. Lots of helpful people at the event who were more electrical savvy than I helped to get the car going again.
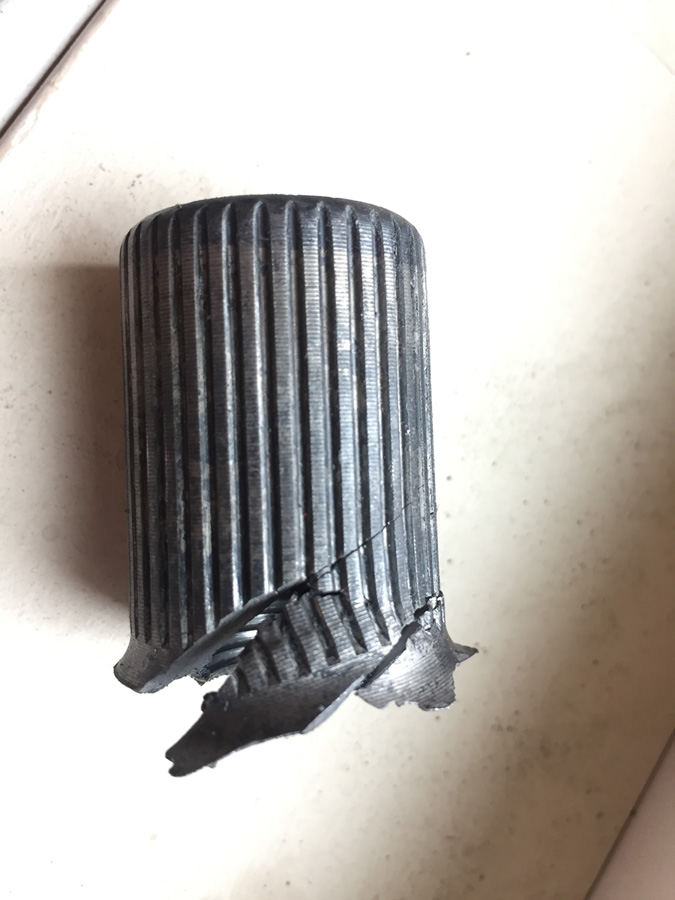
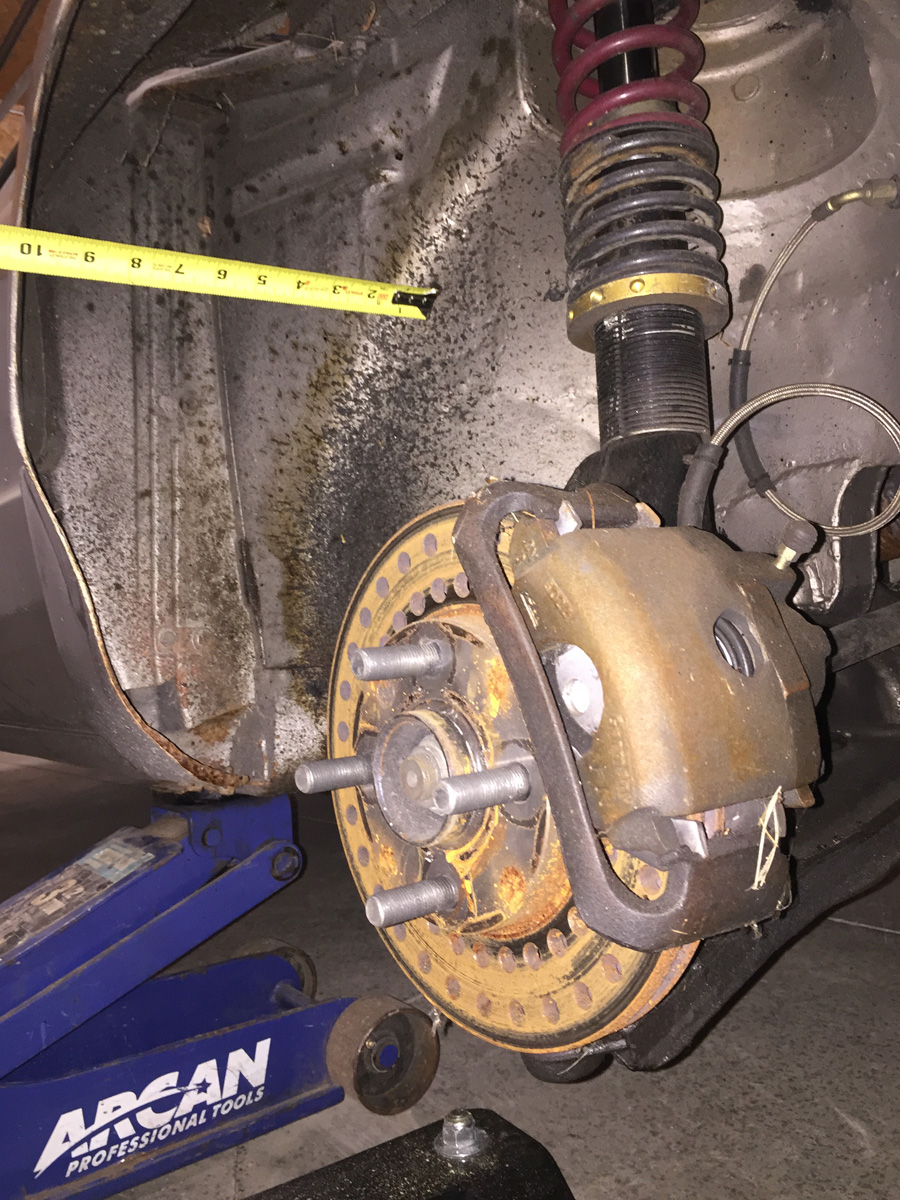
Then Sunday rolled around and I managed to twist the end of the axle off.
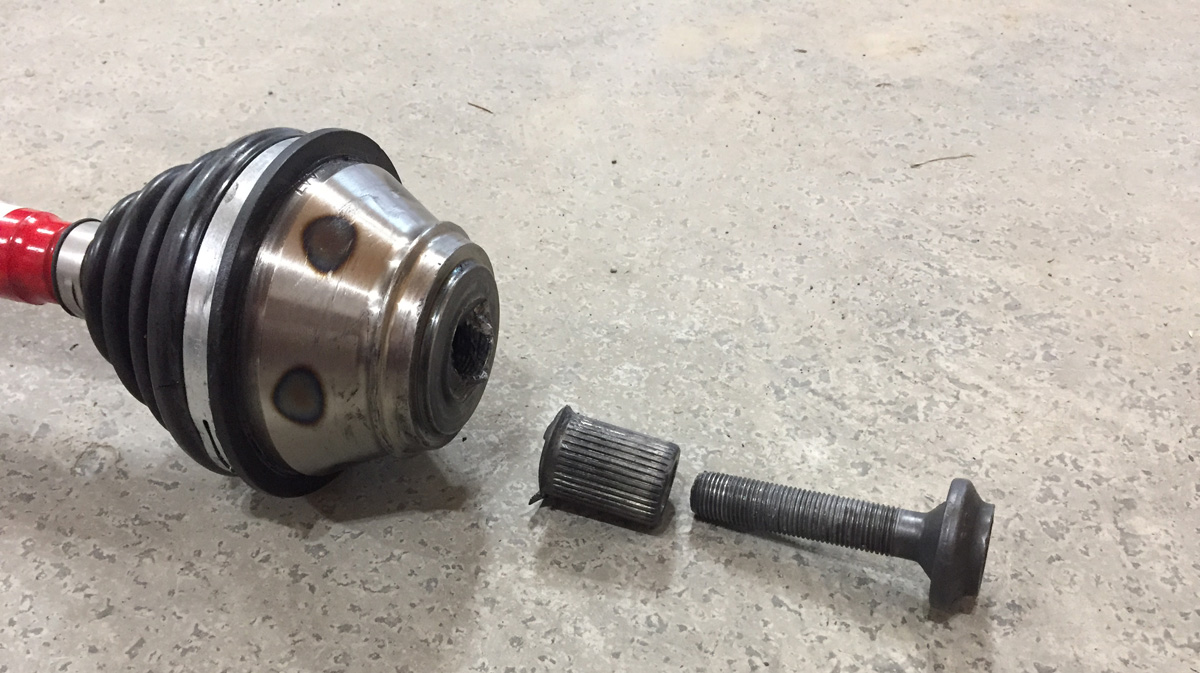
If I saw this, my first guess would be that the installer over torqued the axle bolt. Not the case as I carefully followed the Raxles instructions as they call for very specific torques for the hub bolt and inner bolts.
Since Ascutney, and prior to Okemo, I had the replacement axles back in hand. Now that is quick service! Thanks Marty!
The Ascutney hillclimb memorialize our racing, and mad scientist to everything Volkswagen, friend Bill Rutan.
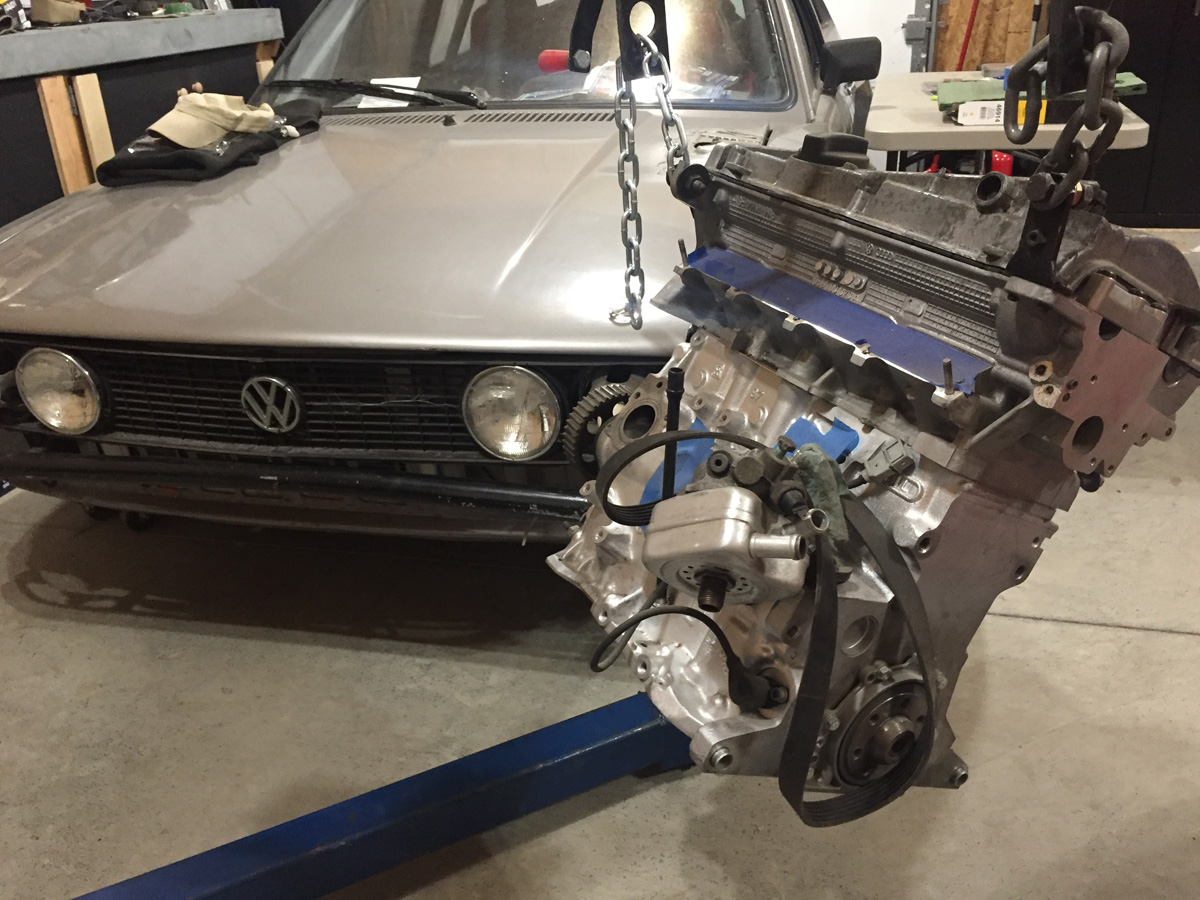
So... that slightly motivated me to get working on the Scirocco.
Already built engine:
AEB 1.8T engine
Bored to 1.9 liter
Manley rods
Supertech stainless steel exhaust valves
Cat Cams valve springs
Titanium retainers
New valve guides and Viton valve seals (e85 ready if I ever when that route)
Integrated Engineering's IECVA1 camshaft:
*CNC ground on new chill hardened cores
*Dialed in via extensive engine dyno testing
*For OE style hydraulic lifter buckets
*Strong power from 5500 to 8500 rpm
*270 / 274 degrees advertised (Intake & Exhaust)
*.370" / .378" Lift (Intake & Exhaust)
ARP connectors for everything including crank bolt with friction washers
Cometic head gasket
And then I took a week off in Rhode Island for a wedding.
Enjoyed three breweries:
Revival Brewing Company
Shaidzon Beer Company
Whaler's Brewing Company (my favorite venue and 1/4 mile away from where we got married)
.....and then some Del's.

Before Ascutney....
I purchased the "QuickTrick Pro Series Alignment System for 13" to 18" Wheels" and the "QuickTrick Ball Bearing Turn Plates" to help me do my own alignment. Use it five times and it pays for itself.
First time doing alignment (caster, camber, and toe) on any car so there was a bit of a learning curve. It turns out it is quite easy.
Good enough to drive 30,000 miles on the road during the year? Unsure about that, but it is fine for racing.
Alignment tool is pretty simple (yep, you could get away with a much cheaper alternative like strings, spider webs, and other mumbo jumbo, but I needed something more idiot proof).
Metal arms mount to rim and tape measures determine toe.
The turn plate makes it easy to rotate the wheel when adjusting toe. You could also use two pieces of metal with sand or oil in between them).
Digital gauge that you first zero-out on the floor to take into account any angle on the work surface and then you can use it for caster (no adjustment on my car) and camber.
Worked great... car handled as expected at Ascutney.
I did have an electrical issue with the wire going to the fuel pump. Lots of helpful people at the event who were more electrical savvy than I helped to get the car going again.
Then Sunday rolled around and I managed to twist the end of the axle off.
If I saw this, my first guess would be that the installer over torqued the axle bolt. Not the case as I carefully followed the Raxles instructions as they call for very specific torques for the hub bolt and inner bolts.
Since Ascutney, and prior to Okemo, I had the replacement axles back in hand. Now that is quick service! Thanks Marty!
The Ascutney hillclimb memorialize our racing, and mad scientist to everything Volkswagen, friend Bill Rutan.
So... that slightly motivated me to get working on the Scirocco.
Already built engine:
AEB 1.8T engine
Bored to 1.9 liter
Manley rods
Supertech stainless steel exhaust valves
Cat Cams valve springs
Titanium retainers
New valve guides and Viton valve seals (e85 ready if I ever when that route)
Integrated Engineering's IECVA1 camshaft:
*CNC ground on new chill hardened cores
*Dialed in via extensive engine dyno testing
*For OE style hydraulic lifter buckets
*Strong power from 5500 to 8500 rpm
*270 / 274 degrees advertised (Intake & Exhaust)
*.370" / .378" Lift (Intake & Exhaust)
ARP connectors for everything including crank bolt with friction washers
Cometic head gasket
And then I took a week off in Rhode Island for a wedding.
Enjoyed three breweries:
Revival Brewing Company
Shaidzon Beer Company
Whaler's Brewing Company (my favorite venue and 1/4 mile away from where we got married)
.....and then some Del's.
Go Fast VW & Audi parts at FastAddiction.com
-
Rabbit Farmer
- Posts: 2260
- Joined: Wed Jun 25, 2003 11:37 pm
- AntiSpam: No
- Location: Earth
- Contact:
Re: Rabbit Farmer's various VW Projects
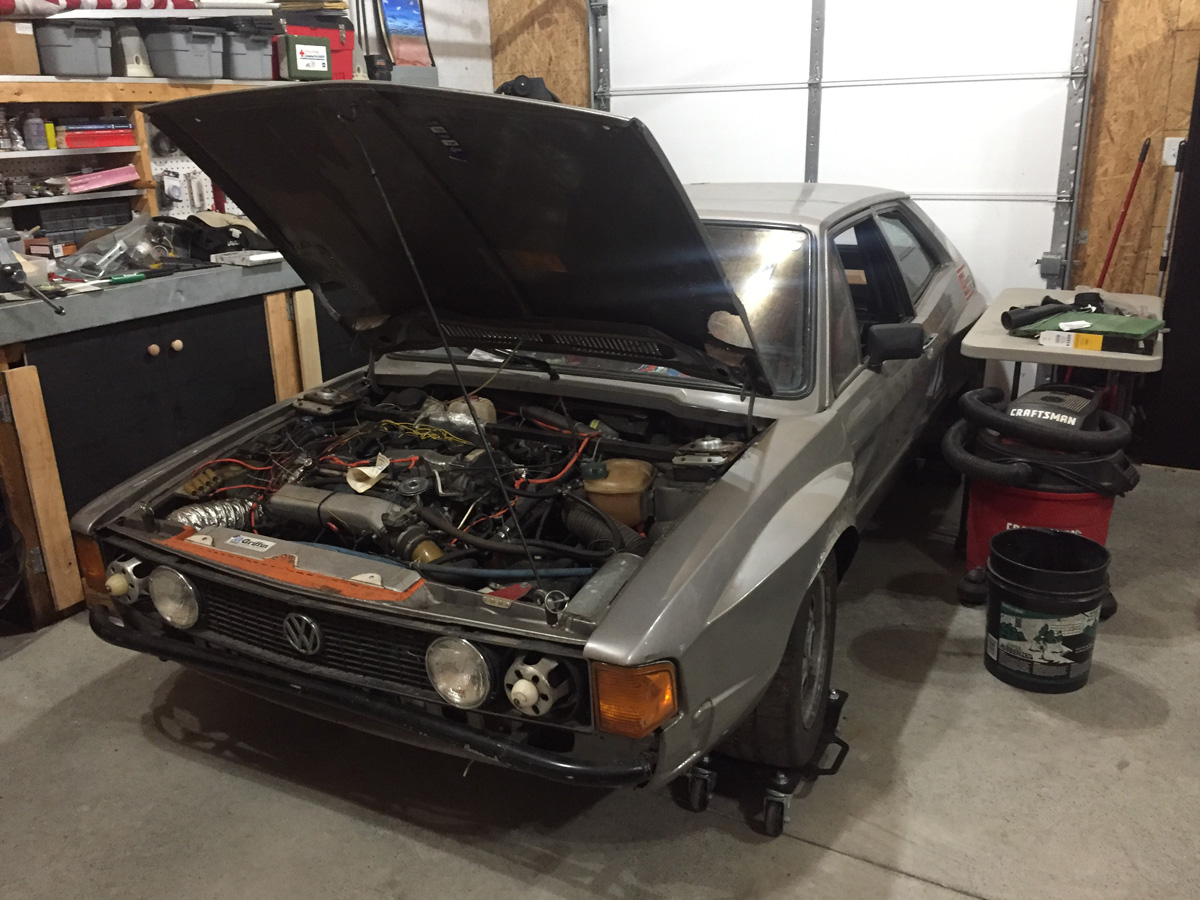
And so it begins....
DAY ONE
The Scirocco has been on the back burner (heck, not even on the stove) for quite some time. There is always something else that needs to be done just at the moment I wanted to start on it.
I've been planning and conceptualizing what I think is the perfect car (regardless of what you drive) for racing... reliable, easy to work on, easy to source parts (it is an old car!), and fun to drive.
The car has some crazy stuff going on... DAY TWO will include the documentation (photos and notes) of every corner of the car to determine what Bill did when building/modifying the car over the years (and why!); plus it will help me put it all back together.
Day one is strictly cleaning the car to get ready for day two. Day one is done.
But how did we get here? A fellow racer "threatened" to purchase the car. Put me in the spot of poop or get off the pot. I'm pooping. (thanks Brad!)
As mentioned early, the engine is ready. I will go through it to make sure everything is good. Need to research the cam to see if it will work for me.
The plan for the car:
Removable front end like the MK4 (I guess the MK2 and beyond were that way..... I kinda skipped from MK1 to MK4).
6-speed (02M) cable shift gearbox.
MK4 mounts on the car (as opposed to MK4 engine/trans to MK1 body mounts)
Air dam
Air ducts for front brakes (track events!)
Glass! Yep, I am going to make this street legal-ish.
VEMS standalone engine management
Bodywork and new paint (need to determine color)... blue? orange?
The car is going someplace very special down the road (more to come on this new development) within a few weeks to start the fabrication and bodywork.
Go Fast VW & Audi parts at FastAddiction.com
-
Rabbit Farmer
- Posts: 2260
- Joined: Wed Jun 25, 2003 11:37 pm
- AntiSpam: No
- Location: Earth
- Contact:
Re: Rabbit Farmer's various VW Projects
DAY TWO
So far I am on schedule.
Day one to remove all the excess parts that I am accumulated over the years in preparation for when I was ready to restore the car. (Done!)
Day two, as expected, took a very long time. I just wanted to capture all the neat modifications (and everything is modified!) in the car to set a base for the project. It is always nice to go back to photos to see where one started and to help putting everything back together.
I took a lot of photos and saved them HERE.
Below, I captured a lot of the details that warrant sharing at this time.
I am still guessing how the rear suspension currently works. Wow!
I do wish I noticed that the car had grass clipping hanging from spider webs so that I could have cleaned up before taking the pictures. Oh well… one day I will have this on the lift to be able to get much better photos of the underside.
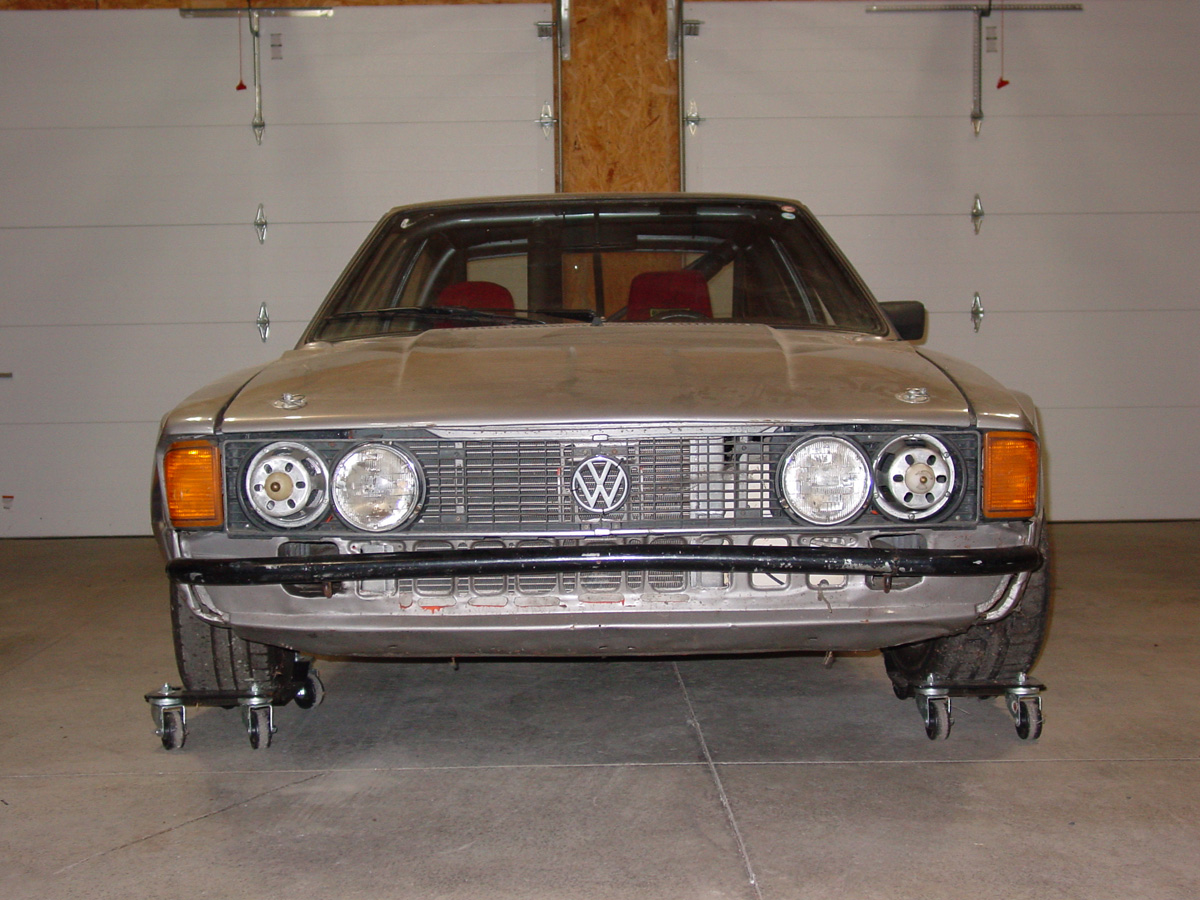
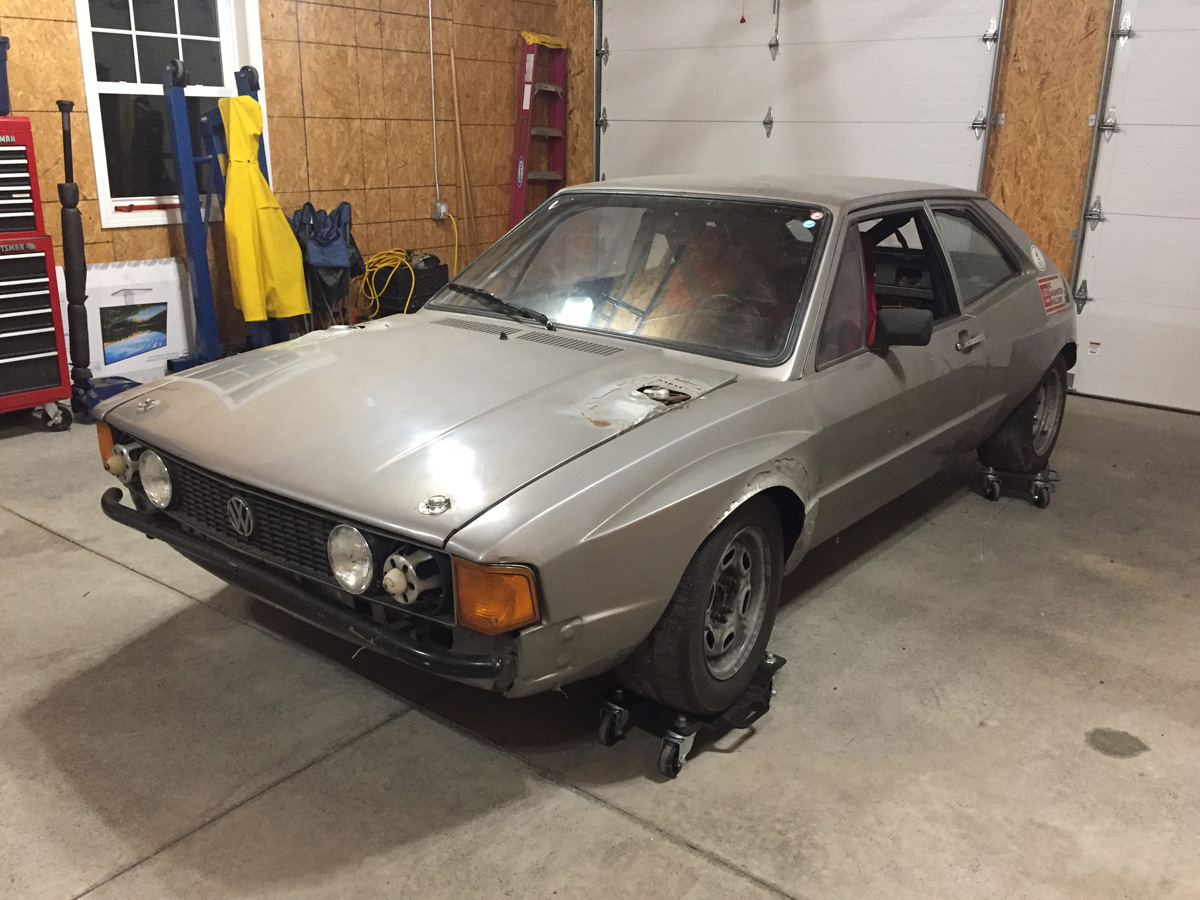
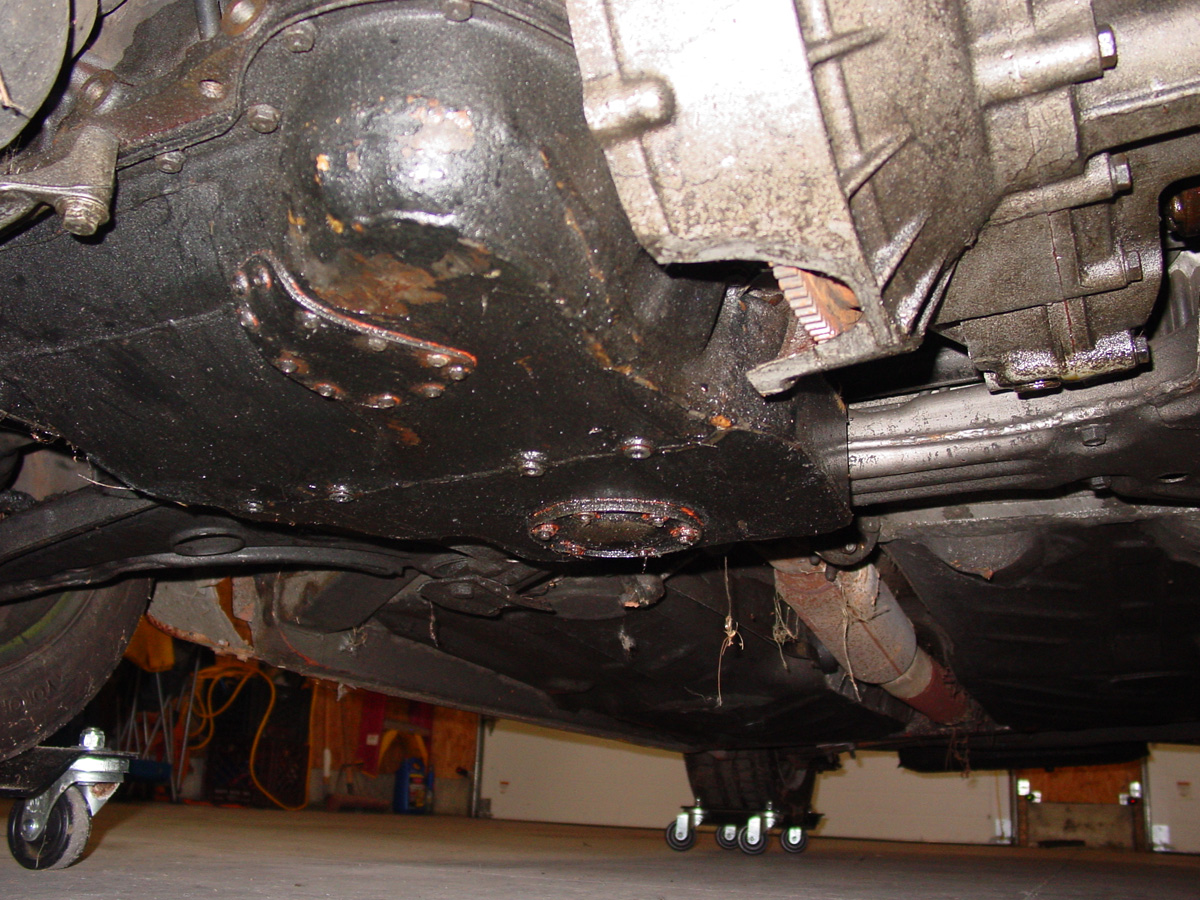
Front shot of the car. You can’t quite get a feel for how low the car is because it is on caster dollies, but I did measure from the bottom of the transmission (while car was on the dollies) and it was approximately 7.5” to the ground. The dollies raise the car approximately 2.75” for a difference of… carry the two and divide by zero… about 4.75”. You will see in the images below that the bottom of the transmission bell was cut off and there is a custom oil pan to give the car some ground clearance.
Of course, this will be a challenge with doing the 02M… assuming it is even possible with trying to keep the look of the car and not having a transmission 1” off the ground.
I will try to show in the pictures that follow how much the interior of the car has changed to move the driver closer to the center. The center tunnel has been moved towards the passenger side. You know, minor stuff like that.
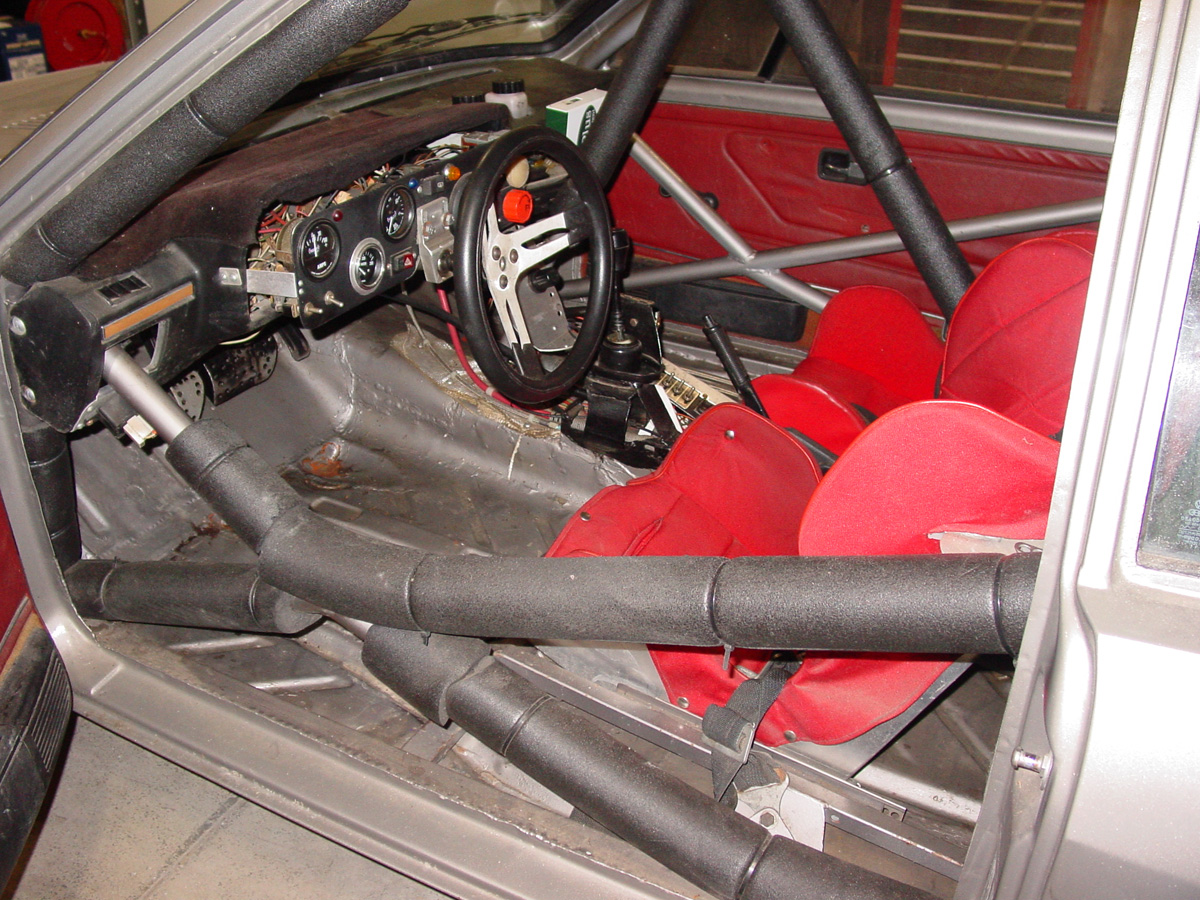
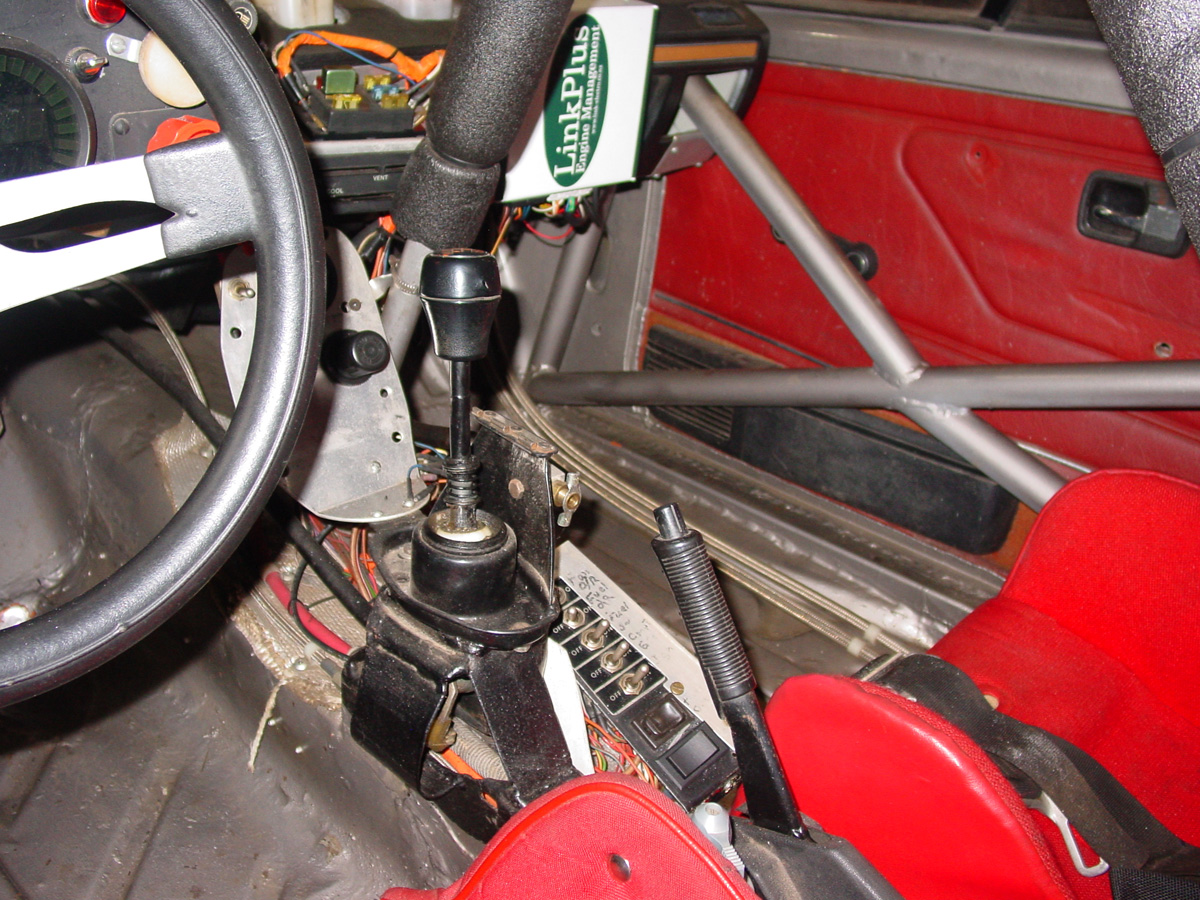
Transmission is a 020 (typically Scirocco or Rabbit 5-speed) with the usual crazy spherical bearings for all connections from shifter to transmission. The shifter is also raised
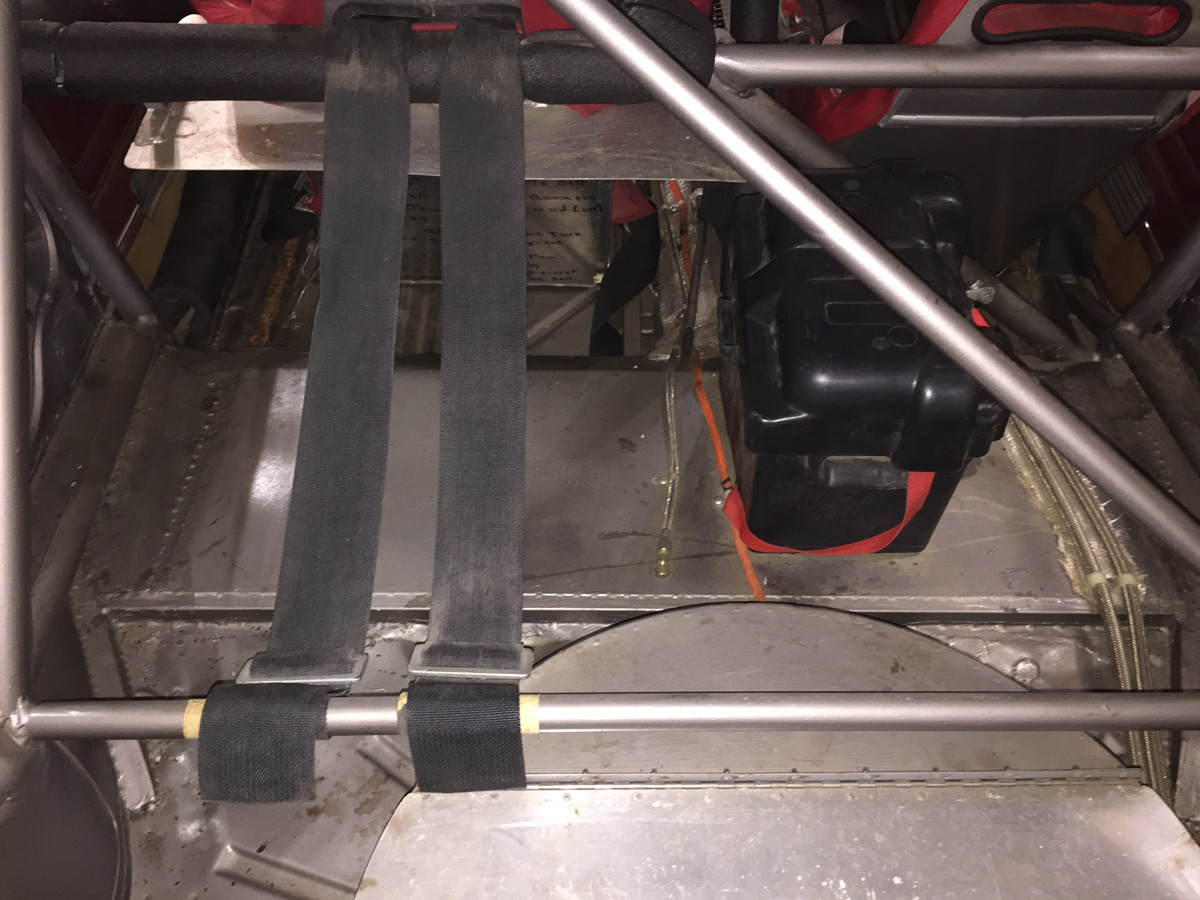
A little help in the survivability department… additional bar in the (modified) center of the car.
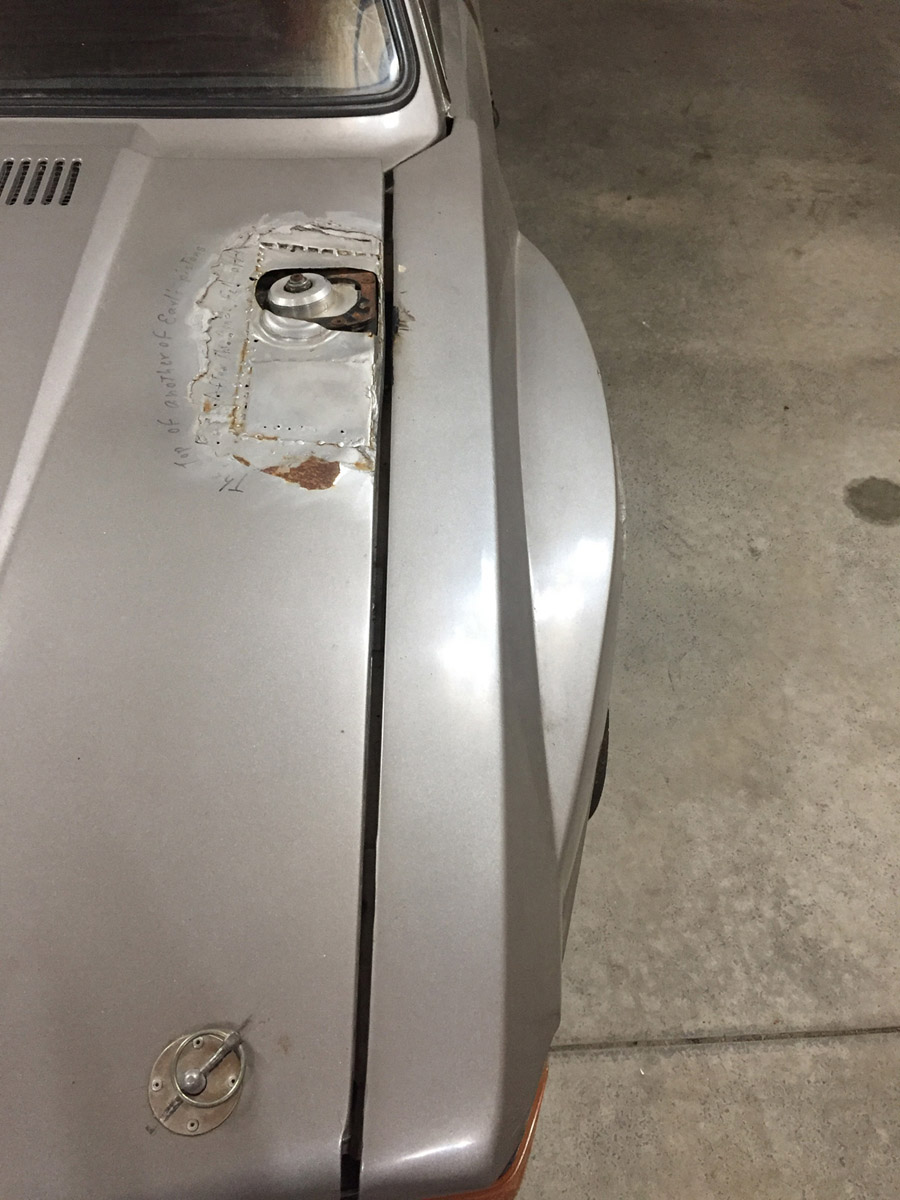
Showing off the sexy fenders. Assuming I remember this correctly… the neat thing about the design of the fender was to allow this car to fit into the current rules that stated that the fender had to look stock from the side (stock profile, something like that). So, sure, looking dead-on 90-degrees at the side of the car, the straight out fender extension would technically not be visible, therefore, it meet the rule; it would not be considered modified/widened. Tricky. That lasted for one year.
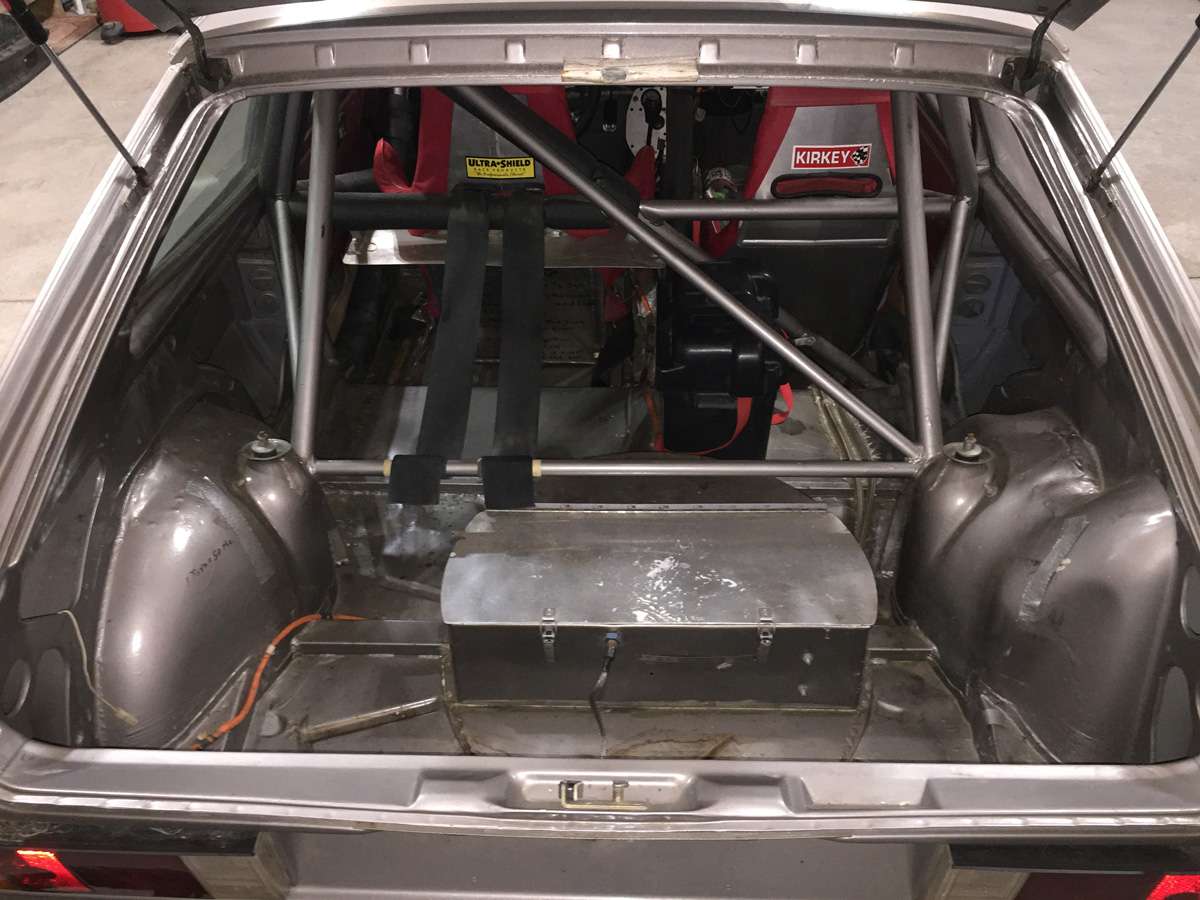
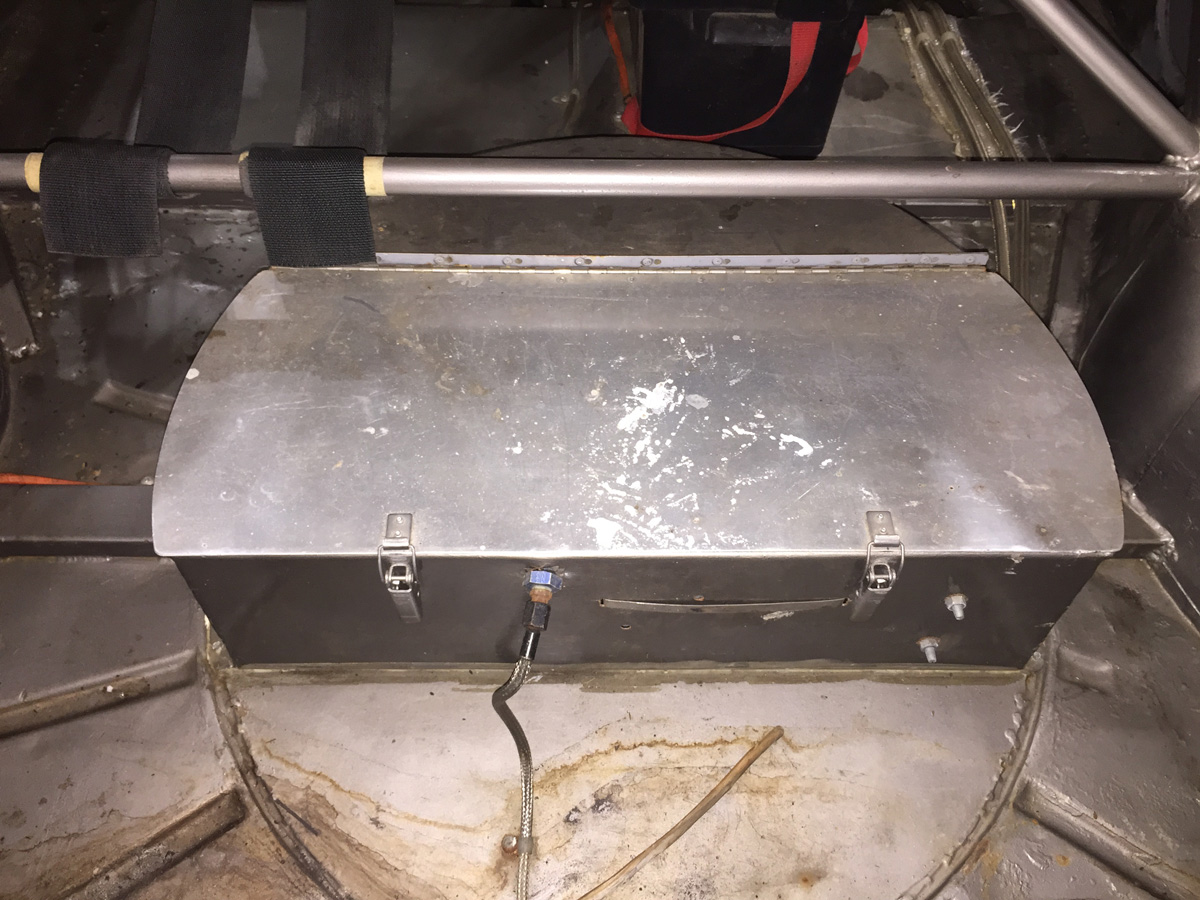
Let’s move around to the rear. Lots of cage work and reinforcement (notice the added braces on the floor between the bulk head for the fuel system and the wheel wells.
Fuel system bulk head. I might add rubber seal to edge/lip.
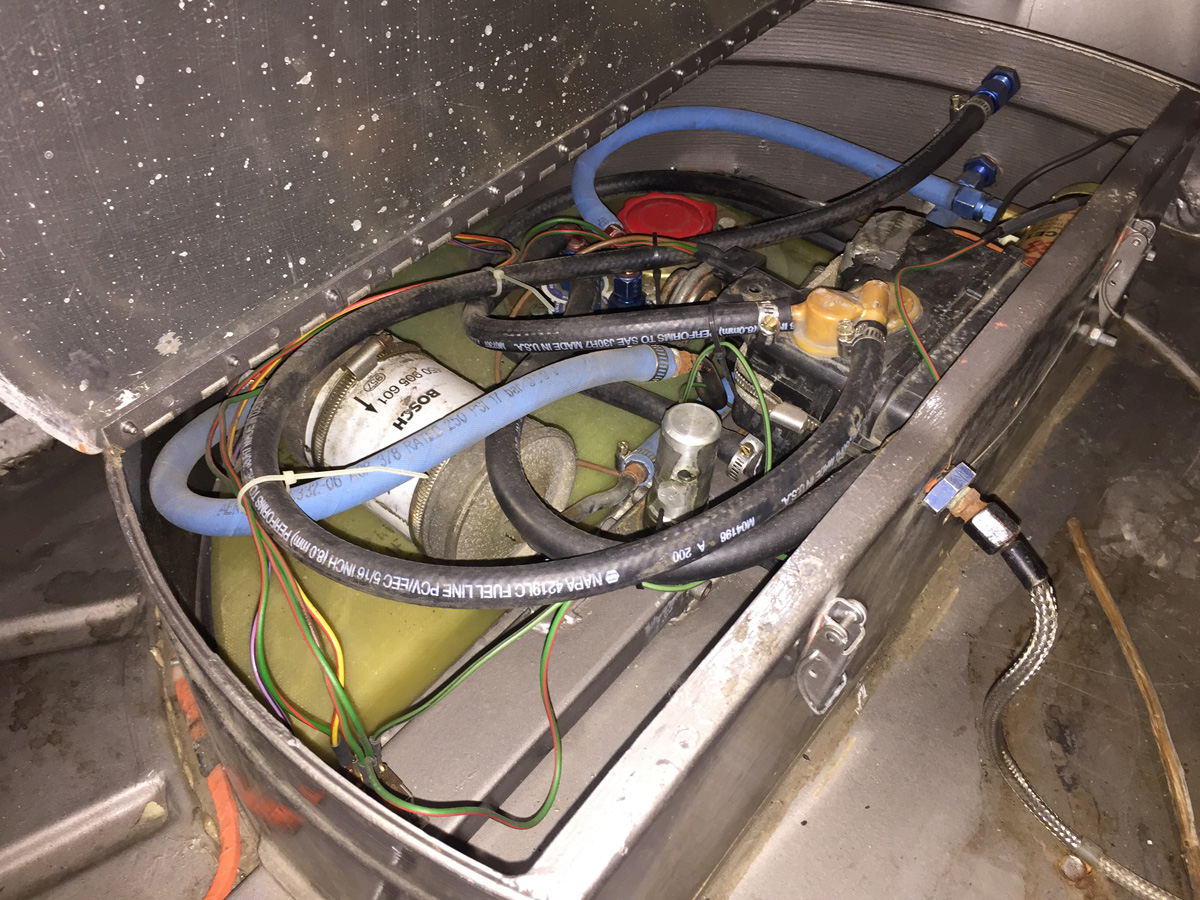
Stuff inside that I need to determine exactly what is needed with my future setup.
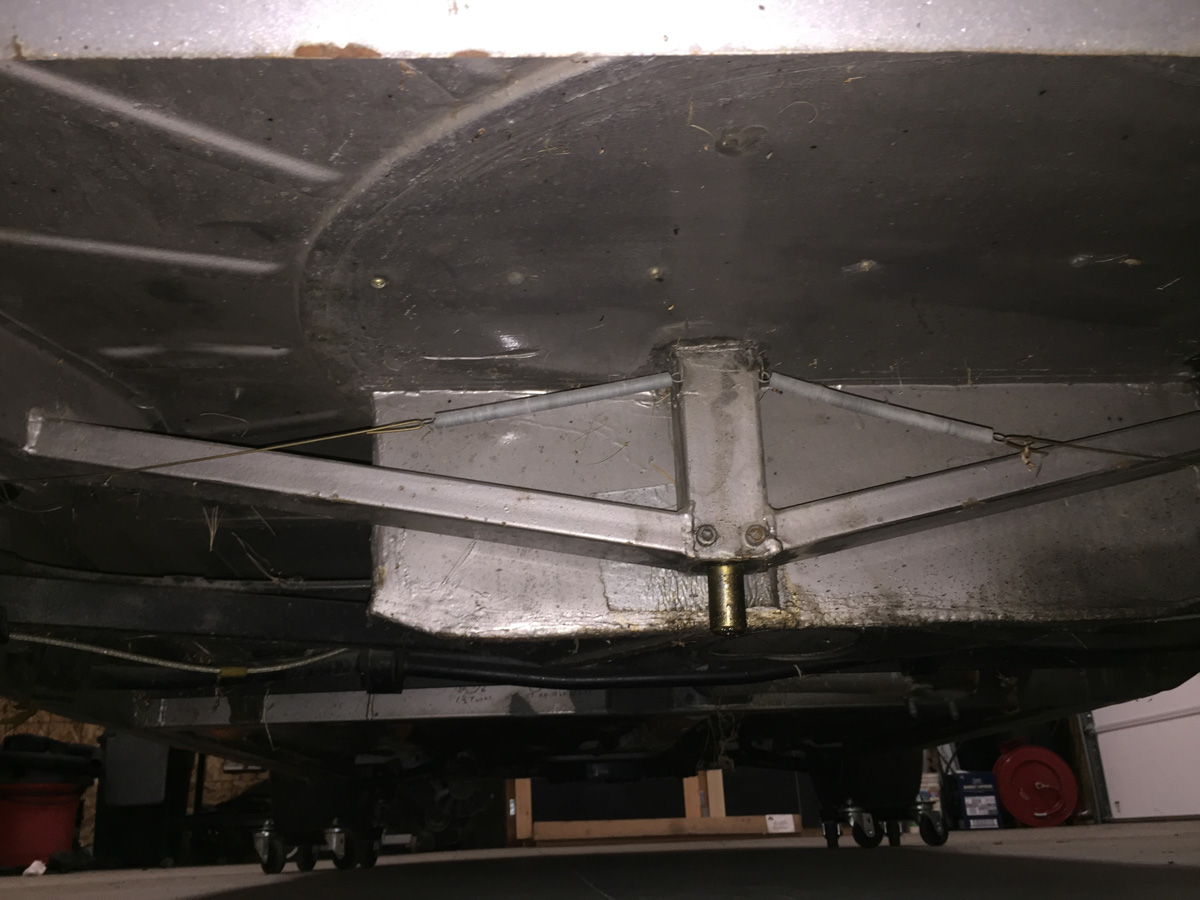
Okay… what are we looking at here? Where the rear seat would normally go, the section is now flat and very structural. Hmmm… might have something to do with rear suspension. More below.
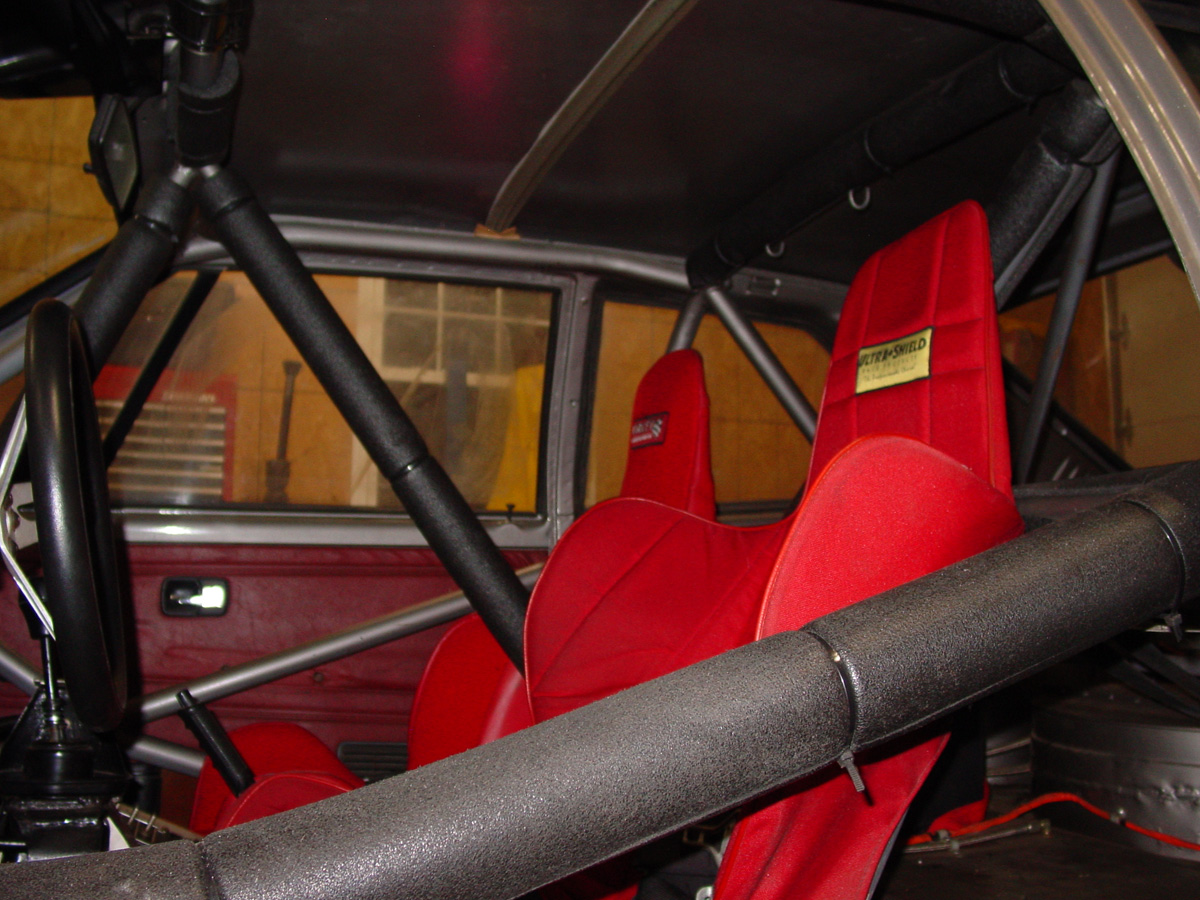
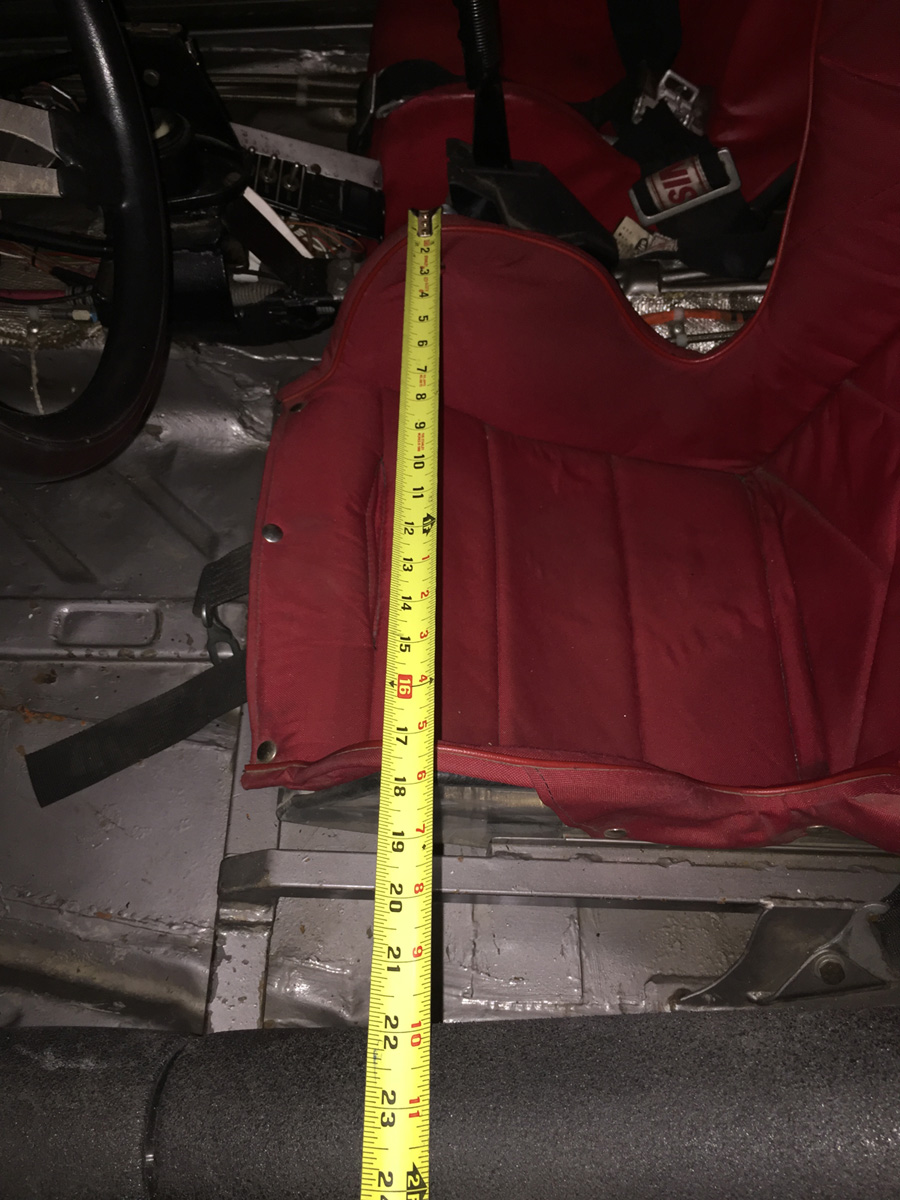
Another photo showing the location of the driver’s seat vs. the passenger seat.
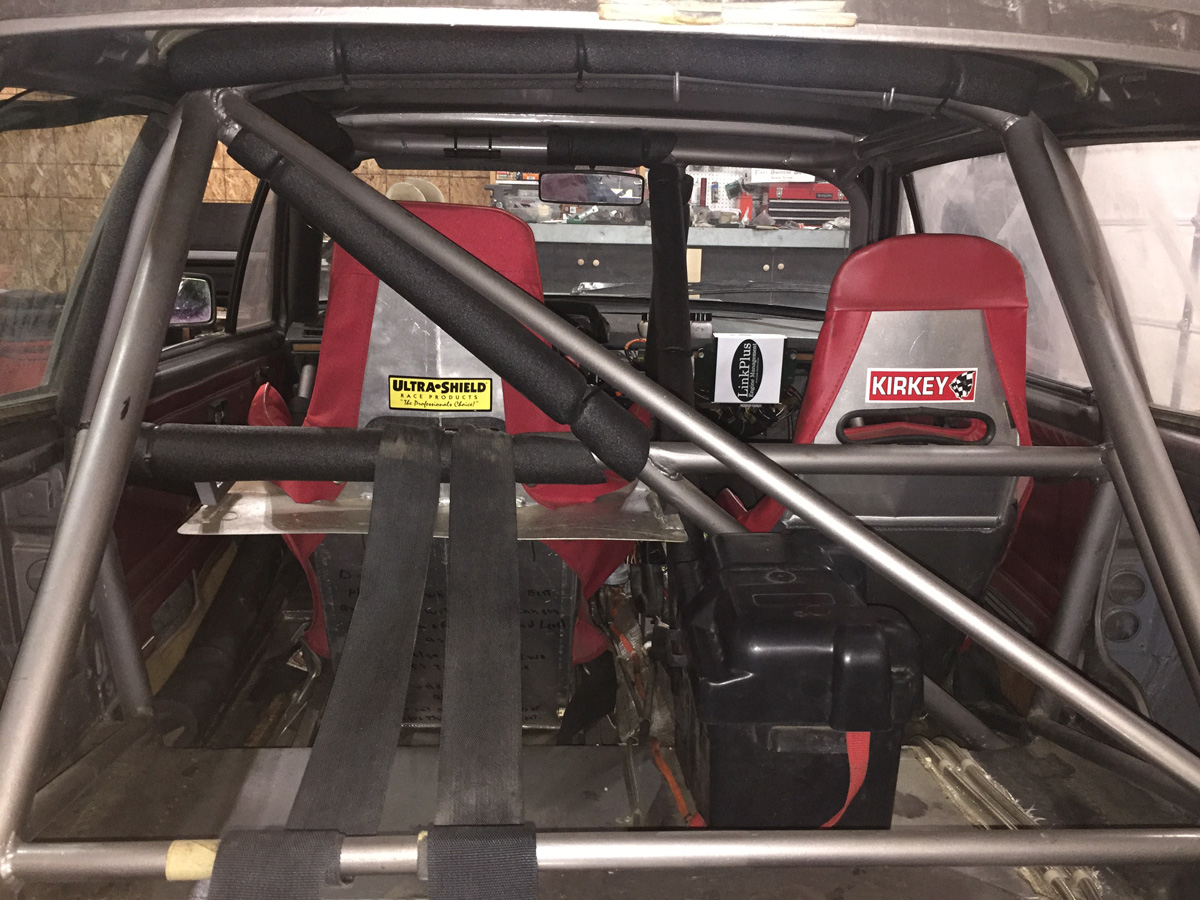
Small passenger seat.
Let’s move to the engine. When Bill built this 1.8T MK1 Scirocco, it was the only one I knew of at the time. I am not saying he was first, they just weren’t on my radar. The point is that because putting 1.8T engines in MK1 was relatively new, resources for mounting the engine and making it run were very limited.
Notice how the extra large radiator is mounted… more body modification that serves a function.
Brakes and suspension. I am unsure if Bill modified existing vented brakes or purchased them… I have never seen cross drilling holes this large.
Suspension is the typical two step springs. I forgot to check spring rates when I had the wheel off.

The crazy modified oil pan and transmission. I am surprised that he did not have a skid plate.
Now things get interesting.
Equal length driver and passenger axles. Carrier bearing addresses the distance issue.
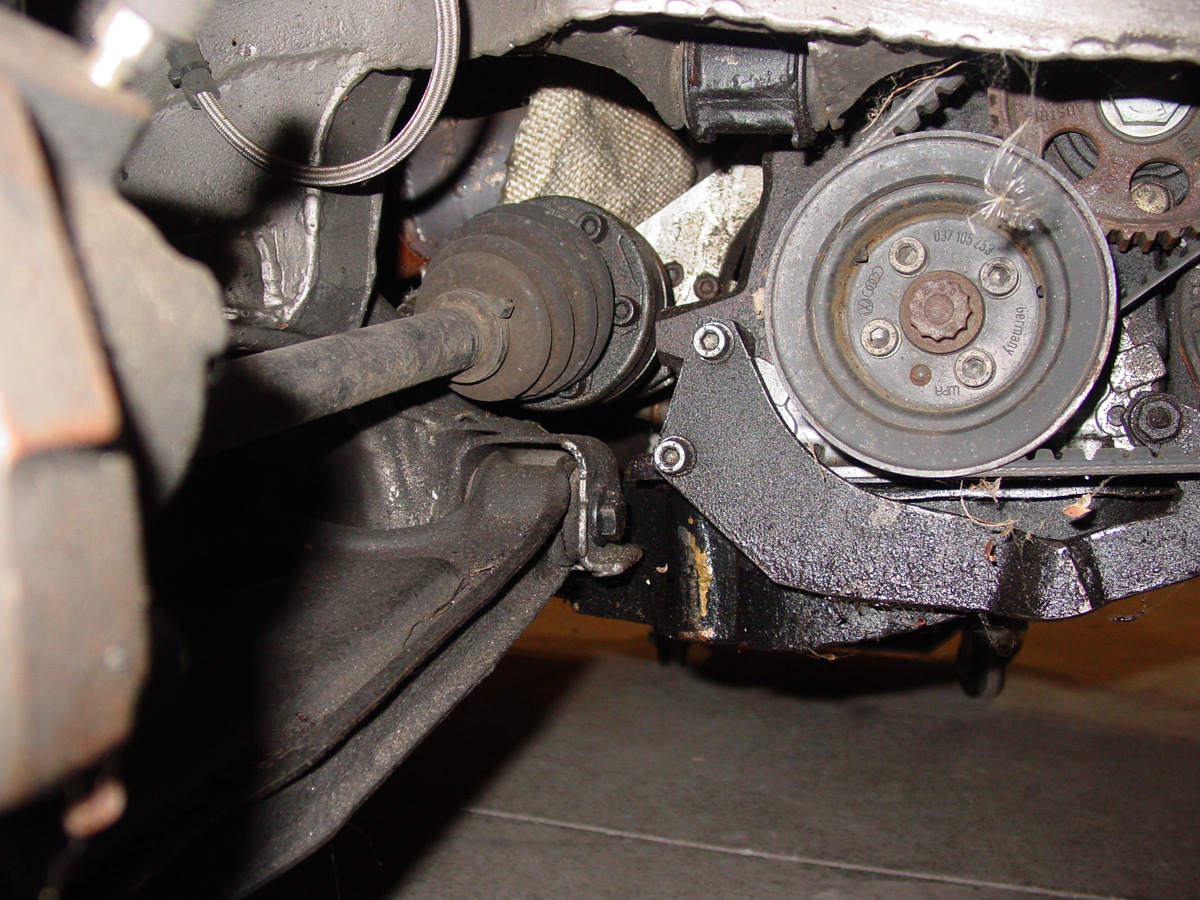
Not the best picture… I am trying to show the sub-frame. This should be helpful with the 02M installation as we can mount the dogbone (MK4 rear transmission mount to keep the engine in place) to the sub-frame.

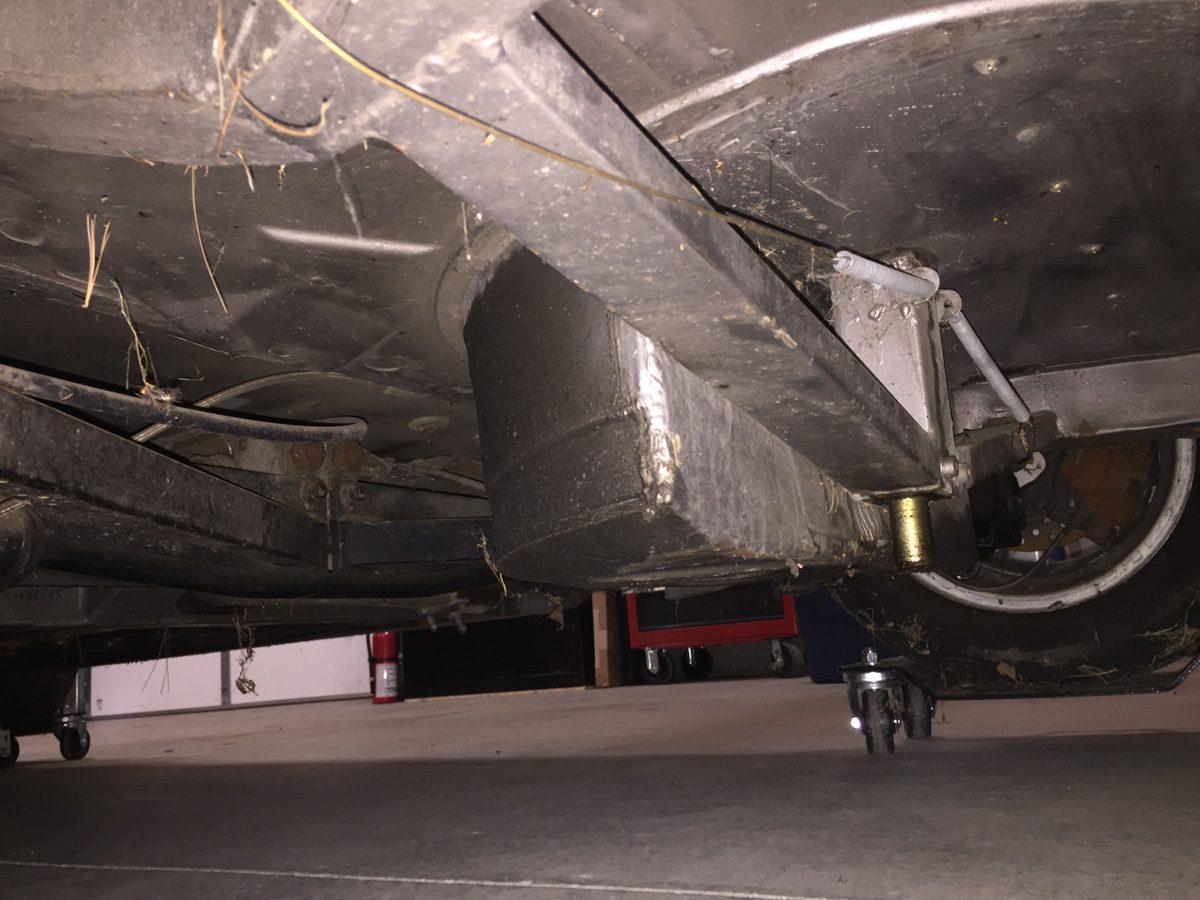
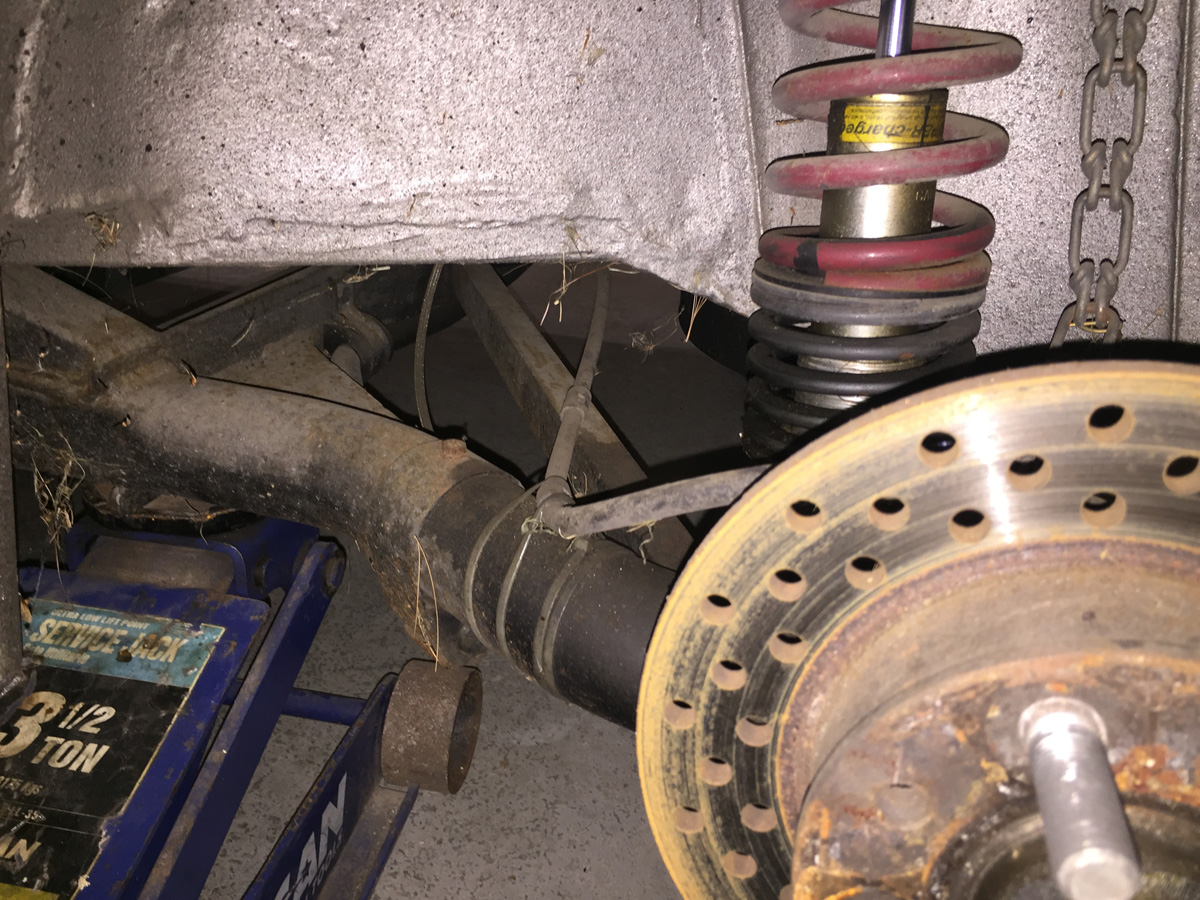
And now to the rear of the car. I do recall that Bill used to run full independent in the rear. I thought he did away with that with future modifications. I’m still not quite sure how everything works at the moment. When I get the car on a lift, I can get a much better understanding.
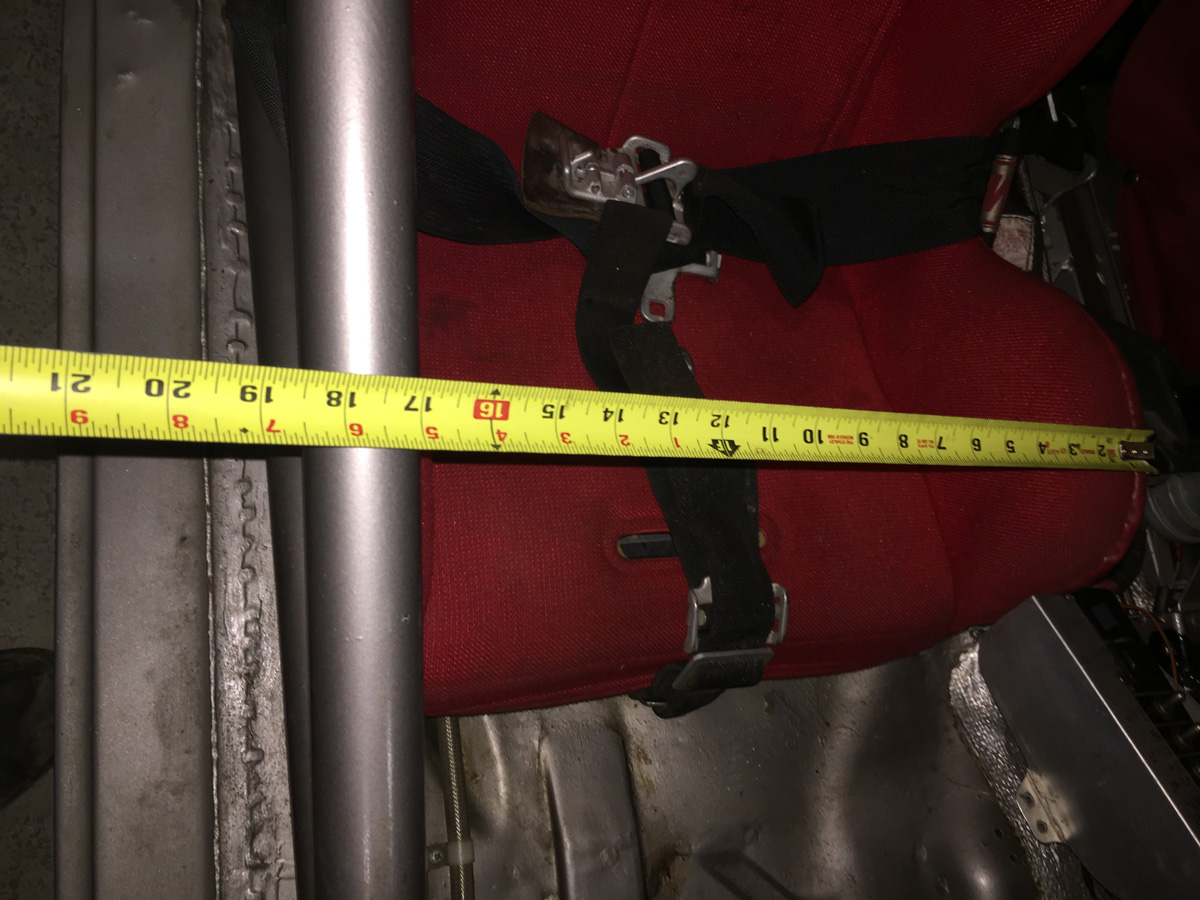
Got the tape measure to show distance from the inside edge of the seat to the outside edge of the roll bar. (approximately) Driver 23” passenger 18”
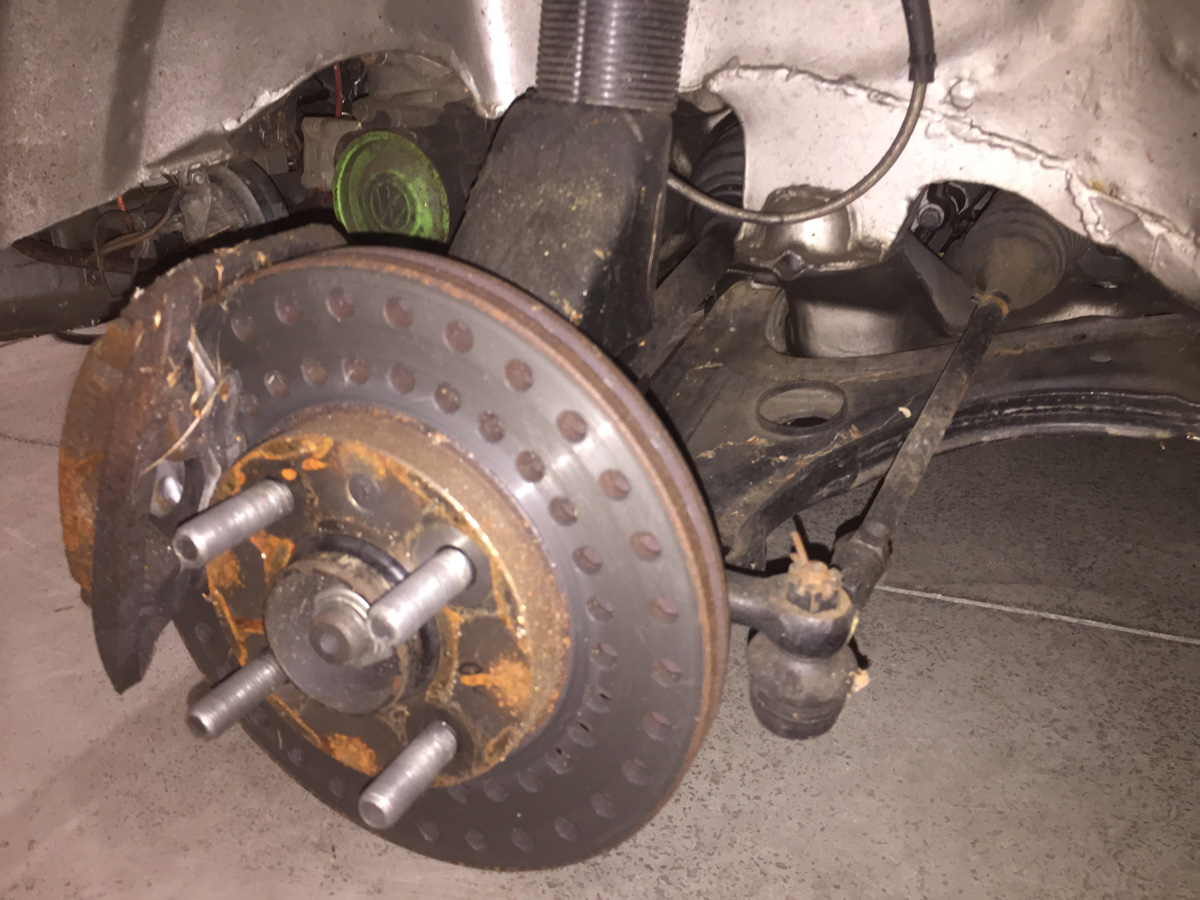
More shows of the suspension, brakes, control arms, and flipped tie rod.

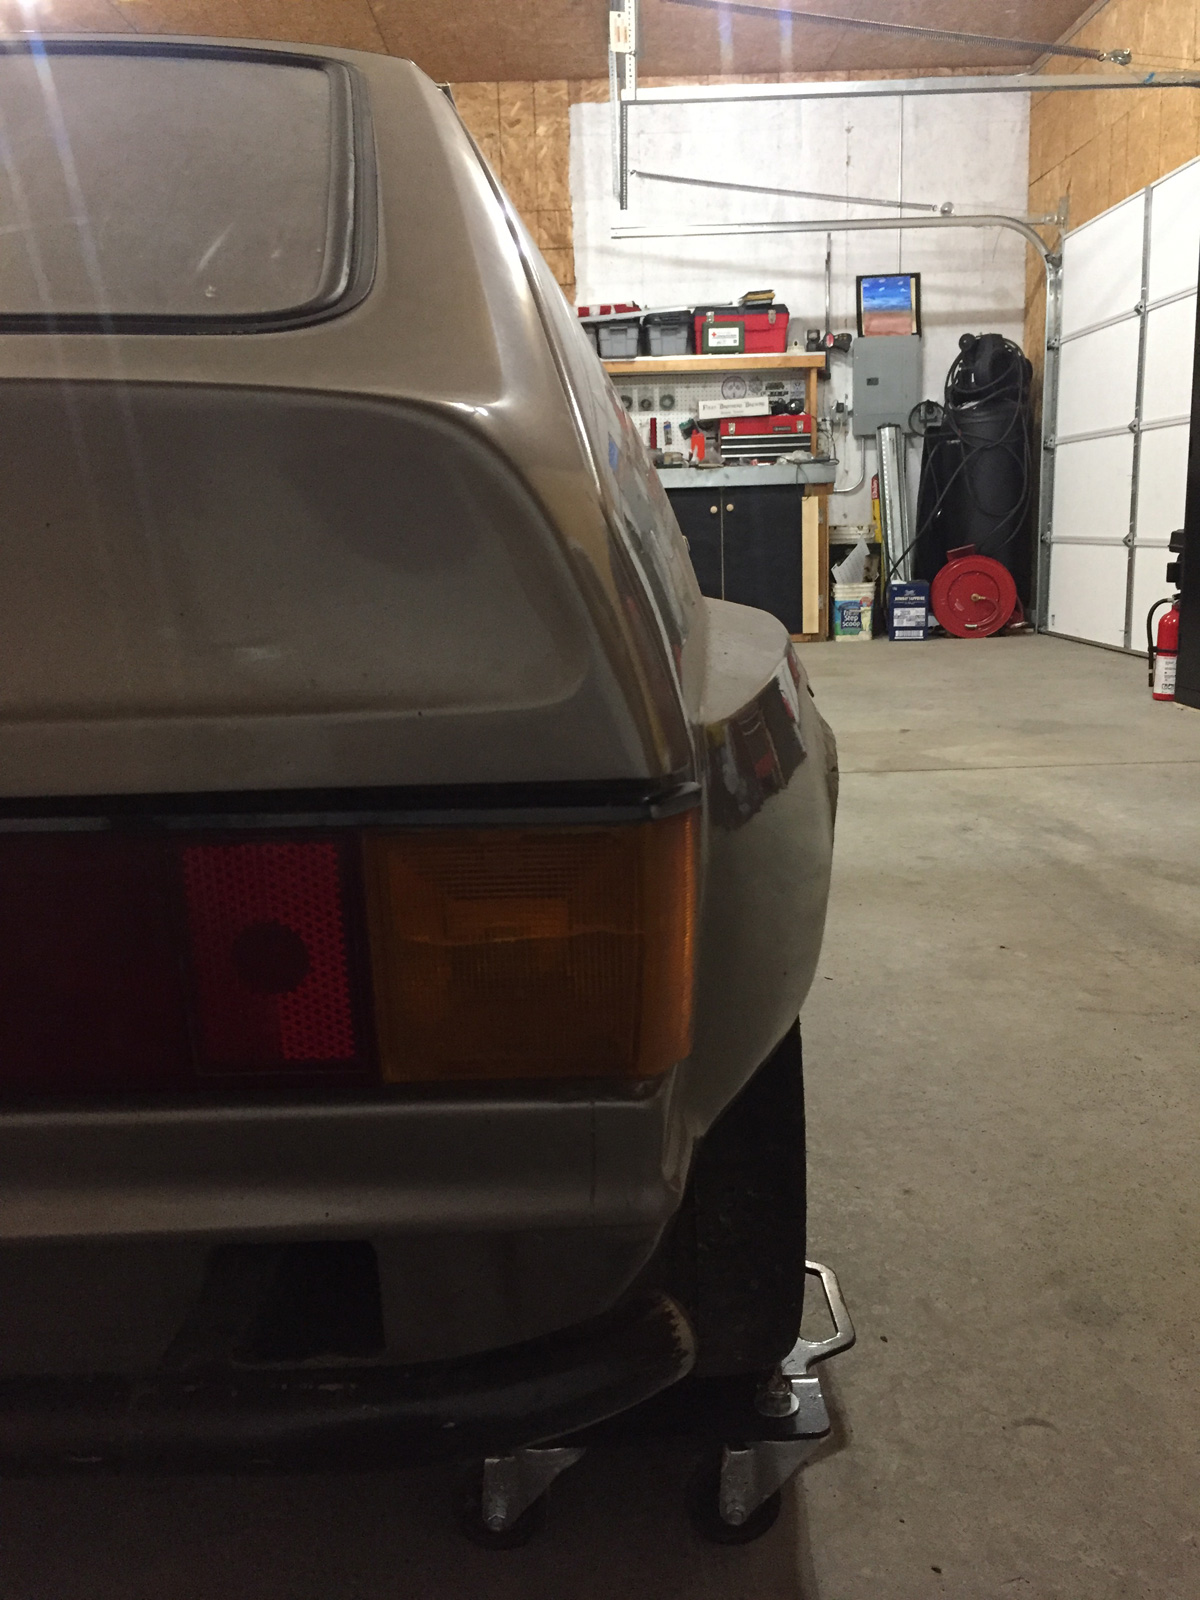
There is a lot of distance between the unibody and the edge of the fender. The car has 215 wide tires in the front. I think the rears are 185.
Well, that is about it for the night.
Thinks will get a little slower as I have to remove all the current wiring harness, take pictures and take notes, etc. to get the car rear for the fabrication and bodywork process. That will be a major stepping stone for this car.
Looking forward to it.
Oh… and the pictures should be uploaded “soon”… I’m on slow DSL and it will take some time to upload all the pictures.
First world problems, I know.
Enjoy!
Steve
So far I am on schedule.
Day one to remove all the excess parts that I am accumulated over the years in preparation for when I was ready to restore the car. (Done!)
Day two, as expected, took a very long time. I just wanted to capture all the neat modifications (and everything is modified!) in the car to set a base for the project. It is always nice to go back to photos to see where one started and to help putting everything back together.
I took a lot of photos and saved them HERE.
Below, I captured a lot of the details that warrant sharing at this time.
I am still guessing how the rear suspension currently works. Wow!
I do wish I noticed that the car had grass clipping hanging from spider webs so that I could have cleaned up before taking the pictures. Oh well… one day I will have this on the lift to be able to get much better photos of the underside.
Front shot of the car. You can’t quite get a feel for how low the car is because it is on caster dollies, but I did measure from the bottom of the transmission (while car was on the dollies) and it was approximately 7.5” to the ground. The dollies raise the car approximately 2.75” for a difference of… carry the two and divide by zero… about 4.75”. You will see in the images below that the bottom of the transmission bell was cut off and there is a custom oil pan to give the car some ground clearance.
Of course, this will be a challenge with doing the 02M… assuming it is even possible with trying to keep the look of the car and not having a transmission 1” off the ground.
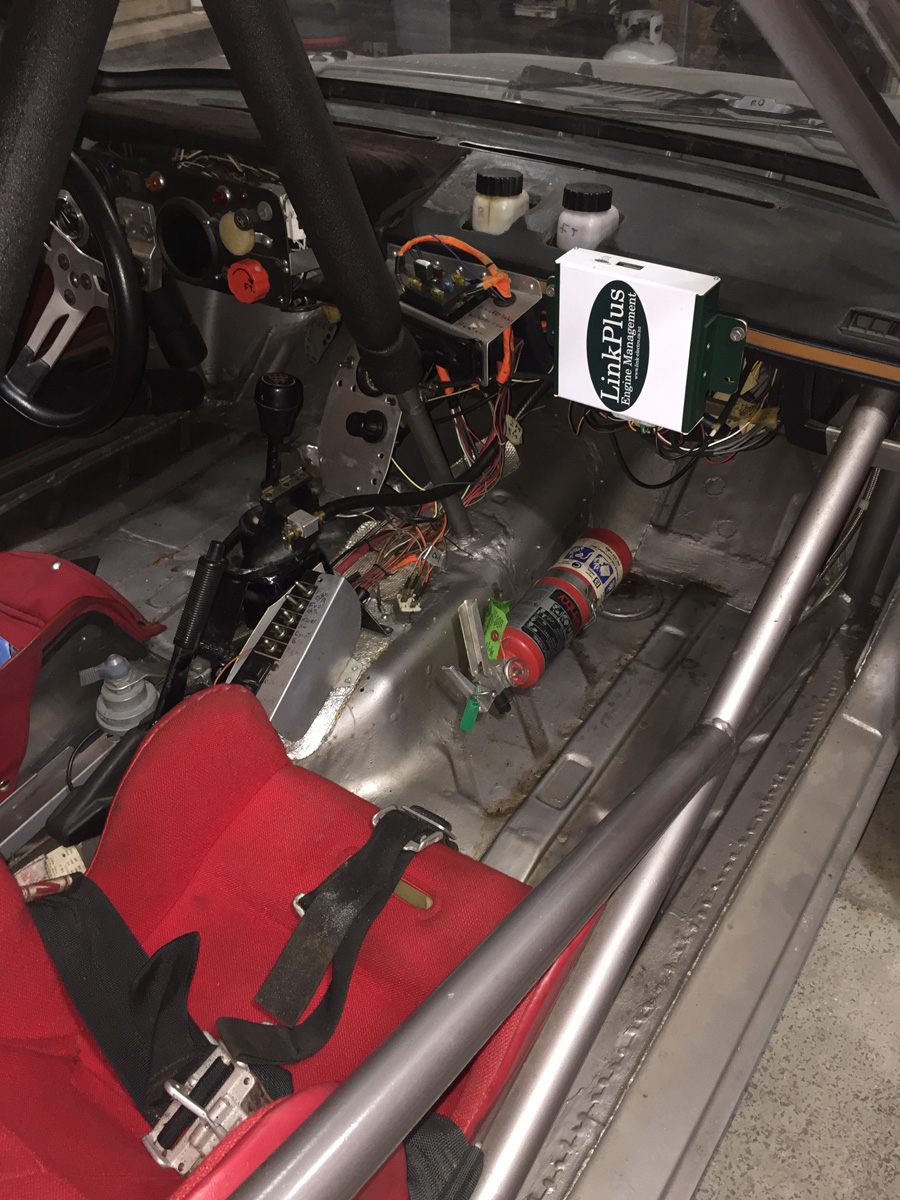
I will try to show in the pictures that follow how much the interior of the car has changed to move the driver closer to the center. The center tunnel has been moved towards the passenger side. You know, minor stuff like that.
Transmission is a 020 (typically Scirocco or Rabbit 5-speed) with the usual crazy spherical bearings for all connections from shifter to transmission. The shifter is also raised
A little help in the survivability department… additional bar in the (modified) center of the car.
Showing off the sexy fenders. Assuming I remember this correctly… the neat thing about the design of the fender was to allow this car to fit into the current rules that stated that the fender had to look stock from the side (stock profile, something like that). So, sure, looking dead-on 90-degrees at the side of the car, the straight out fender extension would technically not be visible, therefore, it meet the rule; it would not be considered modified/widened. Tricky. That lasted for one year.
Let’s move around to the rear. Lots of cage work and reinforcement (notice the added braces on the floor between the bulk head for the fuel system and the wheel wells.
Fuel system bulk head. I might add rubber seal to edge/lip.
Stuff inside that I need to determine exactly what is needed with my future setup.
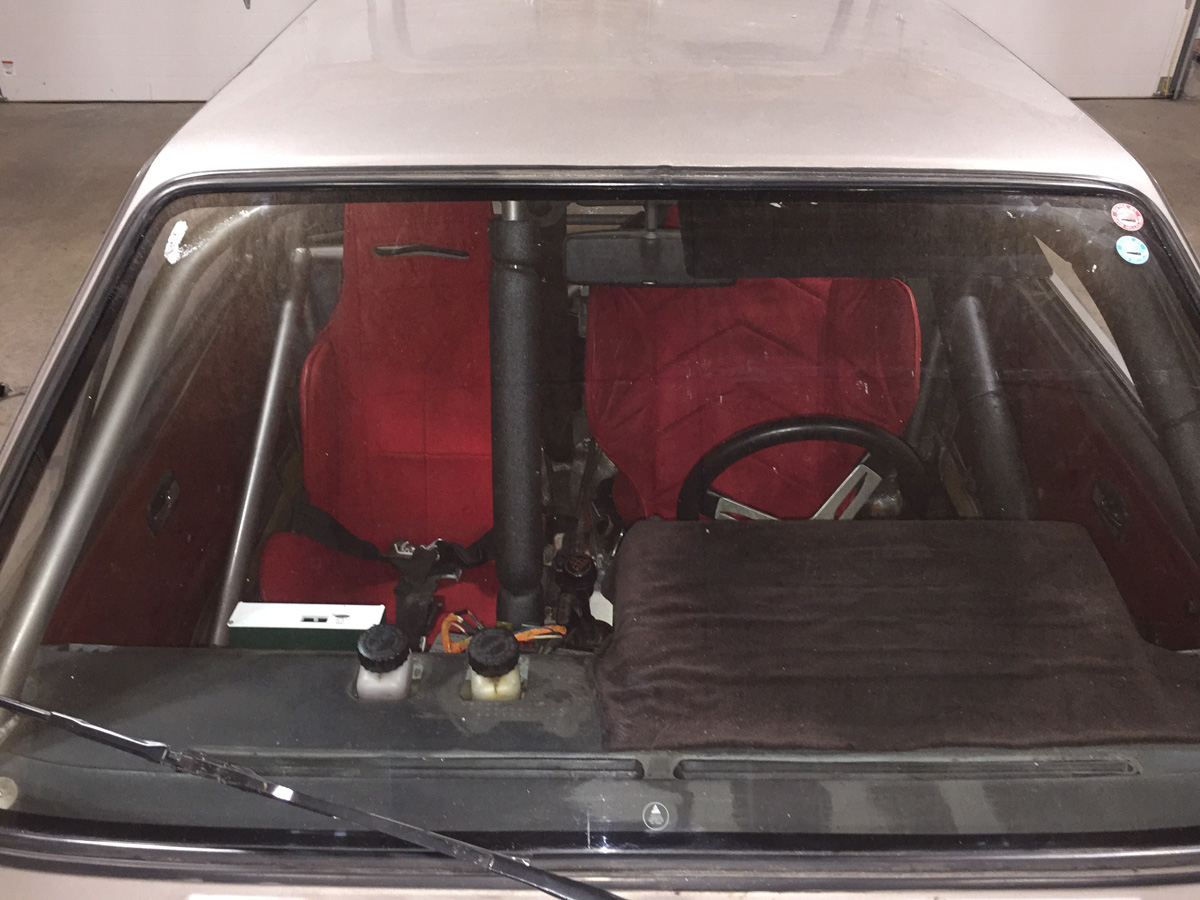
Okay… what are we looking at here? Where the rear seat would normally go, the section is now flat and very structural. Hmmm… might have something to do with rear suspension. More below.
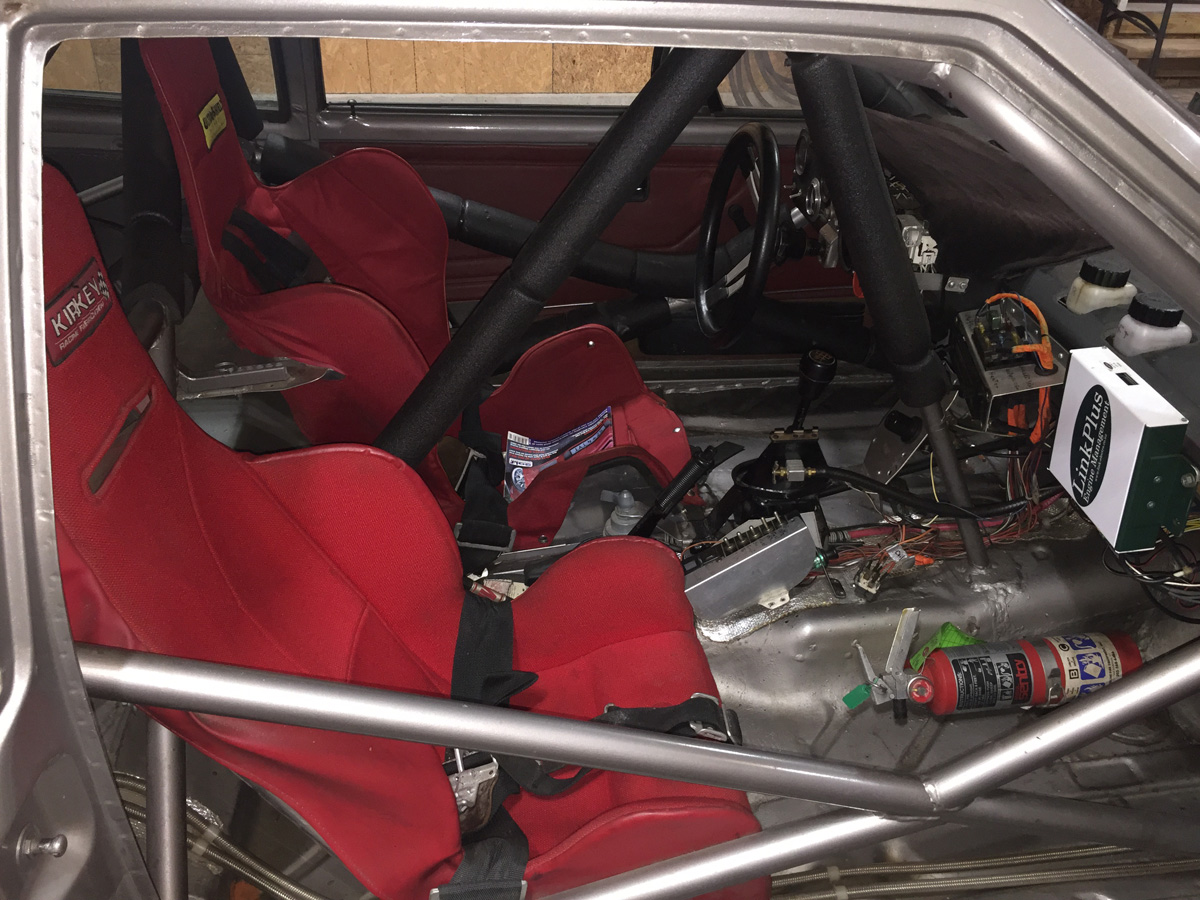
Another photo showing the location of the driver’s seat vs. the passenger seat.
Small passenger seat.
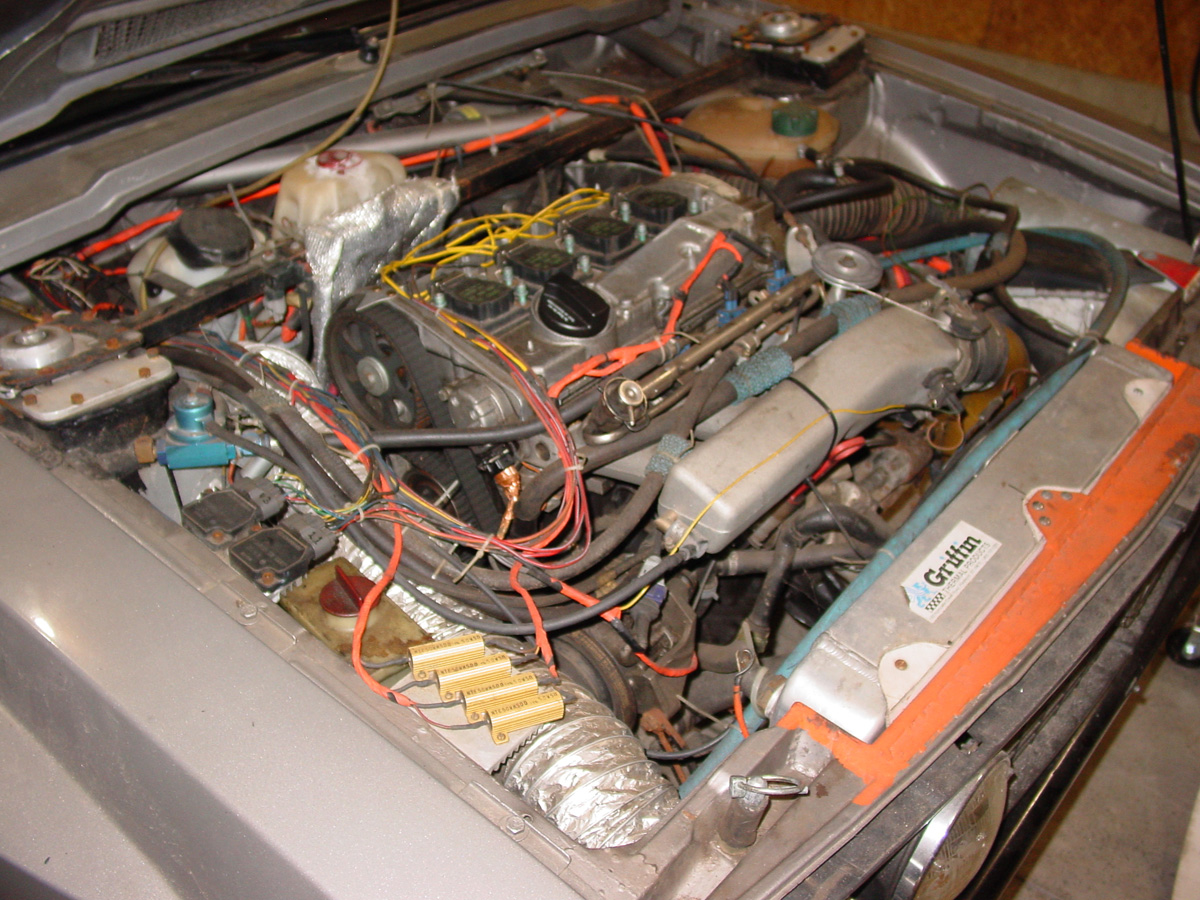
Let’s move to the engine. When Bill built this 1.8T MK1 Scirocco, it was the only one I knew of at the time. I am not saying he was first, they just weren’t on my radar. The point is that because putting 1.8T engines in MK1 was relatively new, resources for mounting the engine and making it run were very limited.
Notice how the extra large radiator is mounted… more body modification that serves a function.
Brakes and suspension. I am unsure if Bill modified existing vented brakes or purchased them… I have never seen cross drilling holes this large.
Suspension is the typical two step springs. I forgot to check spring rates when I had the wheel off.
The crazy modified oil pan and transmission. I am surprised that he did not have a skid plate.
Now things get interesting.
Equal length driver and passenger axles. Carrier bearing addresses the distance issue.
Not the best picture… I am trying to show the sub-frame. This should be helpful with the 02M installation as we can mount the dogbone (MK4 rear transmission mount to keep the engine in place) to the sub-frame.
And now to the rear of the car. I do recall that Bill used to run full independent in the rear. I thought he did away with that with future modifications. I’m still not quite sure how everything works at the moment. When I get the car on a lift, I can get a much better understanding.
Got the tape measure to show distance from the inside edge of the seat to the outside edge of the roll bar. (approximately) Driver 23” passenger 18”
More shows of the suspension, brakes, control arms, and flipped tie rod.
There is a lot of distance between the unibody and the edge of the fender. The car has 215 wide tires in the front. I think the rears are 185.
Well, that is about it for the night.
Thinks will get a little slower as I have to remove all the current wiring harness, take pictures and take notes, etc. to get the car rear for the fabrication and bodywork process. That will be a major stepping stone for this car.
Looking forward to it.
Oh… and the pictures should be uploaded “soon”… I’m on slow DSL and it will take some time to upload all the pictures.
First world problems, I know.
Enjoy!
Steve
Go Fast VW & Audi parts at FastAddiction.com
-
Rabbit Farmer
- Posts: 2260
- Joined: Wed Jun 25, 2003 11:37 pm
- AntiSpam: No
- Location: Earth
- Contact:
Re: Rabbit Farmer's various VW Projects
Been a while since I did a video.
The Burke #1 hillclimb on July 27-29, 2018 was a blast. As always, a great group of people, well organized, and good times. Thank you to all the organizers and volunteers that make these events both possible and successful!
The setup of my Golf makes it hard to do well at Burke because I am waiting soooo long for the power to come on after a sharp and steep corner that I slow down a lot... then the power comes on too much/too late, just in time for be to get off the throttle before the next turn.
Yep... there is a solution for that... a smaller turbo. We did try that route, just not enough. Without redoing all the exhaust work, our only (known) option was to get a small hot side to the turbo.
Car did very well at the bottom of the hill where speed was involved.
Anyway... Burke #2 is on August 17-19, 2018. (then Ascutney, Okemo!?, Philo)
Make sure to watch in 720 or 1080HD. Yep, the PIP video is slightly off from the main video. I couldn't figure out how to nudge the PIP video to sync them. Oh well, keeping my day job.
Enjoy
Steve
Go Fast VW & Audi parts at FastAddiction.com
-
Rabbit Farmer
- Posts: 2260
- Joined: Wed Jun 25, 2003 11:37 pm
- AntiSpam: No
- Location: Earth
- Contact:
Re: Rabbit Farmer's various VW Projects
So… we have a lot of catching up to do. Just closing out the 2018 season.
**SEP 2018**
Spent a fun and relaxing weekend at the Canaan track in New Hampshire on September 1-2, 2018 with the Sports Car Club of Vermont. The event is essentially an autocross using the full track. Saturday we cut out a section of the track (ran it counter clockwise), but used the entire track on Sunday (clockwise). I was told it wasn’t that big of a track, but the person that told me has been to Lime Rock, Watkins Glen, etc.
I brought my Subaru WRX for two reasons. I understood it was a small track and that my high-end turbo breathing FWD Golf might not have been best for the event. Turns out the Golf would have done just fine. The other thing was the plan to travel from VT with truck, trailer, and Subaru to NH for the weekend, then leave on Sunday with everything, parking the truck and trailer at a friend’s in NH, and then driving the WRX to RI for the next three days for a family visit. Naturally, a drive from NH to RI and back with a non-street legal, $12 a gallon race fuel, etc. car would not be the best answer. So… the WRX it is.
Link to track: http://www.canaanmotorclub.com/the-track/
There is a great video on that page of someone driving the entire track at speed.
Had a great time at the track, but left early for the trip to RI.
Looking forward to getting back there again in 2019.
**OCT 2018**
Last hillclimb of the year was the Historic Mt. Philo Hillclimb sponsored by the Sports Car Club of Vermont. I have been helping a great group of people make this event happen since 1999 (when I started hillclimbing… the event was around since 1975).
I drove about half of the runs, but was very limited with how well I could do because the tires were so thin. I was spinning in 4th in the straights. Decided to get some good times and park it early on both days… wasn’t going to improve much with limited traction from the tires that saw their first event at Mt. Washington in 2017. New tires in 2019!
Had a great time.
We are working with the state of Vermont to move the event to May in 2019. The first hillclimb at Philo was in May 1975. I guess we are getting back to where we started. Hoping that the weather in May is warmer than October. We will see.
Video from Philo… yep, that is snow in the video!
Make sure to watch in 1080.
Car was great all year with the exception of a problematic wire going to the fuel pump and a broken axle; both at Ascutney. Not a bad year.
Next update: The Scirocco
Go Fast VW & Audi parts at FastAddiction.com
-
Rabbit Farmer
- Posts: 2260
- Joined: Wed Jun 25, 2003 11:37 pm
- AntiSpam: No
- Location: Earth
- Contact: