Rabbit Farmer's various VW Projects

User avatar
Rabbit Farmer
Posts: 2260
Joined: Wed Jun 25, 2003 11:37 pm
AntiSpam: No
Location: Earth
Contact:

Re: Rabbit Farmer's various VW Projects

Post by Rabbit Farmer »

Image

No project pictures... just our two hillclimb cats (got them from fellow racer) Marley and Minion wanting to check out the mouse situation in the garage.

Just some notes so I recall what I did and what I need to do.

Reinstalled the skid plate, car is now sitting on the tires, wheels TQ'ed, and tire pressure adjusted.

Tires are Toyo R888R 235-40-17. I used 34 front and 30 rear at Mt. Washington in 2017 (with same tires).

Tires are set for 34/30 for Philo. Asctuney (more technical and more heat in the tires) will be a better indicator of a good tire pressure.

I did not use the two step spring setup in the front; just ran the single main spring. Now I need to remember the hub to fender lip height to adjust the coilovers.

Tuning is this Friday on 93 octane pump fuel.

Steve
Go Fast VW & Audi parts at FastAddiction.com
User avatar
Rabbit Farmer
Posts: 2260
Joined: Wed Jun 25, 2003 11:37 pm
AntiSpam: No
Location: Earth
Contact:

Re: Rabbit Farmer's various VW Projects

Post by Rabbit Farmer »

Adjusting the coilovers...

Stock is 15.5” front and 15.25” rear measuring from the center of the wheel to the lip on the fender.

I wasn't too accurate with the fender lip to center measurement. I just needed it to get understanding of approx where everything is sitting.

I didn't change anything in the rear from the original Gaz install, therefore, this is height that I am working with.

Wheel location | Fender Lip to Ground | Fender Lip to Approx Center of Wheel
Front Left | 25.00" | 13.25"
Front Right | 25.50" | 13.75" (half inch higher on right front vs. left front... visually noticeable)
Rear Left | 26.00" | 14.00"
Rear Right | 26.00" | 14.00"

The left front is the new strut... I just didn't measure everything accurately when counting coilover threads compared to the right side.

Both fronts are lower than expect because of the removal of the tender spring.

Looking at the rears, my current ride height (14.00) is 1.50" lower than stock of 15.25"

Ergo... I need to do 1.25" lower than stock on the fronts.

(multiply by the square-root of eleventeen and carry the two)

My goal should be 14.25" in the front (15.50" stock minus 1.25" lowering).

Steve
Go Fast VW & Audi parts at FastAddiction.com
User avatar
Rabbit Farmer
Posts: 2260
Joined: Wed Jun 25, 2003 11:37 pm
AntiSpam: No
Location: Earth
Contact:

Re: Rabbit Farmer's various VW Projects

Post by Rabbit Farmer »

This morning was spent in the garage adjusting the height of the front of the car and installing the new darker shield on the helmet.

I realized I did some overthinking on the front suspension. Duh.

Rear is 26" fender lip to floor. Front of car should be 0.25" higher than the rear, so it is as simple as making the fronts 26.25"

They are now 26 and 1/16". Close enough.

I also installed a darker shield on my helmet. I don't race with the shield down, and there is no requirement for me to have a shield (I could use an open face helmet), but I like having the shield for better protection in emergency situations (fire for example).

I don't normally wear sunglasses at the hillclimbs as there is a lot of sunny to dark transitions while navigating the treelined course. My old eyes don't like sunglasses with the dark parts.

So, I use the helmet shield as temporary sunglasses as needed... the shield is down a little from all the way open so that I can tilt my head down a little to utilize the bottom edge of the dark shield. Pretty snazzy.

I purchased a "light" tinted shield last year and realized that wasn't nearly dark enough... ordered the "dark".

Image

Fiddled around with the install to ensure all the pieces were correct.

Pre-Caffeine brain... I accidentally missed the ring that was mounted to the hole in the shield and couldn't figure out why it was loose when assembled.

Here is the correct install (each ring snaps in)

Image

Image

Image

Image
Go Fast VW & Audi parts at FastAddiction.com
User avatar
Rabbit Farmer
Posts: 2260
Joined: Wed Jun 25, 2003 11:37 pm
AntiSpam: No
Location: Earth
Contact:

Re: Rabbit Farmer's various VW Projects

Post by Rabbit Farmer »

Tonight's fabrication adventure once again proves to me that I cannot make a living making things.

I just needed a basic (and temporary) bracket to hold the ignition switch and USB power.

I think I swapped the entire front suspension in less time than it took to make the bracket.

I took a piece of 2" x 1/8" x 36" flat bar aluminum... that I purchased in 2018 for some project that I don't seem to have started.

Cut to length, bent it with sledge hammer using the vise as a metal brake, blocks of wood for the form, got to use my new rivet nut driver for the 6mm inserts, and use old bolts in the parts bin. Drilled 1/8" holes and tapped them with 4mm tap to mount the ignition switch.

I lost one bolt twice... it had a 10mm head, so I figure that had something to do with it.

Functional, but not pretty. I do plan to do an entire switch panel in the large open space, but didn't want to get into it until after the first two events. Going to get someone with a swear-wording lot more talent than I with fabrication when doing the full panel.

Image

Image

Car is essentially ready to go. I need to adjust the shifter. VEMS on Friday Apr 28 for the tune. If all goes well, I'm ready.

Image
Go Fast VW & Audi parts at FastAddiction.com
User avatar
Rabbit Farmer
Posts: 2260
Joined: Wed Jun 25, 2003 11:37 pm
AntiSpam: No
Location: Earth
Contact:

Re: Rabbit Farmer's various VW Projects

Post by Rabbit Farmer »

Dyno results and information coming soon.

Tuned on 93 octane pump fuel.
New EGT/air fuel gauge in pod on steering column.
Tuned associated with gear (for example, wastegate pressure only on first gear, moderate power on second, and all boost on other gears).... and, I can change it myself with a laptop.

Good power numbers where it counts... surprisingly, the max HP wasn't that far off of what I had before.

Nick at VEMS did a great job creating a safe and performance oriented tune. Looking forward to getting it on the hill.

Jason at VEMS pictured here.

Image

Image

Image
Go Fast VW & Audi parts at FastAddiction.com
User avatar
Rabbit Farmer
Posts: 2260
Joined: Wed Jun 25, 2003 11:37 pm
AntiSpam: No
Location: Earth
Contact:

Re: Rabbit Farmer's various VW Projects

Post by Rabbit Farmer »

Results of the 93-octane pump gas tune with the new VEMS ECU is awesome.

I'm very impressed with the options available both from the experience tuner level and me, the mere mortal.

Nick at VEMS (Colchester, Vermont) tuned the car at many levels of RPM and boost pressure to create a range of performance between 18 psi and 24 psi that now allows me to select boost by gear.

I need purchase a simple laptop to plug into the VEMS ECU so that I can add or subtract boost (units are KPA, so I will have to look up what that means in Bar or PSI) in each gear.

We setup first gear at wastegate pressure (about 13psi of boost / ~190kpa) , second gear a bit more aggressive (I think using the 18 psi setting) with all other gears at 24psi.

The VVT seems to ramp up the low end power nicely.

Very happy with the tune and all options available. Looking forward to the first hillclimb to see how it impacts my times.

The previous tune on $21 gallon VP Racing C12 leaded race full yielded 383 wHP.

On pump, we are looking at 357 wHP / 334 ft-lb TQ at 24 psi and 302 wHP / 275 ft-lb TQ at 18 psi.

EGT and AF all look good across the range.

Technical stuff for me when I am looking to make changes to the boost for each gear and understanding the new EGT/AF gauge:

100 kpa = 1 bar = 14.5 psi
100 kpa or less is vacuum / over 100 kpa is boost
200 kpa = 14.5 psi of boost; 250 kpa = 21.75 psi of boost

Car is tuned at 224 kpa (18 psi) and high of 265 kpa (24 psi). Anywhere under 265 kpa is safe.
0% duty cycle on boost settings is `190 kpa (13 psi) waste gate spring

Air Fuel gauge is in Lamba: Stoich is 1.0, rich is lower, lean is higher. "Full rich" is 0.8ish.

Thank you to Jason and Nick at VEMS! https://www.facebook.com/VEMSUS

Steve

Image
Go Fast VW & Audi parts at FastAddiction.com
User avatar
Rabbit Farmer
Posts: 2260
Joined: Wed Jun 25, 2003 11:37 pm
AntiSpam: No
Location: Earth
Contact:

Re: Rabbit Farmer's various VW Projects

Post by Rabbit Farmer »

Burke 2023 hillclimb was fun; great seeing the usuals and new people. Well run event (two first-timer chairs) with lots of runs.

There was a lot of rain in the evening, but the days were pretty good. Very wet road on Sunday so I skipped a lot of runs as it was too slippery to put the power to the road.

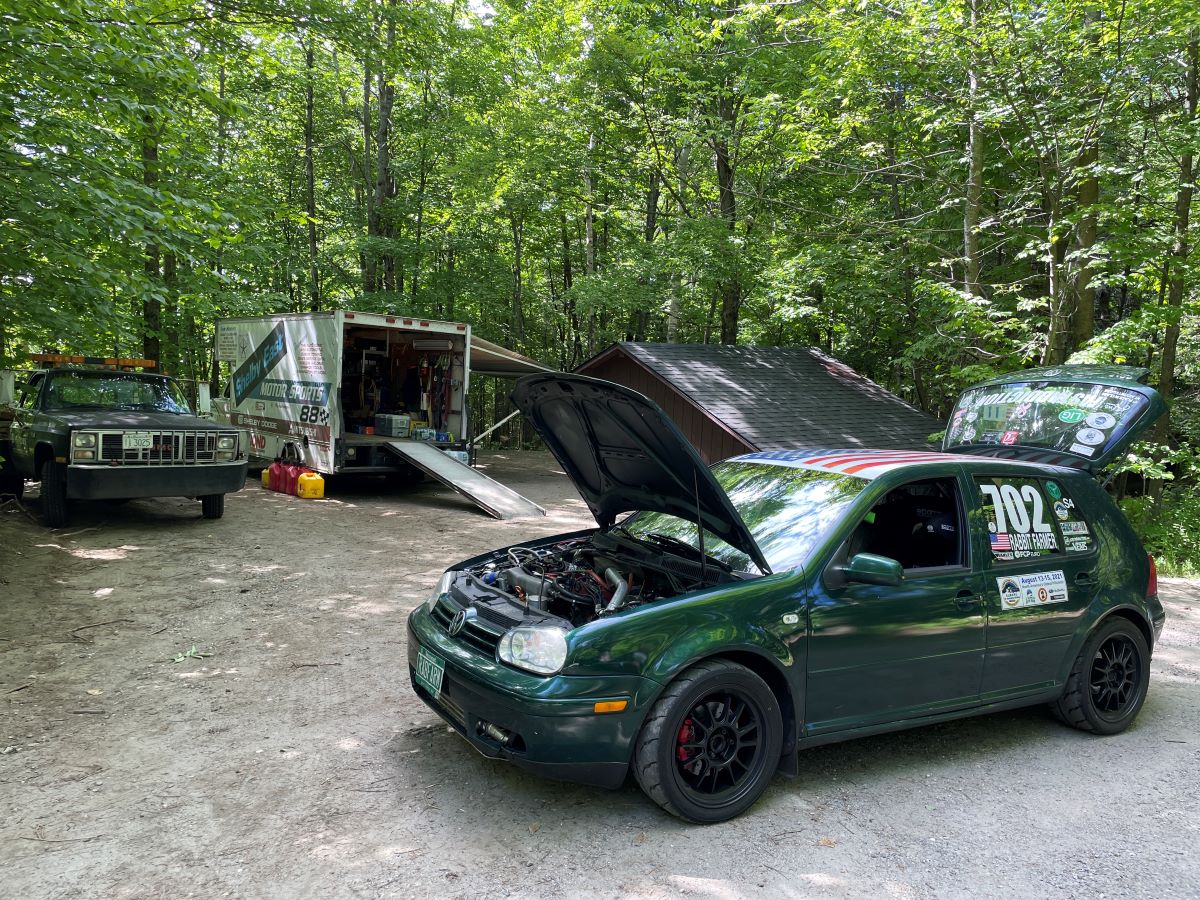
First one at tech inspection on Friday.

Image

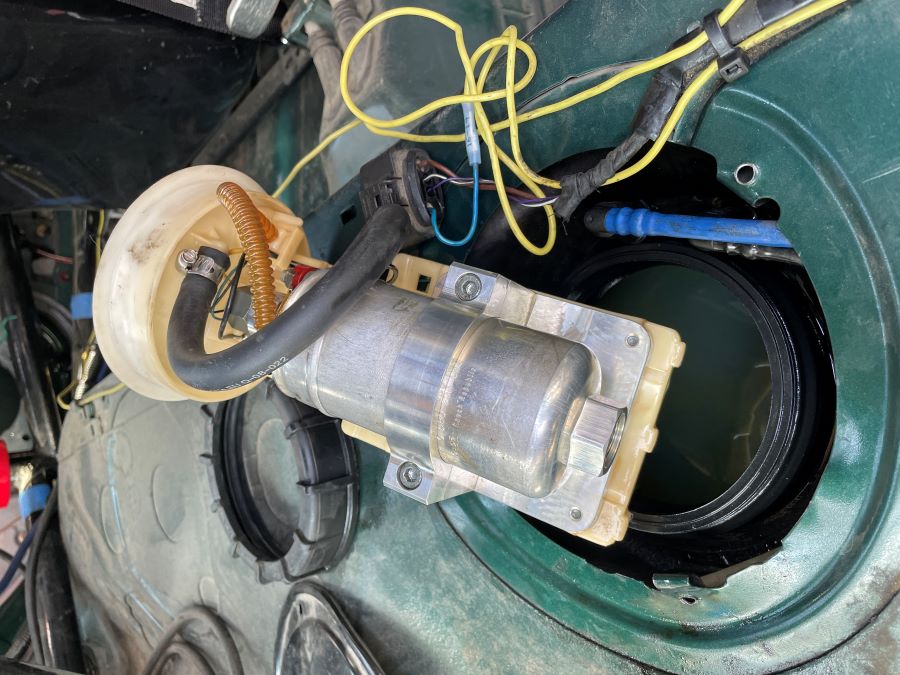
Before the weekend, I replaced the fuel pump seal. It seems with the monkeying around with pumping the race fuel out of the tank earlier this year, I dorked up the seal.

Image

Three problems at the event.

On Saturday I noticed that my car was running hot while waiting in line to go up the hill. Since I was next in line to practice, I drove up the hill pretty slow just to get air going over the radiator. Cooled everything down.

At the top of the hill, I checked all the coolant hoses... they were all hot (means it isn’t the thermostat not opening). But... the fans weren’t running.

I turned off the car to poke around. Started the car again and pushed the AC button. I recall that the fans run full speed with the AC is on. Of course, I have no idea if this works on my car because so many stock wires were removed and there is no AC present.

But... the fans were now running. Pushed the AC button off and the fans still ran. Seems I had a correlation/causation fallacy.

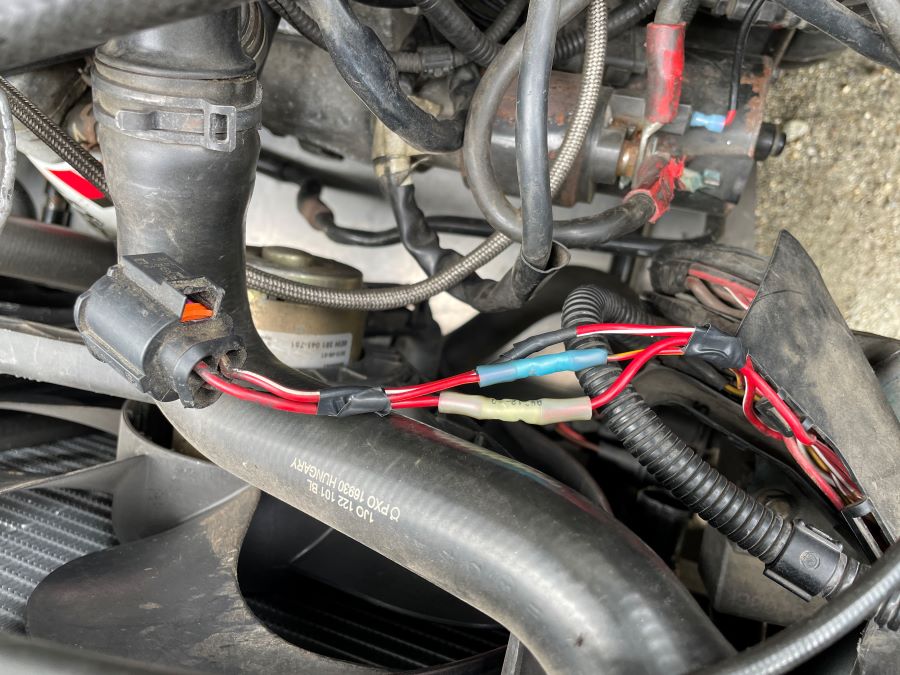
Turns out it was simply some cut wires on the fan switch. The wire raceway was no longer connected to the car; this allowed the wires to come in contact with the sharp edge of the fan. Was able to fix thanks to fellow competitors with tools/parts.

Image

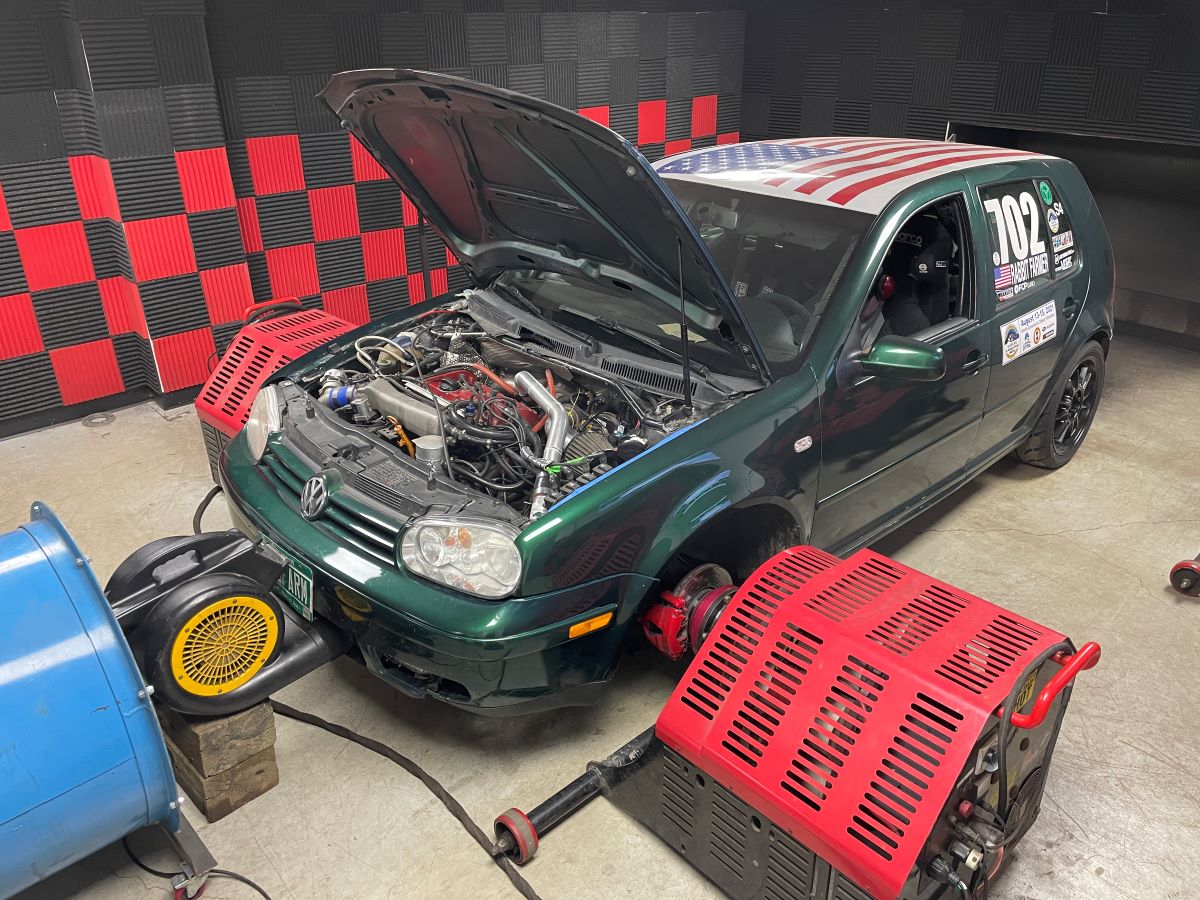
I could also smell coolant (since the first hillclimb of the year), but didn’t locate the source until this weekend. The -6 AN fitting for coolant that connected to the turbo was leaking.

It was hardly leaking, but we decided to see if we could fit it. Nope... made it much worse!

Thankfully, Joey (Kales Fabrication) was coming to the event on Saturday night and brought extra fittings and hoses. We did a temp fix with two premade hoses. Something to address in the next few weeks.

Image

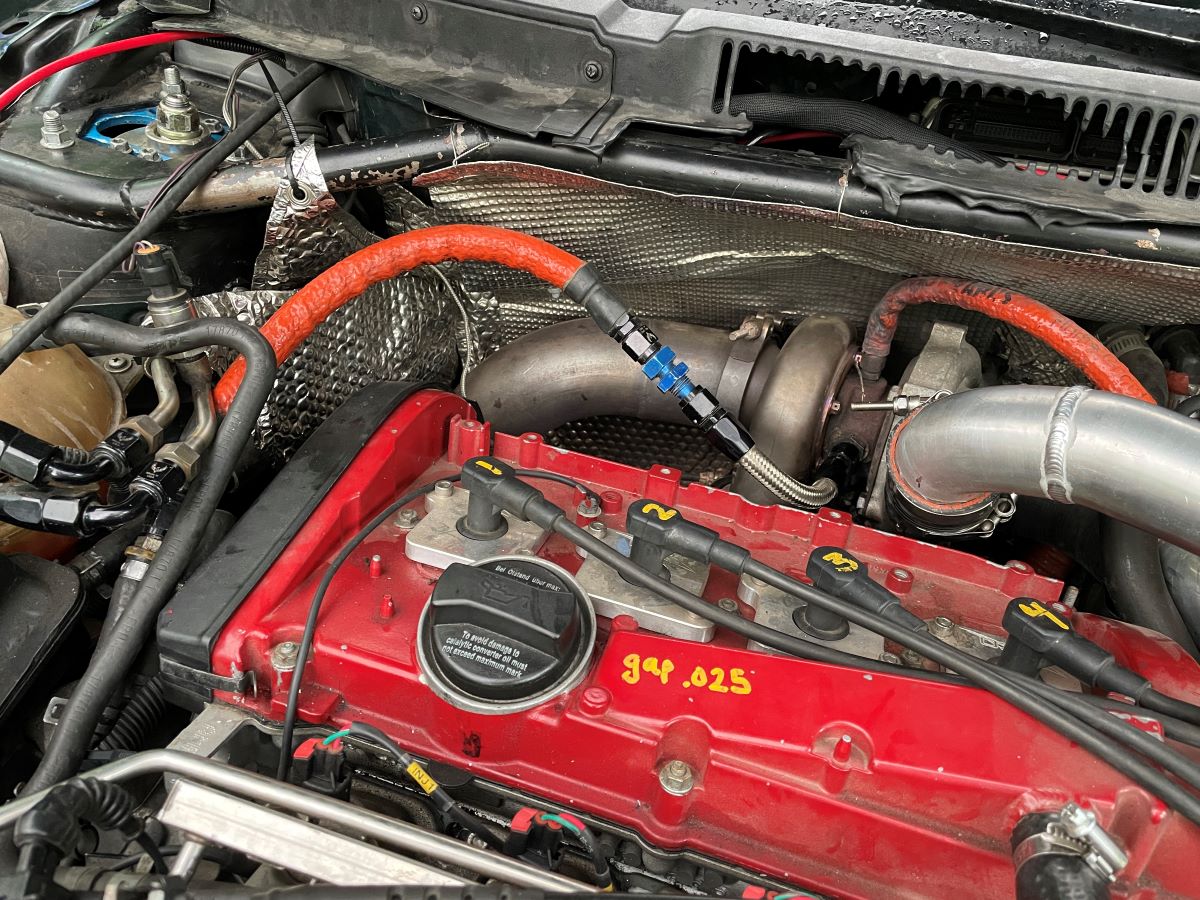
The biggest problem was discovered when we were fixing the coolant line. The hot side of the turbo was loose... it was able to wiggle and rotate on the center housing. We checked the bolts and what we could easily access were tight.

Will have to take the turbo apart over the next few months and figure out a solution.

I believe I will replace the timing belt/manual tensioner/water pump at the same time.

Two months until the next event... good time to start is this week.
Go Fast VW & Audi parts at FastAddiction.com
User avatar
Rabbit Farmer
Posts: 2260
Joined: Wed Jun 25, 2003 11:37 pm
AntiSpam: No
Location: Earth
Contact:

Re: Rabbit Farmer's various VW Projects

Post by Rabbit Farmer »

Day 01: Scirocco

Remove 1.8T AEB engine with 5-speed 020. Next step is to determine how to make the 1.8T non-AEB engine with 5-speed 02J cable shift work.
Will have to work around the MK2 subframe and other front end modifications. This is a different animal than other Sciroccos with the extensive modifications to the structure of the car.

Image

Update: 2001 VW Golf 1.8T

At the Burke hillclimb as we were fixing the turbo coolant line, we noticed there was play in the turbo where it would allow the hot side (Turbine) to rotate on the center section... and all the bolts were tight.

Joey and I removed the turbo and Joey brought it to his shop to check the play in the shaft and what needs to be done to tighten the turbine side to the center section.

Begosh... it's busted. Bearing shot in center section. Determining options... same center or different turbo.

Image
Go Fast VW & Audi parts at FastAddiction.com
User avatar
Rabbit Farmer
Posts: 2260
Joined: Wed Jun 25, 2003 11:37 pm
AntiSpam: No
Location: Earth
Contact:

Re: Rabbit Farmer's various VW Projects

Post by Rabbit Farmer »

I got side tracked with a week long stay-cation where I wasn't able to do anything on my 'to-list'. But, I was committed to completing one project... replace the fold out ramp and hinge on the enclosed trailer ramp.

The hinge was damaged when my car was a bit too low and the skid plate was fighting back. The hinge worked, but would bind.

The ramp board split... too thin in my opinion and not pressure treated lumber.

Hinge was about $100, new hardware around $40, and the PT plywood was effectively free as it was leftover from another project.

Image

Image

I took the grinder to the top edge of the ramp (under where the ramp mounts) to address surface rust and did a few coats of Rust-Oleum paint.

Image

The old ramp used screws (which were all loose) and 4 Tee Nuts; I installed 5 stainless steel long prong tee nuts (3/8-16, 7/16 x 1). I figure one more bolted connection would be better.

Image

Image

I finished the project around 9:30pm. I still need to add some aluminum trim pieces to the edges of the ramp to protect the wood.

Image
Go Fast VW & Audi parts at FastAddiction.com
User avatar
Rabbit Farmer
Posts: 2260
Joined: Wed Jun 25, 2003 11:37 pm
AntiSpam: No
Location: Earth
Contact:

Re: Rabbit Farmer's various VW Projects

Post by Rabbit Farmer »

Finally done with ramp. Instead of using thin L channel, I used thicker aluminum 3/4" C channel to wrap around the entire leading edge of the ramp along with the sides.

I tried... I really did... to make 45-degree cuts without a miter. Nope. I was lucky to get a straight cut.

So... I cut a corner by not cutting corners. Wocka Wocka (which is the correct spelling of Fozzie Bear's post-punchline)

1.25" screws in the edge and 3/4" along the top and bottom.

Image

Image

After I was done I decided that I would take the Subaru for a drive since it has been in storage for over 3 weeks since the Volkswagens are getting my attention in the garage.

I was closing the ramp door to keep varmint out while I went to change... noticed that all three of the ramp bumpers that hold the ramp off the ground were loose.

Spent time tightening the bolts (all had good purchase) and decided a shower and the couch was in order. No driving the Subaru for a little while now.
Go Fast VW & Audi parts at FastAddiction.com
Post Reply