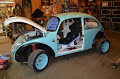
My '86 GTI build

User avatar
walterclark
Posts: 1442
Joined: Sun Feb 08, 2009 12:57 pm
Location: Dover, MA.
Contact:

Re: My '86 GTI build

Post by walterclark »

Today's project was cutting the access points and mounting the cables and shifter to the pedestal, then mounting the pedestal in the car. I used 1/4" bolts and Rivnuts in the tunnel to mount it to the car

Image

Image

Success! It even shifts pretty cleanly. I think it may need a slight adjustment to dial in the 1-2 gate guide but that will wait until later. The pedestal still lacks having the front and back end flaps attached, and the lower back is not yet made or attached, but the pedestal is quite strong anyway. Next I will cut the back lower cover and attach it with machine screws to the pedestal and a bolt to the tunnel, attach the front flap, then remove the whole thing, trim the flap edges a bit and clean it up.

So far, actual money spent on this is $20. I wanted to replace the white plastic thing the shifter pivots F-R with and slides down in because the pivot bushing is well worn, and I needed to put a new 9mm C-clip on that shaft since it was missing. The new plastic piece arrives tomorrow. Otherwise everything is from stuff I had on hand already.
The older I get the better I was.
User avatar
KevinGale
Posts: 836
Joined: Thu Sep 04, 2003 3:01 pm
Location: Sutton, NH

Re: My '86 GTI build

Post by KevinGale »

As usual everything you build looks fantastic.
dsldubn
Posts: 247
Joined: Mon Aug 24, 2009 11:24 am
AntiSpam: No

Re: My '86 GTI build

Post by dsldubn »

looks real good! I think you'll like the raised shifter. Mine is in a similar spot and it's comfortable, little movement needed to get from the wheel to the shifter
Jason Orzell
VW Rabbit turbo diesel, the green soot shooter
User avatar
Super1303
Posts: 226
Joined: Wed Mar 27, 2013 11:15 pm
AntiSpam: No
Location: 935 US Route 5, Sutton, Vermont 05867
Contact:

Re: My '86 GTI build

Post by Super1303 »

Aww man.... Should have left the wood, total rat rod style dude, worth at least 8 BDA points!(was it BDA?)
Na, it looks amazing. How you cut the aluminum, plasma?
Hello, my name is Evan and I'm a Volksaholic.
1973 Super Beetle, #666
User avatar
sachilles
Posts: 1189
Joined: Thu Jun 26, 2003 3:11 pm
Location: Waitsfield, VT

Re: My '86 GTI build

Post by sachilles »

Agree with Mr. Gale, nice work as always. Can I bring Scrappy down to you to give him some love too?
Sachilles
02 Subaru impreza (Donut) #66
User avatar
walterclark
Posts: 1442
Joined: Sun Feb 08, 2009 12:57 pm
Location: Dover, MA.
Contact:

Re: My '86 GTI build

Post by walterclark »

Thanks!

I got it finished up today. Added the rear plate with SS machine screws /Rivnuts and SS riveted the front and rear flaps in place. Solid as a rock. Pics when it goes back in...first I have to weld a bit of sheet metal over the hole in the tunnel this sits over that was the old shifter. The new plastic bit for the shifter arrived today so I took everything out and it apart to put that in and while apart I cleaned up the aluminum of the pedestal some - sanded with 800 W/D to hide scratches and hammer marks, polished with metal polish until it looks like old but well cared for previously polished aluminum.

I like to use my plasma cutter to cut stuff like this out. Then I clean it up by hand. I thought about welding in the front and rear panels rather than using SS rivets, but Alu TIG isnt one of my strengths...I takes me a lot of practice to get dialed back in to aluminum and this being 6061 I didnt really want to play with re-aging afterward.
The older I get the better I was.
Mopar 151w2
Posts: 342
Joined: Fri May 11, 2012 9:08 pm
AntiSpam: No

Re: My '86 GTI build

Post by Mopar 151w2 »

As someone who's spent years cutting aluminium very well, and more years hacking and butchering the stuff - a flne tooth blade in a sabre saw, Porta-Band or Sawzall does very well at cutting up to 1/4" or so, WD-40 makes excellent lube, paraffin wax is neater. Bacon grease is the best! But housemates will wonder why you are frying eggs at 9:30 PM, cuz it smells good when it's hot....Vegetable oil works well, too, but clean it off before it gels up, or lacquer thinner will barely touch it! A Slilsaw or table saw with a carbide tooth blade, and lube, makes short work, and a neat job, of long straight cuts, but the disaster potential is large, and the noise is frightful! Files do a nice job of smoothing and deburring the edge, but you have to clean them constantly! Built up chips is what galls and gouges your smooth finish.. A little wax on the teeth helps, most wire brushes (except knotted) do a good job of cleaning files.
For finishing, I like maroon Scotch-brite, mild detergent, and water. Straight up Simple green will leave spots, dilute seems OK. Cleans off WD-40, wax, pencil marlks, and the like, leaves a nice satin finish, fast...
User avatar
walterclark
Posts: 1442
Joined: Sun Feb 08, 2009 12:57 pm
Location: Dover, MA.
Contact:

Re: My '86 GTI build

Post by walterclark »

Its been a while...

With the extreme cold and a bad back from shoveling the roofs I decided to take most of Feb and some of March off and leave the shop unheated.

Now that I have been seeing a chiropractor for a couple weeks the back is in much better shape and the outside temps are almost reasonable so I fired up the shop heater and started back in on the car.

First order of business...fabricate the new seat mount structure.

I decided to make this a three purpose project.

1) To put something under my butt other than the seat that could reduce the chances of my hips and legs being crushed from a side big impact. The floor of the GTI is made of thin tin so in a side impact, if the side X and sill bars move inboard (the X bars are already touching the seat's side), the floor would simple fold up under me and provide no energy absorption or protection. I decided that if I could transfer any driver side bars - in particular the sill bar - lateral movement over to the tunnel and right side floor and maintain the space under my seat more or less the same width as it is now, that would be a good thing.

2) Provide me with a solid anchor point for the FIA seat side mounts. The structure I installed when I built the car was welded into the bottom of the existing seat tracks and thru bolted with backing in case the welds or original tracks failed but fundamentally they did whatever the floor did and over the years and numerous incidents they have moved a bit here and there. Last year I had to add shims on one side to even the seat mounts and remove a tilt from the seat...not a great solution.

3) Add the capability of moving the seat forward 10" or more to accommodate a driver with much shorter legs than mine. The original structure I built permitted movement of about 4" total, which was enough for me but pretty useless for everyone on the other side of the height bell curve from me. Also moving the seat forward needs to be accompanied by a commensurate rise in seat bottom height.

So here is what I settled upon (note: this pic is really wide so you may need to view it separately or make your browser window very wide).

Image

The front of the car is to the left.

All the welds are TIG.

I "plated" both the sill and tunnel vertical surfaces with .075" ASTM A1011 sheet steel. The sill side (bottom of image) already had the sill bar stitch welded to the sill itself so I stitched the top edge of the plate to the sill bar and the bottom to the sill. On the tunnel side I stitched the plate to the bottom of the tunnel and where the plate ends on top (roughly halfway thru the tunnel curve from vertical to horizontal in most places). These plates are intended mainly to keep the cross tubes from just punching thru the sill and tunnel if the sill bar is caved in.

I installed (welded) 3 - 1.5" section, .12" thick, A513 1020, square steel tube cross members between the plates. The tubes are spaced 10" apart and increase in height in 1.5" steps so the seat will rise 1.5" when moved forward 10".

I welded .12" 1020 rectangular plates to hold the 10.9 grade metric bolts and nuts, for the seat bracket attachments, and AN7 aircraft grade nuts, for the crotch strap eyebolts. The nuts or bolts (depending on where they are used) were tack welded to the back side of the plates to make them captive. I used captive bolts for the seat mounting brackets on the middle and rear bars but nuts on the front. I prefer the bolts solution since it makes re-positoning the seat easier. I decided the front bar sits too high to have bolts sticking out so went with the captive nuts there. I reused the original lap belt eyebolt locations, although I extended the plating to cover those locations. I am using the front 2 crossbars for the crotch strap mountings since it is MUCH stronger than the floor. All of the eyebolts are the forged shoulder eyebolts approved by the FIA for harness use and suitable for loads in any direction. You can see the eyebolts in place for my seat location. There is a second set of locations that can be used when the seat is located way forward that maintains the proper belt lead angles. I will be installing eyebolts in those spots as well.

For now I will be using the seat side brackets supplied with the Cobra seat, but the bottom horizontal section on them, that bolts to the vehicle, only permits about a 4" adjustment range. That would leave my setup with a significant gap in ability to move the seat forward or back between setting the seat on the front 2 bars and setting on the rear 2 bars. So I plan to replicate the 2 side mounts but with a modified horizontal base on each that is enough longer to permit closing that gap.

One thing this does not address is the likelihood that when the seat is 10" forward from where I use it, the steering wheel may be too close for comfort...

Image

at least these days.

To correct that I think I would have to fab a nearly flat steering wheel hub adapter (the existing one is maybe 3" long), then have 2 steering wheels, the dish wheel I have now with a 3" extension for me, and a flat wheel without an extension for someone needing the seat way forward and wheel moved some. I dont plan to anything about that for now.

None of this creates a fast change solution that is like jumping in and sliding the seat on a stock vehicle for double drivers. The seats needs to be unbolted, the crotch and waist belts unclipped, the seat moved and bolted back in, the belts clipped back in and the harness straps adjusted, and the steering wheel swapped. But it IS better than it was...at least its possible.
The older I get the better I was.
Mopar 151w2
Posts: 342
Joined: Fri May 11, 2012 9:08 pm
AntiSpam: No

Re: My '86 GTI build

Post by Mopar 151w2 »

Very nice! Always good to see real steel structure to mount the seat - particularly with the "FIA style" seats, which cantilever the backrest support to the floor mounts. And these of us on the "big galoot" side of the height distribution curve make for a long lever... 8-) We've been making jokes about the "Burlap,Tarpaper, Iron oxide, and HiFructose Corn Syurp" composite floors for a while, but the detail pics of the "Pikes Peak Evo" crash floor/ seat mount failure, frankly, scare me more than a little.
User avatar
walterclark
Posts: 1442
Joined: Sun Feb 08, 2009 12:57 pm
Location: Dover, MA.
Contact:

Re: My '86 GTI build

Post by walterclark »

After the paint cured for a couple days under heat, I reinstalled the seat and the difference in how solid it feels is VERY noticeable.

Now on to other things.

Still correcting issues caused by my spin at Ascutney.

I removed the right steering knuckle which took a very hard sideways hit. I already knew the 19mm top pin on the control arm extender on that side was bent (you can see it in the photo)...I found that when I noticed the steering arm knuckle ball joint clamp would not seem to "tighten" around that pin so I ordered a new set of extenders from the UK back in January. They are due in anytime now. These arent cheap and can sometimes be hard to find these days since the number of MK2 and MK3 Golfs racing has dropped off. These extenders are used to lower the outer end of the control arms when the car is lowered to correct suspension geometry. It seems most cars of this generation are used on the street only and despite the popularity of "stancing", decent handling is not part of that crowds concern, so stuff like this doesnt sell. Anyway, the knuckle itself seems to have come away straight - these are MK3 knuckles, the Mk2 versions tended to bend easily and frankly I had used all of mine up hitting stuff a couple years ago so needed to move on then. But the wheel bearing didnt come away cleanly. Without the preload of the outer CV joint output shaft and nut, the bearing had about 1/8" of lateral play. So I replaced that. The ball joint seemed OK but I replaced it as well.

Image

I also finished up the front facia. It had been ripped off as I went backwards over the cement culvert and that tore up the splitter, all the splitter mounting hardware, the 4 Dxus connectors that hold the facia in place, and bent and dislodged the aluminum sheet covers I blind riveted over all the openings in the cover. I made a new splitter and re-ordered the bits I use to mount it from McMaster-Carr. I straightened and re-riveted the aluminum covers and I replaced the Dzus connectors (both the screws on the bumper and the spring retainers on the body tabs). The plastic VW used for the facia is really tough stuff. It probably helps that it is fairly thick. Last fall I removed all the damaged bits and hung the bumper up for the winter. Over that 4 months of storage it self straightened and I had only one small tear that I had to mend (at one corner of what passed for a spoiler on the original facia). I did need to put small washers on the backside of all the rivets on the aluminum covers and Dzus connectors this time around as they had pulled out, leaving damaged holes behind.

I have almost everything I need to finish up the transmission on order and I picked up and installed a couple things I wanted - like the Wilwood remote brake balance bar adjuster.
The older I get the better I was.
Post Reply