My '86 GTI build

User avatar
walterclark
Posts: 1442
Joined: Sun Feb 08, 2009 12:57 pm
Location: Dover, MA.
Contact:

Re: My '86 GTI build

Post by walterclark »

The last couple weeks have drug by waiting on parts.

I ordered and received the Wavetrac LSD, Autotech lighweight flywheel and clutchnet 6-puck clutch and stage 2 pressure plate (the last 2 items arriving just today).

The 02A came apart and the LSD went in without much fuss. The shiny new flywheel, clutch and pressure plate are on the engine. I realized I should replace the release bearing and that should be here tomorrow. I disassembled and reassembled the 02A using a couple VW tech bulletins I found on the internet but I think there were a few typos and certainly were some omissions, so a 90-94 Passat service manual is coming then as well which should cover the 02A in great detail. Once I am sure I didnt miss anything and the new release bearing is here, the transaxle will go back on the engine and that back in the car.

Image

Image
The older I get the better I was.
User avatar
walterclark
Posts: 1442
Joined: Sun Feb 08, 2009 12:57 pm
Location: Dover, MA.
Contact:

Re: My '86 GTI build

Post by walterclark »

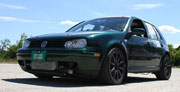
Good progress this weekend. The drivetrain is back in and everything is hooked up.

I had to fiddle a bit with the front motor mount to get things to line up. The motor mount I used on the 020 doesnt fit the 02A and luckily I kept motor mount from the Passat. This is one of the big rubber donut thing and the rubber long since went soft. Rather than use a new OEM or an aftermarket "slightly harder rubber" solution, I wanted a solid mount. There used to be a couple places that sold Delrin pucks, but not any more. I bit the bullet and bought one of these Black Forest Industries mounts.

Image

The aluminum block has tapped holes in the top (bolts to the engine half of the motor mount) and bottom (bolts thru the front subframe) and at least on my car the hole in the top of the block was about 3/8" offset (after using up all the wiggle room the slotted subframe offered) from where the motor half of this mount lined up - with the other motor and transaxle mounts secured. Of course this car has had a pretty hard life and the front subframe could be offset by that much... A little work on the hole in the motor half of the mount with a rotary file took care of the problem.

I bled the brakes and clutch hydraulics with fresh DOT4 and added coolant (I use a 75/25 mix of distilled water and Prestone) to the radiator. Last year, after struggling for years with air locks around the thermostat I finally drilled a small hole in the thermostat...way better. I probably get 90% or more of the coolant in the system without having to start it up... and hope the damn thermostat opens before the engine overheats.

I need to go get fresh 94 octane and mix some of my 94/109 blend fuel before it can start and I want to change the oil since it is last seasons and sat in the engine all winter. Thats for tomorrow. Then I will turn the engine over for a minute to circulate the new before I allow it to start, purge the air from the fuel lines and light the fire.

That Passat Bentley service manual I bought is something of a joke. Absoutely nothing on the 02A (or any other) transaxle internals in it. VW really dumb'd down the "service manual" between the A2 chassis from the mid/late 80's and the B3 chassis in 1990. I guess that is why VW generated the 02A "overhaul" bulletins that I found before I bought this book. Its hard cover too. Not that I think it woudl hold up any better than the soft cover of the A2, but since it really more of a coffee table book, maybe that is appropriate.

Big news of the day. The shop got to almost 70 this afternoon on the strength of the outside temps and sunshine!
The older I get the better I was.
User avatar
Rabbit Farmer
Posts: 2260
Joined: Wed Jun 25, 2003 11:37 pm
AntiSpam: No
Location: Earth
Contact:

Re: My '86 GTI build

Post by Rabbit Farmer »

I agree with the manuals... the old MK1 Bentley's told you bolt sizes, had internals, etc. etc.

MK4 (I have only seen MK1 and MK4) is too general and doesn't tell you how to do something.
Go Fast VW & Audi parts at FastAddiction.com
User avatar
walterclark
Posts: 1442
Joined: Sun Feb 08, 2009 12:57 pm
Location: Dover, MA.
Contact:

Re: My '86 GTI build

Post by walterclark »

Drove the GTI out of the shop for the first time today...for a long overdue bath.

After assembling everything left, checking things twice and adding the fresh fuel I started it up. Or tried. It wouldnt. The Megasquirt software, TunerStudio complained about a problem with the MAF and some other analog input in conflict foe the same input port on the MS3. I dont have a MAF. Damn firmware update. It enabled MAF causing the conflict. After I disabled the MAF it started and ran fine...except the wide band O2 sensor was not being seen. I had revised this over the winter to use the digital output (I2C bus) of the controller thru an adapter in the MS box, but it seems the I2C bus is extremely sensitive to interference. I used a shielded cable inside which both wires for the I2C was run bit it seems it needs even better - each wire needs to be shielded and be part of a twisted pair (other half grounded). So a bit of a Belden cable that meets that description is on the way. In the meantime I configured it back to use the analog output and that worked fine. The speedo also didnt work and that was traced to another firmware update surprise...its input to the MS had been turned off.

First drive impressions. Clutch pedal needs to come up some, it starts to engage the clutch about 1/2" off the floor. The brake pedal needs to go down a bit. I set it where the old one was and this pedal's travel is shorter. I like to be able to blip the throttle while the brake pedal is pressed and as hard as I pressed it, it doesnt get down as far as the gas pedal. I am going to have to learn the shifter and reduce the force I use on it...it doesnt need much.

I seem to have issues with the steering. On the trip down and up the driveway once I got above maybe 10 MPH it started to feel loose and car wandered about. This is with the toe set to 0 where it usually is. At the bottom of the driveway when turning around I was unable to move the steering wheel (twice) after I stopped with the wheels turned to near lock...I had to start moving first. It has always been real heavy steering what with it being manual and a quickener to boot. But nothing like this. Back on the lift there feels like I have an excess amount of slop in the steering and I may have set the inner tie rod ends too far out on the rack. Got to go thru that.
The older I get the better I was.
User avatar
Rabbit Farmer
Posts: 2260
Joined: Wed Jun 25, 2003 11:37 pm
AntiSpam: No
Location: Earth
Contact:

Re: My '86 GTI build

Post by Rabbit Farmer »

Progress is progress. :D
Go Fast VW & Audi parts at FastAddiction.com
User avatar
walterclark
Posts: 1442
Joined: Sun Feb 08, 2009 12:57 pm
Location: Dover, MA.
Contact:

Re: My '86 GTI build

Post by walterclark »

Got the brake bias to a decent starting point. I will need to wait until Ascutney to dial it further. Also have to get used to non-boosted brakes... It needs a lot of leg. I found the issue was the balance bar was binding up because the bits on the bar that connect to the master cylinders were set too close together and were binding on the pedal. Simple adjustment, right. Not so fast. I had to disconnect both master cylinder rods and remove the steering column to get enough room to unscrew one of those "bits" a couple turns and create more clearance for the bar to swing when the balance point was move toward either end. Because of the binding issues with the balance I needed to unbolt the front MC from the firewall before I could get the rod to unscrew completely. And the front MC is the middle one an I cant get to the hidden top nut unless one of the other MC are moved out of the way...And so on.

The steering did have a couple kind-of loose couplings in the the pinch bolts werent tight enough to keep the coupling from rocking...I blame the new rack for one of them because the coupling was tight enough going onto the old one that the bolt didnt have to squeeze the coupling.

The steering rod inner ends are about 3/8" too far out on each end allowing the rack to move beyond its limits (a shoulder on each inner rod end acts as a stop). But, it requires a 28mm and 32mm wrench to adjust them and there is not enough space with the rack in the car to move the wrenches...so the heck with it for now. I just need to remember to not turn the wheel past 270 degrees each way (only urge to do that is when maneuvering in tight spaces).

I decided there is a bit of a binding in the steering just either side of centered and traced it to the Howe quickener. I now remember feeling that last fall and I too the quickener apart, cleaned a couple nicks and assembled it. Feels fine except under load. Turns out this model (5220) is no longer made and I cant seem to find anyone with a rebuild kit in stock either, so I bought a clean used on off eBay today. These things havent changed for years and years, only when I need another one do they come out with an "improved model". The replacement models have been redesigned so the input and output shafts line up now. That is great and all but my steering column has been fabricated to handle the offset of the 1.5 ratio 5220 unit.
The older I get the better I was.
User avatar
walterclark
Posts: 1442
Joined: Sun Feb 08, 2009 12:57 pm
Location: Dover, MA.
Contact:

Re: My '86 GTI build

Post by walterclark »

That was impressive service. The eBay quickener arrived today. I pulled the column and swapped it in. That glitch is gone (and I could feel it in the old quickener after it came out).

I didnt test the car today...70 degrees and dry, perfect for waxing so I spent most of it washing/polishing/waxing the Sprinter. That is one HUGE vehicle. It takes almost 3 times the compound and wax as a normal car. Good news is the Griot's wash & wax stuff I wash it with actually resulted in there being wax on it all winter. The bad news is it was dirty, dull and I was unprepared for it being there, so a PITA to remove with the compound (I had to wash out my buffing pad several times). Next Griot's order will include some of their Paint Prep wax remover.
The older I get the better I was.
User avatar
walterclark
Posts: 1442
Joined: Sun Feb 08, 2009 12:57 pm
Location: Dover, MA.
Contact:

Re: My '86 GTI build

Post by walterclark »

Add one more part to the damaged-at-Ascutney list.

I took the car down and up the drive again today and that wandering problem had morphed into a seemingly random change-of-direction with me chasing it using the steering wheel... It felt almost like a horrifically bad ball joint - but I changed that already.

However when I lifted the car and yanked around on the right front wheel, I found a looseness that almost felt like a really bad wheel bearing (nope, changed that too). A bit more wiggling and I found it. The ball joint stud was rocking back and forth in the receiver in the bottom of the bearing carrier despite the pinch bolt being torqued. Its odd that I have done this several times in the last couple weeks and I didnt notice this movement earlier. Must have spread it when the sideways hit at Ascutney bent the wheel, ball joint extender and steering rack, and put a ding in the quickener gears. I am beginning to have a lot of new found respect for the toughness of those $100 Kosei K1 wheels I am using. The one on the right front must have taken a really hard hit and while being ugly from the impact with a cement culvert that I passed "over", I had to spin it to determine that it was indeed no longer straight.

As it happens after my somewhat similar spin and off at Mt Washington in 2011, Brians Garage in Needham donated a '90 GTI to me for parts. This one happens to have the A3/B3 type bearing carriers, which I am using so I could go with bigger brake rotors (and maybe someday 4 pot calipers). The ones I have been using came from a '90 Passat donor along with the motor and transaxle I am using. So, out came another cement block to hold that corner of the '90 GTI and off came the bearing carrier. Naturally it was well rusted so getting it all apart took some effort. It is now sitting after being media blasted, the steering arm drilled for the bushing needed to use the spherical bearing tie rod end, and painted. Tomorrow, when the paint is well dry, I will press in the new wheel bearing and hub. Then it can go in the car and I can try it again.
The older I get the better I was.
User avatar
walterclark
Posts: 1442
Joined: Sun Feb 08, 2009 12:57 pm
Location: Dover, MA.
Contact:

Re: My '86 GTI build

Post by walterclark »

Well I was only semi-successful swapping the new wheel bearing over from the old bent to the unbent carrier I finished up yesterday. Pressing the hub out didnt rupture the bearing and split the inner race in half as usually happens, but when it was out I noticed the 2 inner races were not connected they way they are in a new bearing. I gave it a try and assembled it anyway but the bearing is clearly loose even with the axle nut torqued. So I am hoping germanautoparts.com is their normal fast turnaround on this one.
The older I get the better I was.
User avatar
Rabbit Farmer
Posts: 2260
Joined: Wed Jun 25, 2003 11:37 pm
AntiSpam: No
Location: Earth
Contact:

Re: My '86 GTI build

Post by Rabbit Farmer »

Your first run up Ascutney will be terrible... everything will feel strange and be the source of concern. What's that noise? What was that? Is that normal?!
Later, you will determine it is driving exactly like it was before.
Go Fast VW & Audi parts at FastAddiction.com
Post Reply